1. Stunning Mirror Chrome Nails: Achieving the Perfect Shine

Stunning Mirror Chrome Nails: Achieving the Perfect Shine
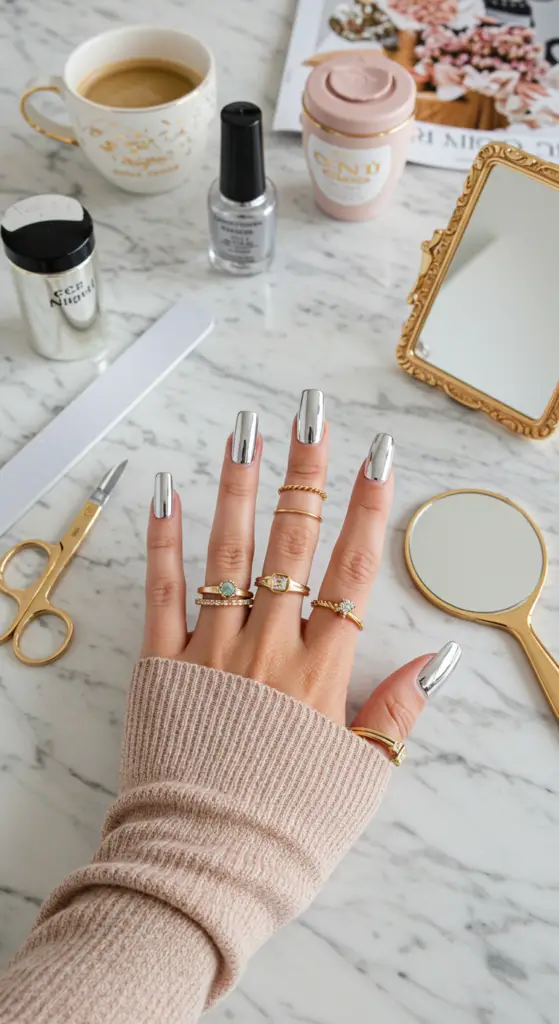
Mirror chrome nails are the latest trend in nail art, offering a stunning, reflective finish that elevates any manicure. Achieving this dazzling look requires a bit of technique and the right products. Here’s how to get those perfect mirror chrome nails that turn heads.
Step-by-Step Guide to Mirror Chrome Nails
- Prep Your Nails: Start with clean, dry nails. Remove any old polish and push back your cuticles.
- Apply Base Coat: Use a quality base coat to protect your nails and ensure longevity. A gel base coat works best for a smooth finish.
- Choose Your Chrome Pigment: Select a high-quality chrome powder. Silver chrome is classic, but iridescent shades are trending for a unique twist.
- Apply Gel Polish: Apply two coats of a black or dark gel polish as a base. Cure each layer under a UV lamp.
- Buff and Apply Chrome Powder: After curing, buff the nails with a soft sponge applicator before applying the chrome powder for maximum shine.
- Seal with Top Coat: Finish with a no-wipe top coat to lock in the shine and protect your design. Cure once more.
Expert Tips and Common Mistakes to Avoid
To achieve the best results, consider the following:
- Use high-quality products; cheap powders may not provide the desired shine.
- Avoid over-buffing, which can damage the base layer and diminish the chrome effect.
- Work in thin layers to prevent clumping and ensure a smooth finish.
Mirror chrome nails are not only a statement but also a reflection of your personal style. By following these steps and expert tips, you can achieve a stunning shine that lasts. Elevate your nail game today!
2. Color-Gradient Chrome Nails: A Trendy Twist for Your Manicure
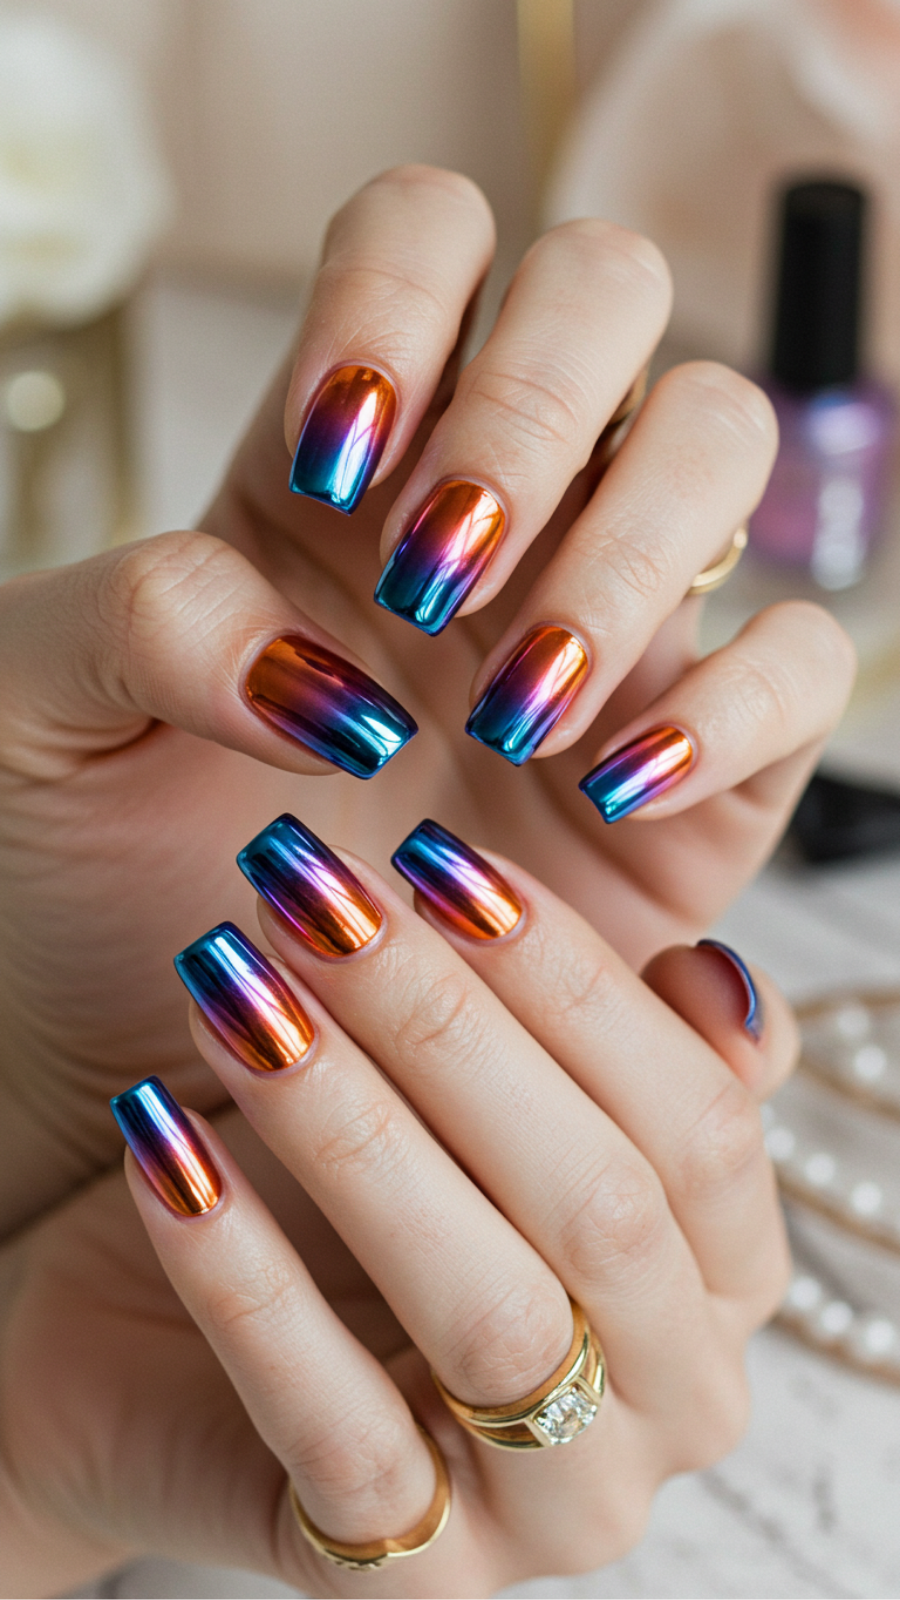
Color-Gradient Chrome Nails: A Trendy Twist for Your Manicure
Color-gradient chrome nails are making waves in the nail art world, combining the sleekness of chrome with the vibrant allure of gradient techniques. This trendy twist not only enhances your manicure but also showcases your unique style. Whether you’re preparing for a special occasion or simply want to elevate your everyday look, this nail art style is perfect for making a statement.
Step-by-Step Guide to Achieving Color-Gradient Chrome Nails
- Prep Your Nails: Start with clean, shaped nails. Gently buff the surface to create a smooth canvas.
- Apply Base Coat: Use a quality base coat to protect your nails and ensure longevity.
- Choose Your Colors: Pick a selection of complementary nail polish shades for the gradient effect.
- Gradient Application: Use a makeup sponge to dab the colors onto your nails, blending them for a seamless transition.
- Apply Chrome Topcoat: Once dry, apply a chrome topcoat for that striking metallic finish.
- Seal the Look: Finish with a high-shine topcoat to enhance durability and shine.
Expert Tips and Common Mistakes to Avoid
- Tip: Use a light hand while applying the gradient for a more natural blend.
- Avoid: Applying too much polish at once; this can lead to streaks and an uneven finish.
- Best Practice: Experiment with different color combinations and placements to find what suits you best.
Incorporating color-gradient chrome nails into your beauty routine not only keeps your manicure fresh but also reflects your personal style. This captivating trend is an excellent choice for anyone wanting to stand out. With careful application and creativity, you can achieve a stunning look that is sure to turn heads.
3. Matte vs. Glossy Chrome Nails: Finding Your Signature Style
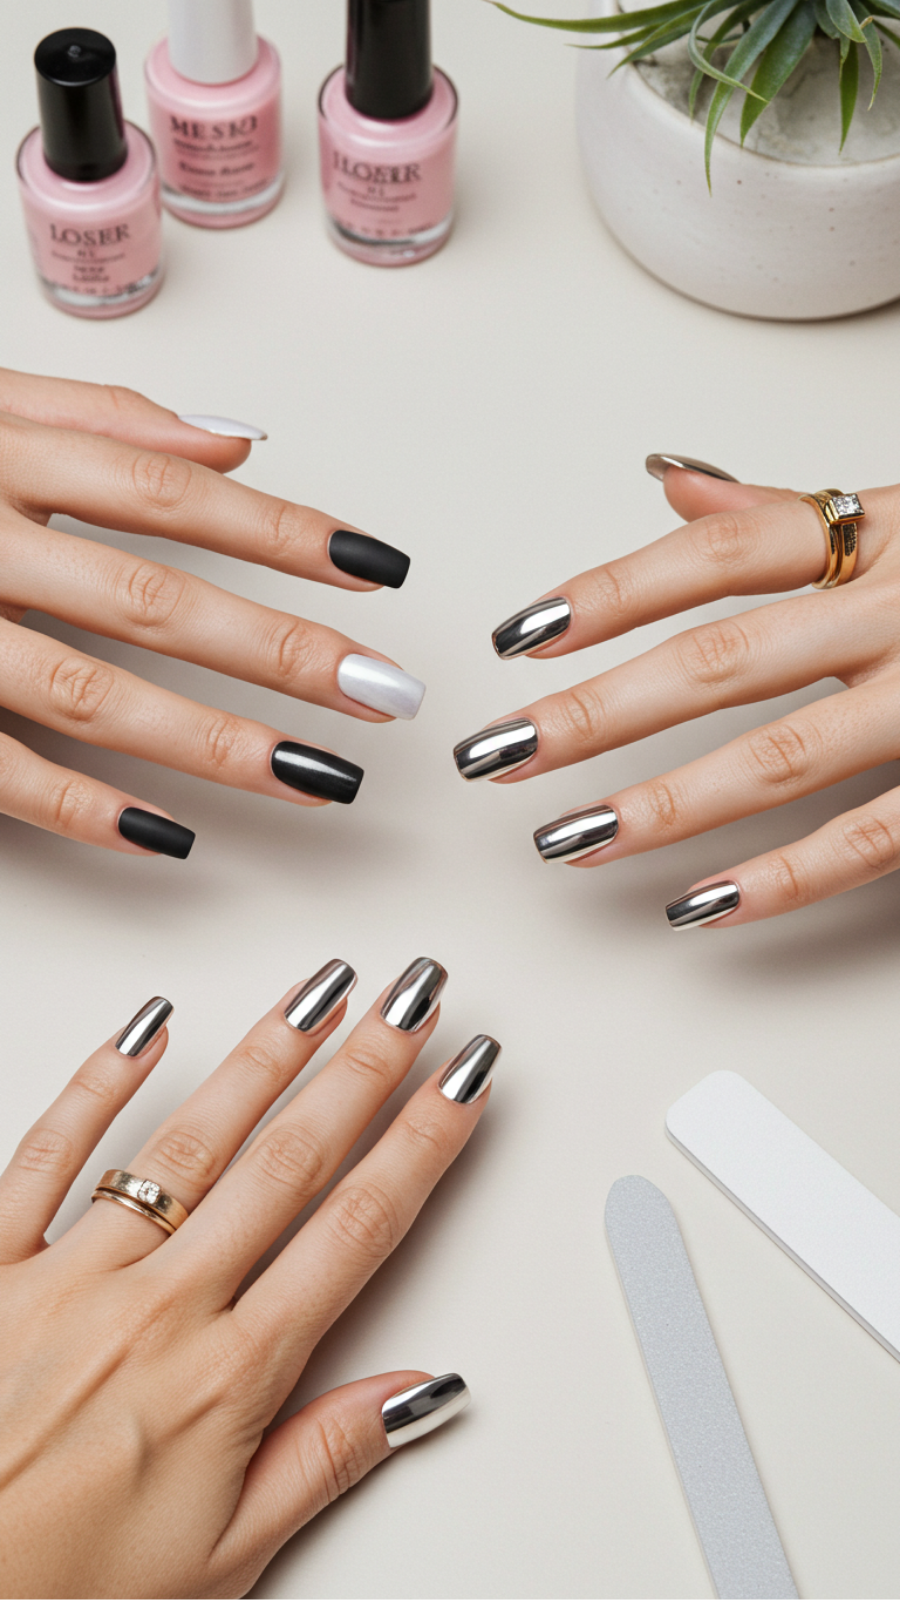
Matte vs. Glossy Chrome Nails: Finding Your Signature Style
When choosing between matte and glossy chrome nails, it’s essential to consider your personal style and the current trends in nail art and beauty. Both finishes offer a stunning metallic look, but they convey different vibes that can enhance your overall aesthetic.
Understanding the Differences
Glossy chrome nails shine with a reflective surface that captures light beautifully, making them a popular choice for special occasions or glamorous looks. On the other hand, matte chrome nails provide a sophisticated, understated elegance that’s perfect for everyday wear. Each style can be customized with various colors and designs, allowing for endless creativity.
Expert Tips for Application
- Choose Quality Products: Invest in high-quality chrome powders and top coats for the best finish.
- Preparation is Key: Ensure your nails are clean and smooth before application to avoid imperfections.
- Layering Techniques: For a flawless matte finish, apply a matte top coat over your chrome polish, while a glossy top coat can enhance the shine of chrome pigments.
Avoid Common Mistakes
One of the most common mistakes is applying too thick a layer of product, which can lead to bubbling and uneven surfaces. Always apply thin, even layers and allow adequate drying time. Additionally, avoid using a matte top coat over unsealed chrome polish, as it can dull the color.
Finding Your Signature Style
Consider your lifestyle when choosing between matte and glossy chrome nails. If you’re drawn to bold, eye-catching designs, glossy chrome may be your go-to. Conversely, if you prefer a chic, minimalist look, matte chrome could be your signature style. Experiment with both finishes to discover what resonates with you the most!
4. Pastel Chrome Nail Art: Soft Hues That Make a Statement
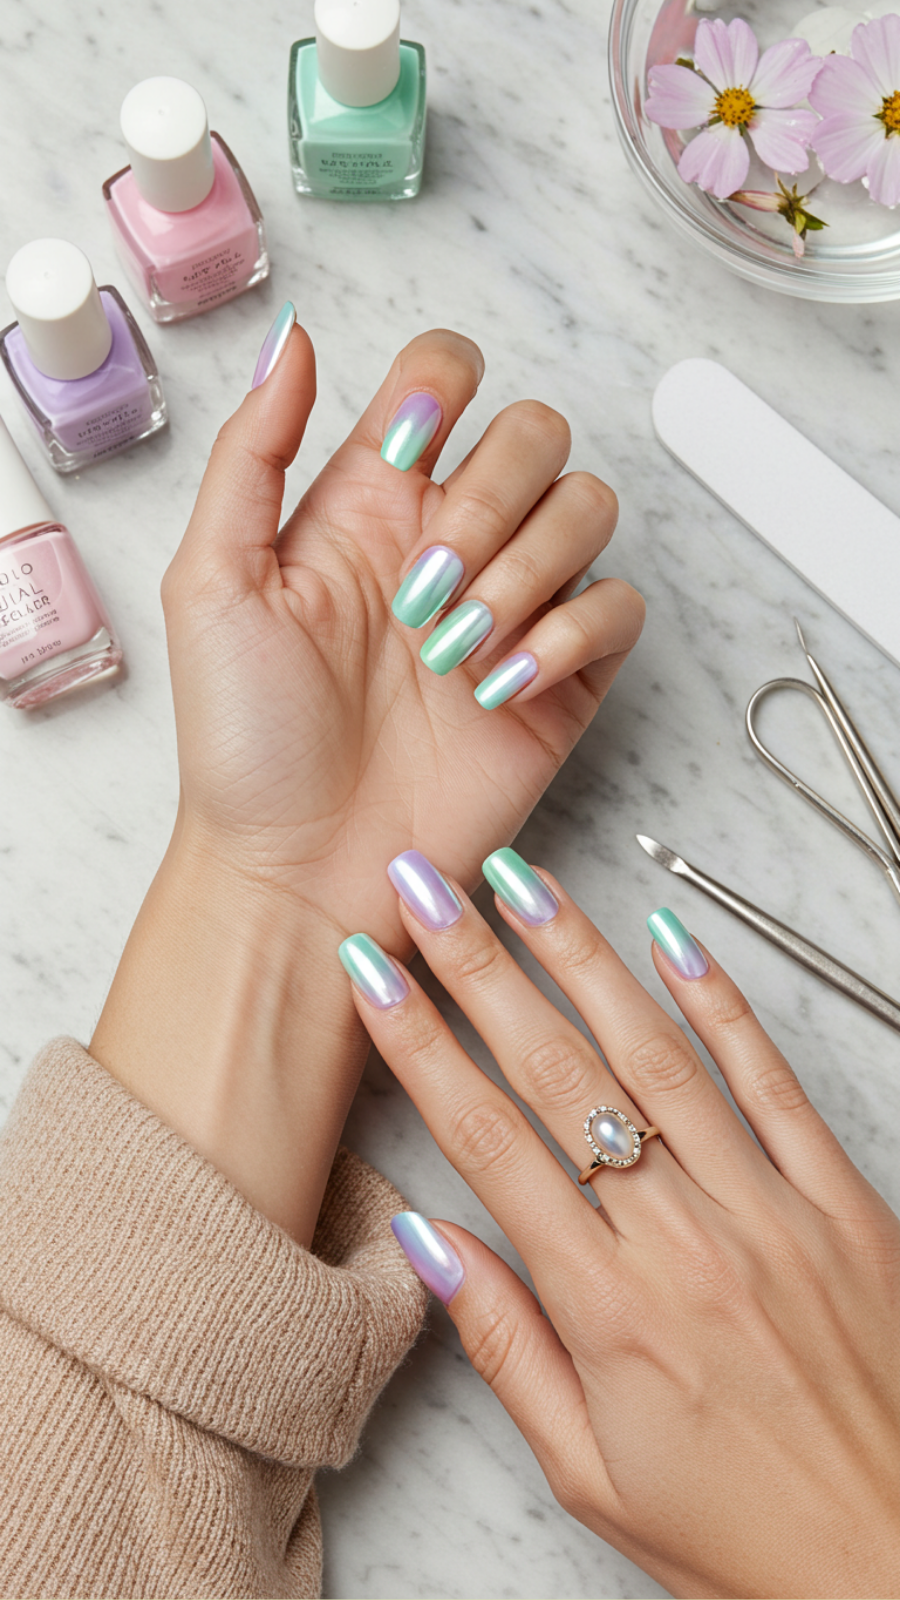
Pastel Chrome Nail Art: Soft Hues That Make a Statement
Pastel chrome nail art is rapidly becoming a go-to trend for nail enthusiasts looking to combine soft hues with a bold, reflective finish. This unique style not only adds a touch of elegance but also makes a striking statement. Here’s how to master the art of pastel chrome nails.
Step-by-Step Guidance
- Prep Your Nails: Start with clean, trimmed nails. Buff the surface to ensure a smooth application.
- Base Coat: Apply a layer of pastel nail polish in shades like mint green, baby pink, or lavender as your base. Allow it to dry completely.
- Chrome Effect: Using a chrome powder, gently rub it onto the surface of the dry pastel polish. Use a soft applicator for an even finish.
- Top Coat: Seal your design with a high-gloss top coat to enhance the chrome effect and add durability.
Expert Tips and Tricks
- Choose high-quality chrome powders for the best results; they offer a more reflective finish.
- Experiment with ombre techniques by blending two pastel shades for a unique look.
- Ensure each layer is fully dry before applying the next to avoid smudging.
Avoid Common Mistakes
- Skipping the base coat can diminish the longevity of your nail art.
- Using too much chrome powder can lead to a clumpy finish; less is more!
As you dive into the world of pastel chrome nail art, remember to embrace creativity and personal style. This trend merges soft colors with a modern twist, perfect for any occasion. Whether you’re prepping for a brunch date or a night out, pastel chrome nails are sure to elevate your look.
5. Geometric Chrome Designs: Elevate Your Nail Game with Edgy Shapes
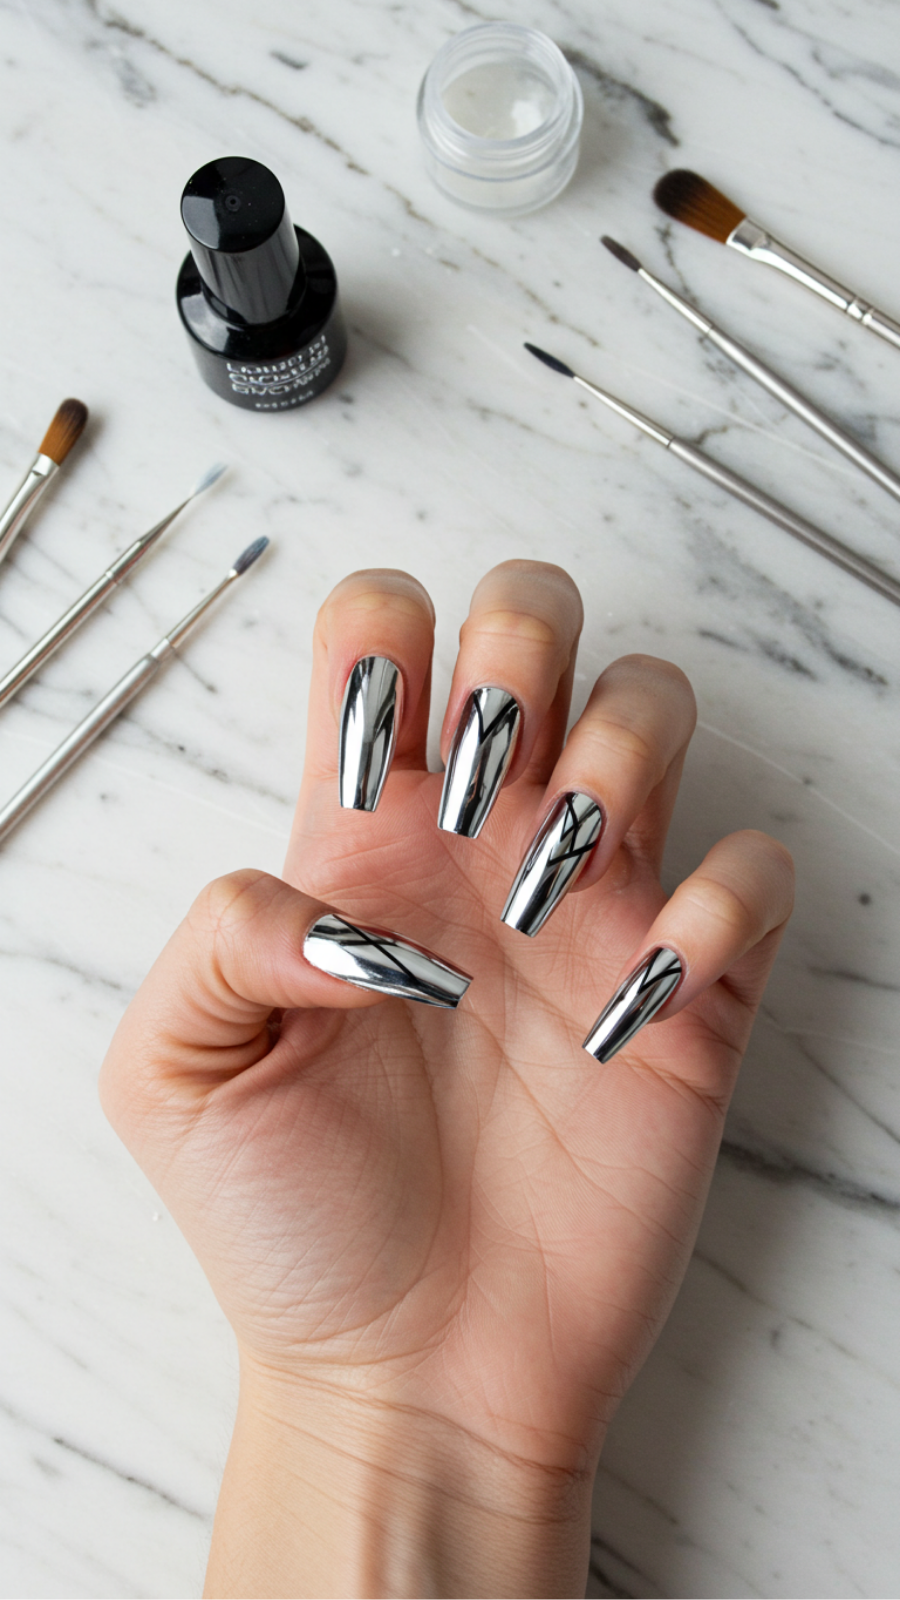
Geometric Chrome Designs: Elevate Your Nail Game with Edgy Shapes
Are you ready to take your nail art to the next level? Geometric chrome designs are the perfect way to add a modern and edgy flair to your manicure. This trend combines sleek, metallic finishes with bold shapes, making your nails a true statement piece.
Current Trends in Geometric Chrome Nail Art
In 2023, the focus is on asymmetrical designs and negative space. Think sharp triangles, bold stripes, and dynamic lines that draw the eye. The use of chrome polish enhances these geometric shapes by providing a reflective surface that catches the light beautifully.
Step-by-Step Guidance for Stunning Geometric Chrome Nails
- Preparation: Start with clean, shaped nails. Apply a base coat to protect your nails.
- Base Color: Choose a solid base color that complements your chrome design. Darker shades like navy or burgundy work well.
- Geometric Shapes: Use nail tape to create precise lines and shapes. Paint over the tape with chrome polish, then carefully remove it.
- Top Coat: Seal your design with a glossy top coat to enhance the chrome effect and add durability.
Expert Tips and Common Mistakes to Avoid
- Tip: Use a thin brush for intricate designs.
- Avoid: Applying too much chrome polish at once, as it can lead to streaks.
- Tip: Experiment with different shapes and colors to find your unique style.
By following these expert tips and avoiding common mistakes, you’ll create stunning geometric chrome designs that truly elevate your nail game. Embrace the edgy shapes and shine bright with this modern nail art trend!
6. Floral Chrome Accents: Adding Nature’s Touch to Your Nails

Floral Chrome Accents: Adding Nature’s Touch to Your Nails
In the world of nail art, floral chrome accents are emerging as a trend that beautifully marries nature with modern aesthetics. This technique involves using chrome powders alongside floral designs, creating a stunning, reflective finish that captures the essence of blooming flowers. Whether you’re preparing for a special occasion or simply want to elevate your everyday look, floral chrome accents are a perfect choice.
Step-by-Step Guide to Creating Floral Chrome Accents
- Prep Your Nails: Start with clean, shaped nails. Buff the surface to ensure a smooth application.
- Base Color: Apply a base coat in a soft pastel or nude shade. This will enhance the floral design and chrome effect.
- Floral Design: Use a fine detail brush or stamping plate to create floral patterns on your nails. Opt for colors that complement your base.
- Chrome Application: Once your flowers are dry, apply a chrome powder over the entire nail or just on the floral accents. Use your fingertip or an applicator for a smooth finish.
- Top Coat: Seal your design with a gel top coat for durability and shine. This protects the chrome and floral art while adding a glossy finish.
Expert Tips and Common Mistakes to Avoid
- Choose Quality Products: Invest in high-quality chrome powders and gel polishes to achieve the best results.
- Avoid Overloading: Be careful not to apply too much chrome powder; a little goes a long way.
- Seal Properly: Always finish with a top coat to lock in your design and extend wear.
Current Trends and Best Practices
Floral chrome accents are particularly popular in spring and summer, aligning with seasonal blooms. Trending designs include delicate cherry blossoms and bold tropical florals, often paired with metallic hues. To keep your nails looking fresh, consider regular maintenance and touch-ups.
With these tips, you can effortlessly incorporate floral chrome accents into your nail art repertoire, adding a touch of nature’s beauty to your manicured look. Embrace this trend and let your nails blossom with personality!
7. Chrome French Tips: A Modern Take on a Classic Manicure
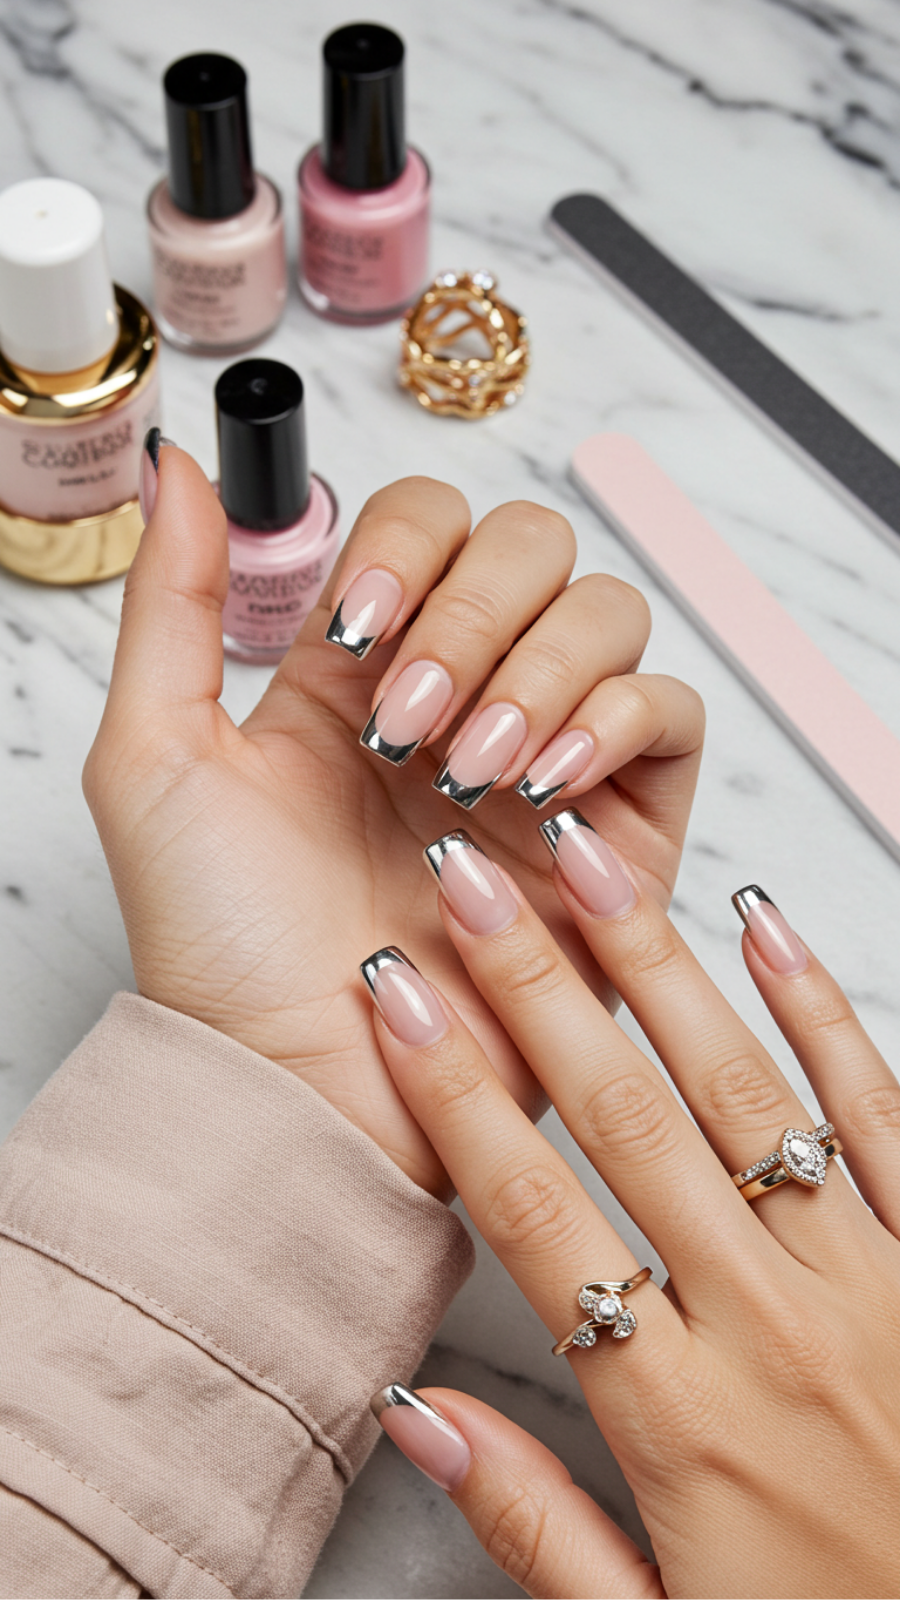
Chrome French Tips: A Modern Take on a Classic Manicure
In the ever-evolving world of nail art, chrome French tips have emerged as a chic and contemporary twist on the timeless French manicure. This modern interpretation combines the elegance of a classic design with the eye-catching allure of chrome finishes, making it a popular choice for fashion-forward individuals.
Current Trends in Nail Art
As we see more emphasis on unique nail designs, chrome French tips stand out. The reflective surface adds depth and dimension, allowing for personalization with various colors. Current trends showcase vibrant hues like emerald green and bold blue alongside traditional white tips, creating a striking contrast.
Step-by-Step Guide to Achieve Chrome French Tips
- Prep Your Nails: Start with clean, shaped nails. Buff the surface to ensure even application.
- Base Coat: Apply a clear base coat to protect your nails and allow the polish to adhere better.
- Color Application: Choose your desired base color. Soft pastels or nudes work well for a classic look.
- French Tips: Use nail tape for precision and paint the tips with chrome polish. Remember to work quickly to avoid smudging.
- Top Coat: Seal your design with a gel top coat for extra shine and longevity.
Expert Tips and Common Mistakes
- Don’t Rush: Allow each layer to dry completely to avoid smudges.
- Use Quality Products: Invest in high-quality chrome polishes for a better finish.
- Experiment: Try different tip shapes, like diagonal or tapered, for a unique look.
By following these guidelines, you can master the art of chrome French tips, combining elegance with a modern edge. This manicure is not only eye-catching but also versatile, perfect for any occasion, from casual outings to formal events.
8. 3D Chrome Nail Art: Texture and Shine for a Bold Look
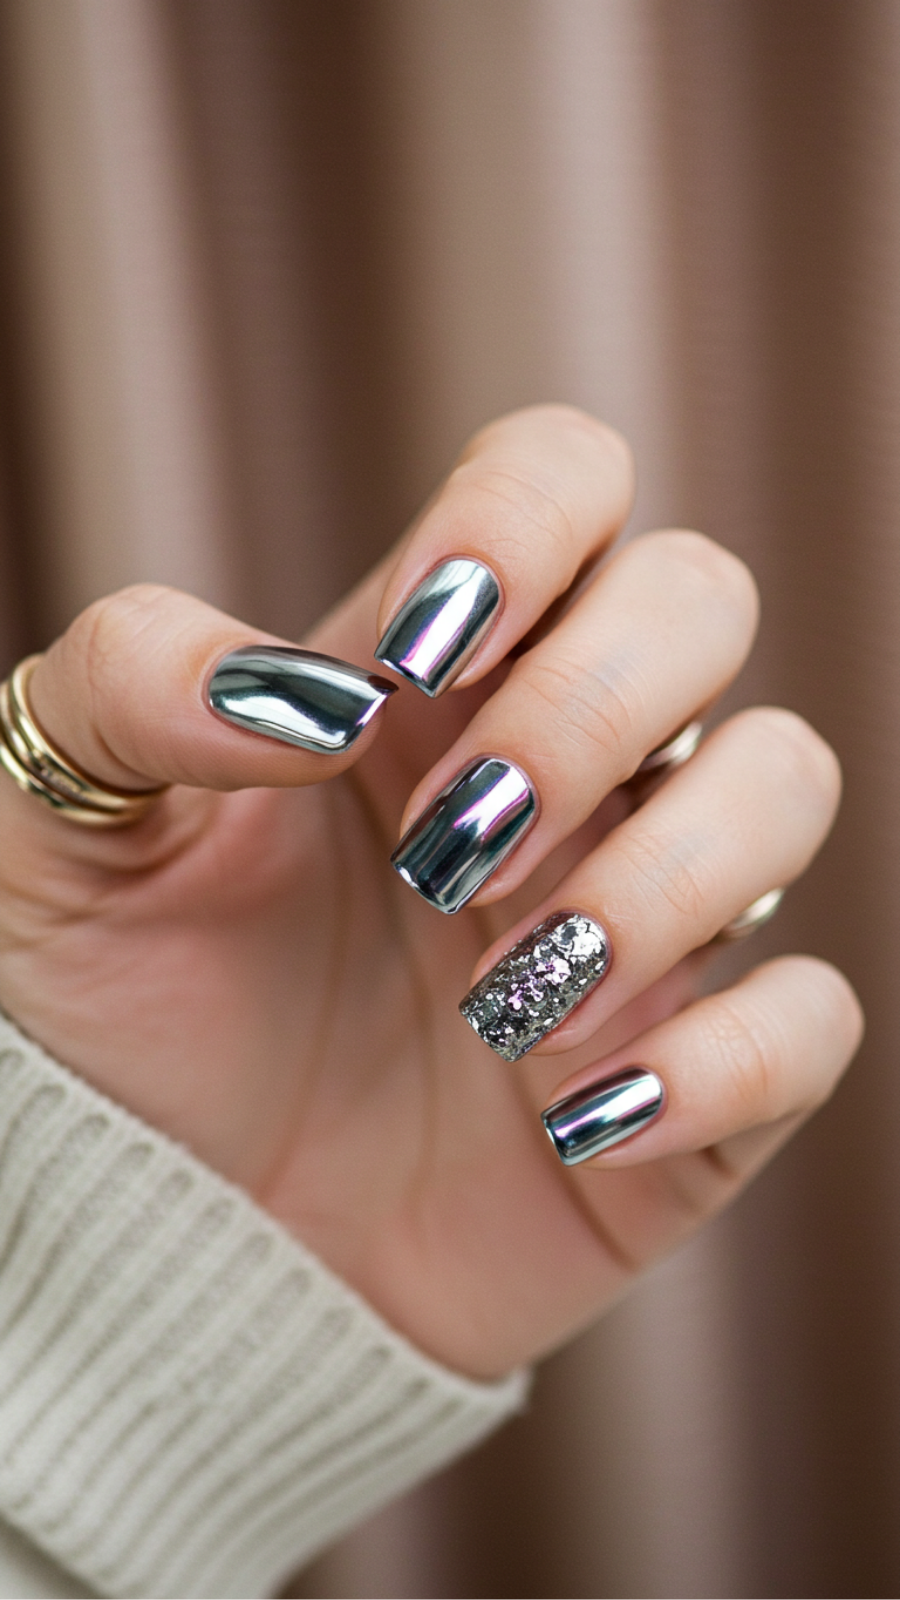
3D Chrome Nail Art: Texture and Shine for a Bold Look
3D chrome nail art is the latest trend capturing the attention of beauty enthusiasts, offering a stunning combination of texture and shine that elevates any manicure. This innovative design not only adds depth but also creates a striking visual impact, perfect for those looking to make a statement.
Current Trends in 3D Chrome Nail Art
In 2023, the trend of 3D chrome nails has seen a surge, with styles ranging from geometric shapes to intricate floral designs. The reflective quality of chrome gives your nails a futuristic feel, while the added texture provides a tactile element that is both fashionable and fun.
Step-by-Step Guide to Achieve 3D Chrome Nails
- Prep Your Nails: Start by cleaning and shaping your nails. Apply a base coat to protect your natural nails.
- Apply Base Color: Choose a base color that complements the chrome effect. Dark shades often enhance the chrome’s shine.
- Apply Chrome Powder: While the base color is still tacky, use a makeup sponge or applicator to gently buff the chrome powder onto your nails.
- Add 3D Elements: Use nail art tools to create raised designs using gel or acrylics. Be creative with shapes like flowers or abstract forms.
- Finish with Top Coat: Seal your design with a high-gloss top coat to enhance shine and longevity.
Expert Tips and Common Mistakes to Avoid
- Tip: Use a high-quality chrome powder to achieve the best results.
- Mistake to Avoid: Applying too much chrome powder can create a dull finish; less is often more.
- Tip: Experiment with different colors for your base to see which chrome effect you prefer.
By following these best practices, your 3D chrome nails will not only look stunning but will also last longer, ensuring your bold look stays fresh. Embrace the texture and shine of 3D chrome nail art this season, and let your nails do the talking!
9. Seasonal Chrome Nail Trends: Must-Have Styles for Every Occasion
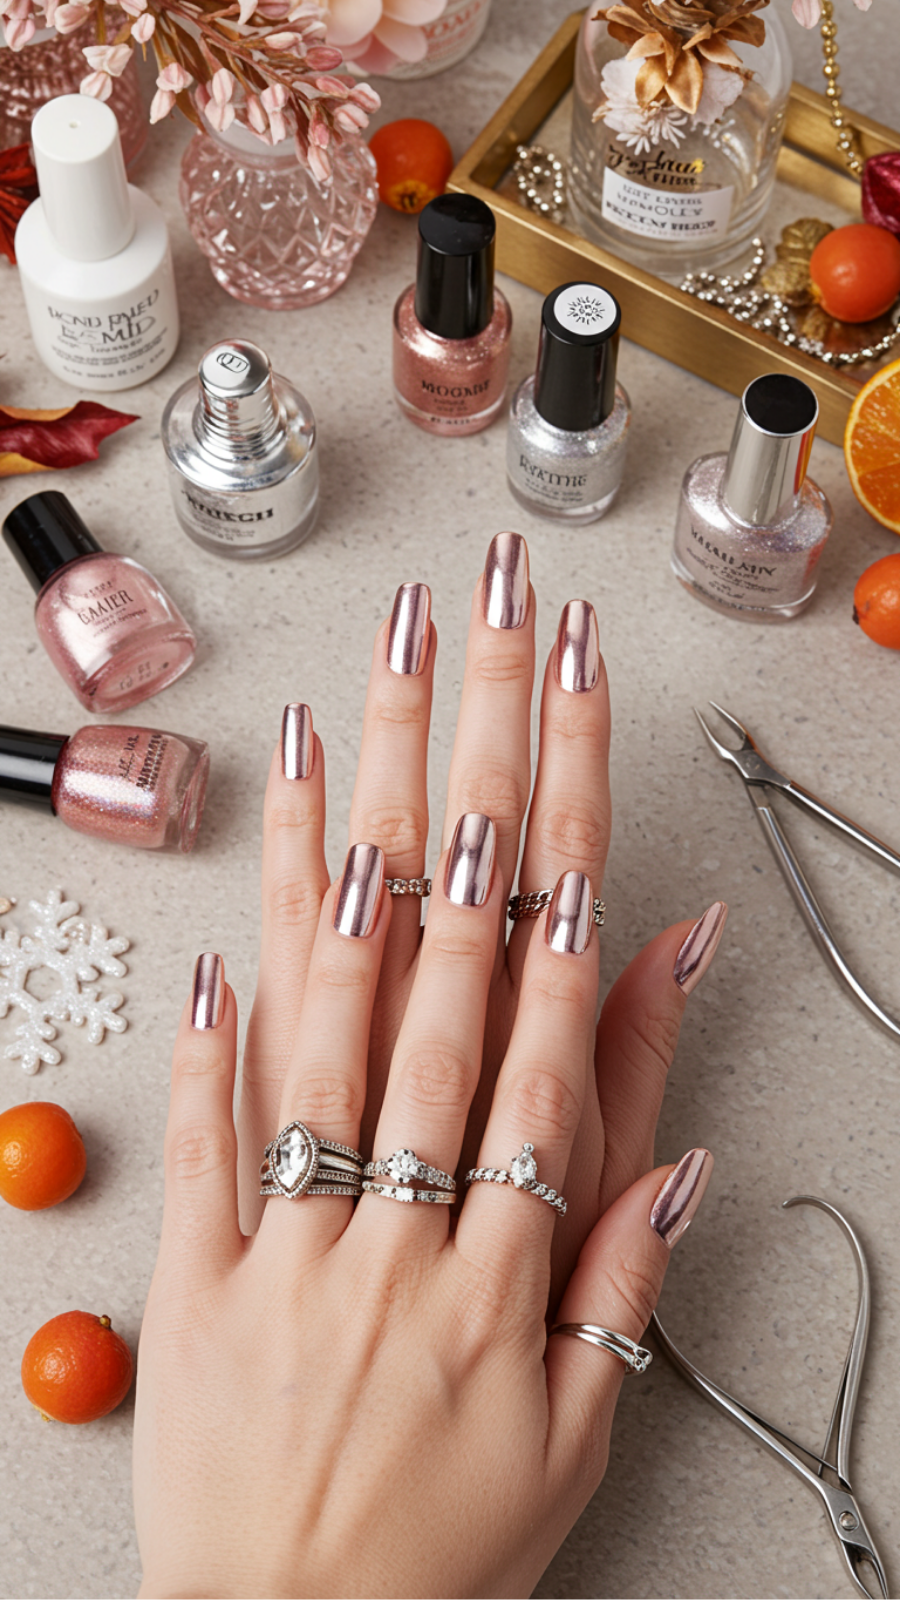
Seasonal Chrome Nail Trends: Must-Have Styles for Every Occasion
As we transition through the seasons, chrome nails have emerged as a versatile and stylish trend that can elevate your manicure for any occasion. From shimmering metallics to iridescent finishes, these nail art styles not only enhance your look but also reflect the seasonal vibes.
Spring: Pastel Chrome Dreams
This spring, embrace soft pastel chrome shades like lavender and mint green. They provide a fresh, airy aesthetic perfect for the blooming season. To achieve this look:
- Start with a base coat for smooth application.
- Apply two coats of your chosen pastel polish.
- Finish with a chrome powder applied using a sponge applicator for that reflective shine.
Summer: Vibrant Chrome Accents
Summer is all about bold colors. Opt for vibrant chrome shades like electric blue or neon pink. To create stunning summer nails:
- Use a clear base coat to enhance the chrome effect.
- Layer on a bright base polish followed by your chrome topcoat.
- Add nail tape for geometric designs that pop.
Fall: Rich Jewel Tones
As the leaves change, so should your nail color. Rich jewel tones like emerald and ruby in chrome finishes are a must-have. Follow these steps:
- Apply a strengthening base coat.
- Use two coats of a deep color polish.
- Seal with a chrome topcoat for a luxurious finish.
Winter: Festive Glam
For the holiday season, incorporate chrome foils or glitter with traditional reds and greens. Expert tips include:
- Use a matte base for a unique contrast.
- Apply chrome foils strategically for intricate designs.
- Top with a high-gloss topcoat to seal your festive look.
Avoid Common Mistakes
To achieve flawless chrome nails, avoid these common pitfalls:
- Skipping the base coat can lead to uneven application.
- Applying too much chrome powder can create a messy look.
- Neglecting to cure the topcoat properly may cause chipping.
With these seasonal chrome nail trends, you can effortlessly transition your manicure from casual to glamorous. Whether you’re attending a spring wedding or a winter party, these styles are sure to make a statement!
10. DIY Chrome Nail Techniques: Mastering the Art at Home
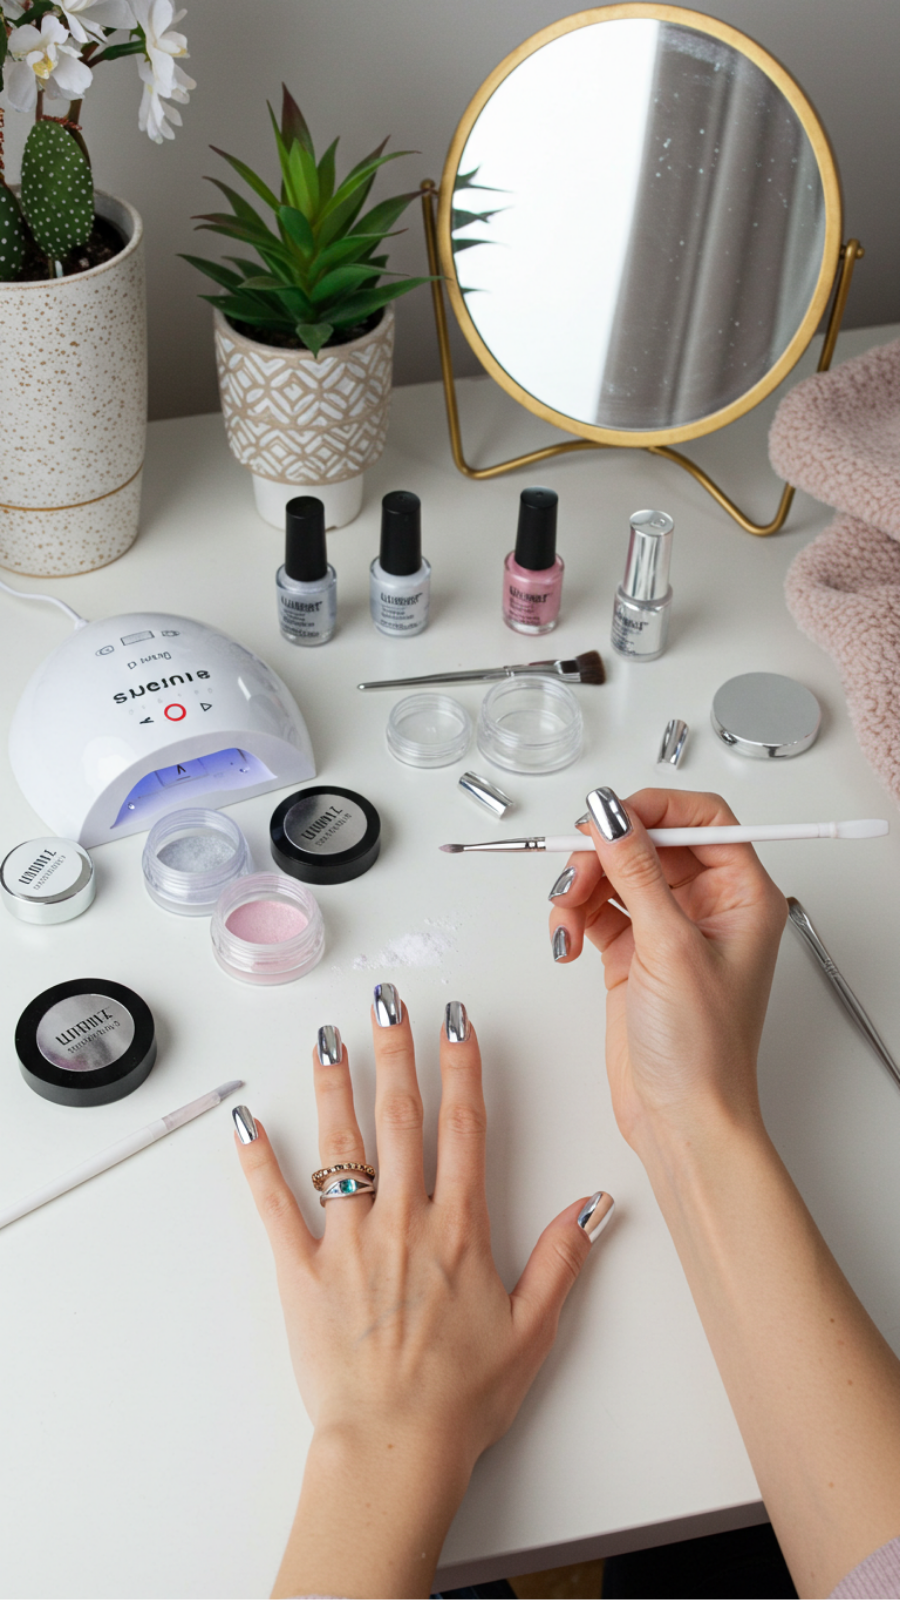
DIY Chrome Nail Techniques: Mastering the Art at Home
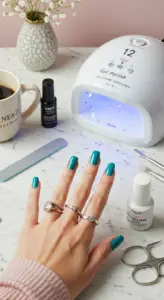
Mastering the art of DIY chrome nails at home can elevate your beauty game without the need for a salon visit. Chrome nails are trending for their sleek, mirror-like finish that exudes sophistication. Here’s how you can achieve this stunning look with expert techniques and insider tips.
Step-by-Step Guide to Chrome Nails
- Prep Your Nails: Start with clean, dry nails. Remove any old polish, buff the surface, and apply a base coat to protect your nails.
- Apply Base Color: Choose a solid base color for your chrome effect. Black or dark shades work best to enhance the chrome finish. Apply two coats for an even look and allow it to dry completely.
- Use Chrome Powder: After your base color is dry, use a makeup sponge or applicator to apply chrome powder. Gently rub the powder onto the nail surface until you achieve your desired chrome effect.
- Seal with Top Coat: Finish with a no-wipe top coat to lock in the shine. This step is crucial to maintain the longevity of your chrome nails.
Expert Tips and Common Mistakes
- Ensure your base color is fully dry before applying chrome powder to avoid smudging.
- Use a high-quality chrome powder for the best results; cheaper products may not deliver the desired shine.
- Don’t skip the top coat! It protects your design and enhances the chrome effect.
By following these DIY chrome nail techniques, you can achieve beautiful, salon-quality nails from the comfort of your home. Avoid common mistakes such as rushing the drying process, and embrace the latest trends in nail art for an elevated look. Happy designing!
Frequently Asked Questions
How can I achieve the perfect shine with mirror chrome nails?
To achieve stunning mirror chrome nails, start with a smooth base coat and apply a high-quality chrome powder using a makeup sponge or applicator. Seal the look with a non-wipe topcoat for maximum shine and durability. Remember to cure each layer under a UV/LED lamp if you’re using gel products for optimal results.
Why should I try color-gradient chrome nails?
Color-gradient chrome nails offer a trendy twist that allows for creative expression and versatility. This style blends different hues, creating a stunning ombre effect that catches the eye. It’s perfect for those who want a unique look that stands out on social media and can be customized to match any outfit.
What are the differences between matte and glossy chrome nails?
Matte chrome nails have a soft, velvety finish, while glossy chrome nails reflect light for a high-shine effect. Choosing between them depends on personal style; matte provides a chic, understated look, whereas glossy offers bold glamour. Experiment with both finishes to discover which suits your aesthetic best.
How do I create pastel chrome nail art?
To create pastel chrome nail art, start with a light pastel base color and allow it to dry. Then, apply a chrome powder and gently buff it to achieve that soft metallic sheen. Top it off with a clear topcoat to enhance the pastel hues while ensuring longevity of your manicure.
What should I do if my chrome nails are not shiny enough?
If your chrome nails lack shine, ensure you’re using a high-quality chrome powder and properly buffing it onto a smooth, cured base coat. Additionally, applying a non-wipe topcoat can enhance the shine. If necessary, buff again after the topcoat has dried to maximize the reflective effect.

