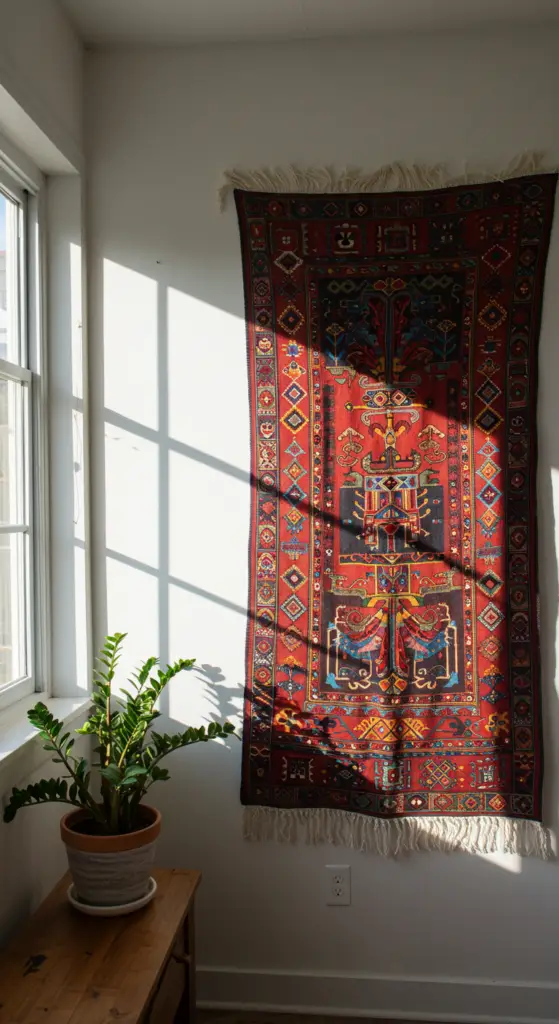
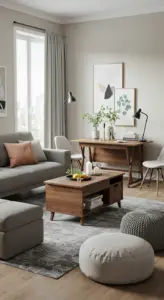
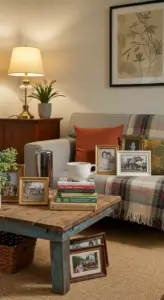
1. Elevate Your Space: The 57-Inch Rule for Artwork Placement

Elevate Your Space: The 57-Inch Rule for Artwork Placement
When it comes to home decor inspirations, the placement of artwork can dramatically transform your space. A widely accepted guideline in interior design is the 57-inch rule, which suggests hanging artwork at eye level, typically around 57 inches from the floor. This measurement is not just arbitrary; it’s based on the average human eye level and helps create a harmonious aesthetic.
Why 57 Inches?
Placing artwork at 57 inches ensures that it is easily visible and engaging. This height allows for optimal viewing whether you’re standing or sitting, making your artwork a focal point in the room. Here are some expert tips to effectively implement this rule:
- Measure from the Floor: Start measuring from the floor to 57 inches and mark the spot on the wall.
- Consider Furniture: If your artwork is above a piece of furniture, such as a sofa or console table, adjust the height accordingly. Aim for 6-12 inches above the furniture.
- Group Artworks: If displaying multiple pieces, maintain an overall center point at 57 inches to create a cohesive look.
Common Mistakes to Avoid
While the 57-inch rule is a solid guideline, here are some common pitfalls:
- Hanging art too high, making it feel disconnected from the space.
- Ignoring the scale of the artwork—large pieces often need to be positioned slightly lower.
- Forgetting to consider lighting, which can dramatically affect how artwork is perceived.
Best Practices for Artwork Placement
To truly elevate your space, consider these best practices:
- Mix different art styles and frames for an eclectic look.
- Incorporate colors that complement your overall decor scheme.
- Use lighting to highlight your artwork, adding depth and drama.
By adhering to the 57-inch rule, you can ensure that your artwork enhances your home decor, creating a gallery-like atmosphere that is both inviting and visually stunning. Remember, the key to successful artwork placement lies in balance and proportion, so take your time to curate your space thoughtfully.
2. Layering Art: How to Create Depth with Mixed Media Displays

Layering Art: How to Create Depth with Mixed Media Displays
Layering art is a contemporary trend in home decor that allows you to create visual depth and intrigue within your space. By combining various mediums—such as paintings, prints, textiles, and sculptures—you can transform a blank wall into a captivating focal point. Here’s how to master the art of layered displays.
Step-by-Step Guidance
- Select a Color Palette: Choose a cohesive color scheme that reflects your personal style. This will unify your mixed media display and create a harmonious look.
- Vary Your Textures: Incorporate different materials like canvas, wood, and metal. Textural contrast enhances visual interest and depth.
- Use Different Sizes: Mix large and small pieces to create a dynamic arrangement. A large canvas can anchor the display, while smaller works can fill in gaps.
- Layer Strategically: Start with larger pieces at the back and overlay smaller items in front. This technique adds dimension and ensures every piece is visible.
Expert Tips and Tricks
To elevate your display, consider incorporating unexpected elements such as mirrors or natural objects. Mirrors can reflect light and expand the visual space, while organic materials like driftwood or plants introduce a fresh touch.
Common Mistakes to Avoid
- Overcrowding: Avoid cramming too many pieces together; it can feel chaotic. Leave breathing room for each artwork.
- Neglecting Balance: Ensure your arrangement feels balanced. Use visual weight to guide placement, positioning heavier items towards the bottom.
Best Practices
Regularly update your displays to keep your decor feeling fresh. Current trends favor seasonal swaps, allowing you to showcase new pieces and reflect changing moods in your environment.
By layering art thoughtfully, you can create a stunning mixed media display that adds character and depth to your home. This approach not only enhances your decor but also expresses your unique style.
3. Focal Points Matter: Strategically Placing Art for Maximum Impact

Focal Points Matter: Strategically Placing Art for Maximum Impact
In the world of home decor, creating a focal point is essential for drawing the eye and establishing a cohesive aesthetic. Strategically placing art can transform a mundane space into a captivating atmosphere. Here’s how to maximize impact with your artwork.
Understanding Your Space
Before hanging art, assess the room’s layout. Consider the following:
- Wall Space: Identify large, empty walls that could benefit from visual interest.
- Lighting: Observe how natural and artificial lighting affects the art’s appearance.
- Furniture Arrangement: Take note of furniture placement to ensure the art complements the existing decor.
Step-by-Step Guidance
- Select a Statement Piece: Choose an eye-catching artwork, such as a large canvas or a striking sculpture.
- Height Matters: Hang art at eye level, typically 57-60 inches from the floor for optimal viewing.
- Group Art Wisely: When displaying multiple pieces, use similar frames or colors to create harmony.
Current Trends
Embrace the trend of mixed media and textured art to add depth to your decor. Incorporating local artists can also personalize your space and support your community.
Common Mistakes to Avoid
- Overcrowding: Avoid cramming too much art on one wall; less is often more.
- Ignoring Scale: Ensure the size of the art is proportional to the wall and surrounding furniture.
Best Practices for Art Placement
To achieve a balanced look, remember to:
- Rotate art seasonally to keep your decor fresh.
- Consider the color palette of the room when selecting art.
- Utilize lighting to enhance the visual appeal of your focal points.
By strategically placing art, you can create stunning focal points that elevate your home decor. Remember, the key is to create a space that reflects your personality while being visually engaging.
4. Gallery Walls 101: Tips for Cohesion in Diverse Art Styles

Gallery Walls 101: Tips for Cohesion in Diverse Art Styles
Creating a gallery wall can be an exciting way to showcase your personality and artistic taste. However, achieving cohesion amidst diverse art styles can be challenging. Here’s how to master the art of the gallery wall with expert tips and tricks.
Understanding Cohesion
Cohesion in a gallery wall doesn’t mean all pieces must match. Instead, focus on a unifying element. This could be a color palette, a theme, or a consistent frame style. For instance, if you have a mix of abstract and photography, select frames in the same color to tie them together visually.
Step-by-Step Guidance
- Select Your Space: Choose a wall that complements your room’s function, be it a living room, hallway, or home office.
- Gather Your Art: Collect pieces of varying sizes and styles. Consider including personal photos, prints from local artists, or even DIY art.
- Plan the Layout: Use painter’s tape to outline where each piece will go. Experiment with arrangements before committing.
- Hang with Purpose: Start with the largest piece at eye level and build around it. Use a consistent spacing of 2-4 inches between frames for a polished look.
Common Mistakes to Avoid
- Overcrowding the wall: Less is often more.
- Ignoring scale: Balance larger pieces with smaller ones for visual interest.
- Neglecting lighting: Ensure your gallery wall is well-lit to enhance the artwork.
Current Trends
In 2023, popular trends include mixing textures with fabric art or 3D pieces, and incorporating natural elements like wood or greenery. These add depth and character to your gallery wall.
By following these expert tips, you can create a stunning gallery wall that reflects your unique taste while maintaining a cohesive look. Happy decorating!
5. Art Height Essentials: The Eye-Level Approach for Stunning Views

Art Height Essentials: The Eye-Level Approach for Stunning Views
When it comes to home decor, the placement of artwork can make or break the aesthetic appeal of your space. Understanding the eye-level approach is essential for creating stunning views that engage the viewer and enhance your home’s atmosphere.
Why Eye Level Matters
Art should typically be hung at eye level, which is generally around 57 to 60 inches from the floor. This positioning allows for optimal viewing and interaction, making the artwork a focal point in the room. Remember, the goal is to create a harmonious balance with the surrounding decor.
Step-by-Step Guidance
- Measure Your Space: Use a measuring tape to find the ideal height for your art. Consider the average height of the room’s occupants.
- Group Artwork: If you have multiple pieces, arrange them in a gallery wall format. Aim for the center of the grouping to sit at eye level.
- Consider Furniture Height: Place art above furniture such as sofas or consoles, leaving about 6 to 12 inches of space to create visual cohesion.
Current Trends in Home Decor
In 2023, incorporating oversized pieces and eclectic styles is trending. Mix textures and frames to add depth and interest. Consider using floating shelves to display smaller artworks or sculptures, allowing for flexibility in arrangement.
Common Mistakes to Avoid
- Hanging art too high or too low can disrupt the flow of the room.
- Overcrowding a wall can lead to visual chaos; less is often more.
Best Practices
Always step back and assess your artwork from various angles to ensure it resonates with your overall decor theme. Use the eye-level approach as a guiding principle, but also trust your intuition and personal style.
By following these expert tips and avoiding common pitfalls, you’ll transform your space into a captivating gallery that reflects your unique taste. Remember, the right art at the right height can elevate your home decor to new heights.
6. Balance and Symmetry: Pairing Artwork for Visual Harmony

Balance and Symmetry: Pairing Artwork for Visual Harmony
Creating a harmonious home environment often begins with the careful selection and arrangement of artwork. Achieving balance and symmetry in your decor can elevate a space, making it feel cohesive and inviting. Here’s how to pair artwork for visual harmony in your home.
Understanding Balance and Symmetry
Balance refers to the distribution of visual weight in a space. Symmetry involves mirroring elements for a sense of order and calm. In home decor, both concepts contribute to a pleasing aesthetic, especially when pairing artwork.
Expert Tips for Artwork Pairing
- Choose a Focal Point: Start with a large piece that captures attention, such as an oversized canvas or a striking photograph.
- Complementary Sizes: Pair smaller artworks with larger pieces, ensuring they share a common theme or color palette for cohesion.
- Consider Frame Styles: Use similar frames to create unity, but mix textures and finishes for depth.
Step-by-Step Guidance
- Identify the main piece of artwork that will serve as the focal point.
- Gather additional pieces that complement the focal piece in terms of color and theme.
- Experiment with layouts on the floor before hanging them on the wall to find the most balanced arrangement.
Common Mistakes to Avoid
Avoid overcrowding your walls with too many pieces, which can lead to visual chaos. Additionally, neglecting to consider scale can disrupt the balance; ensure all pieces are proportionate to the space.
Best Practices for Visual Harmony
Incorporate negative space around your artwork to allow it to breathe. This can enhance the overall aesthetic while maintaining balance. Additionally, consider current trends such as gallery walls or mixed media arrangements to keep your decor fresh and engaging.
By applying these expert tips and understanding the principles of balance and symmetry, you can create a visually harmonious environment that reflects your personal style.
7. Framing Techniques: Choosing the Right Frame to Enhance Art

Framing Techniques: Choosing the Right Frame to Enhance Art
When it comes to showcasing art in your home, the right frame can elevate your pieces and enhance your overall decor. Understanding framing techniques is essential for any home decor enthusiast looking to create a cohesive and stylish environment.
Current Trends in Home Decor Inspirations
In 2023, minimalistic frames with natural wood finishes are trending, offering a warm, organic touch. Alternatively, bold, colorful frames can make a statement and add personality to your space.
Expert Tips for Choosing the Right Frame
- Consider the Artwork: The frame should complement the art without overshadowing it. For example, delicate watercolors pair beautifully with thin, light frames.
- Match Your Decor: Align the frame style with your room’s theme—industrial settings benefit from metal frames, while traditional spaces may call for ornate designs.
- Size Matters: Ensure the frame is proportional to the artwork. Oversized frames can overpower a small piece, while undersized frames can make it feel lost.
Common Mistakes to Avoid
Avoid using frames that are too ornate for simple art or choosing non-archival materials that can damage your artwork over time. Additionally, don’t forget to consider the color scheme of your room when selecting a frame.
Best Practices for Displaying Framed Art
To effectively display framed art, follow these steps:
- Group similar artwork and frames for a curated look.
- Maintain consistent spacing between frames for a polished appearance.
- Experiment with placement before hanging to find the perfect arrangement.
By following these framing techniques and incorporating current trends, you can enhance your artwork and elevate your home decor. Choose wisely, and let your creativity shine!
8. Lighting Your Art: Best Practices for Showcasing Your Collection

Lighting Your Art: Best Practices for Showcasing Your Collection
Enhancing your art collection with the right lighting can transform your space and elevate the visual appeal of each piece. Properly illuminating artwork is an essential aspect of home decor that not only highlights the intricacies of your collection but also creates a warm and inviting atmosphere.
Choose the Right Lighting Fixtures
When selecting lighting for your artwork, consider the following:
- Track lighting: This versatile option allows for adjustable fixtures to direct light precisely where needed.
- Wall-mounted sconces: These can provide ambient lighting while framing your art.
- Picture lights: Specifically designed for illuminating artwork, these fixtures can be mounted above or on the frame.
Implementing Proper Techniques
To effectively showcase your art, apply these expert tips:
- Angle your lights: Aim lights at a 30-degree angle to avoid glare and enhance texture.
- Choose the right bulb: Opt for LED lights with a color temperature of 3000K for optimal color rendering.
- Maintain distance: Position lights 6-12 inches away from the artwork for the best effect.
Avoid Common Mistakes
While illuminating art, keep these common pitfalls in mind:
- Using too bright lights can wash out colors.
- Neglecting to consider the surrounding decor can disrupt harmony.
- Forgetting to adjust lighting as seasons change can affect the ambiance.
Conclusion
By following these best practices for lighting your art, you’ll not only enhance your collection but also create a stunning focal point in your home. Remember, a well-lit artwork can serve as a conversation starter, reflecting your personal style while making a significant impact on your interior design.
9. Color Coordination: Harmonizing Artwork with Room Color Schemes

Color Coordination: Harmonizing Artwork with Room Color Schemes
When it comes to home decor inspirations, color coordination is key to creating a cohesive and inviting space. Harmonizing artwork with your room’s color scheme can elevate the overall design, making it feel both intentional and stylish.
Understanding Color Theory
Begin by understanding the basics of color theory. Consider using a color wheel to identify complementary colors, which are opposite each other, or analogous colors, which are next to each other. For example, if your room features a soft blue palette, artwork incorporating shades of orange can create a striking contrast.
Step-by-Step Guidance
- Assess Your Room: Take note of the primary colors in your decor, including wall paint, furniture, and accessories.
- Select Artwork: Choose pieces that either match or contrast with these colors. For a modern touch, consider abstract art that uses bold splashes of color.
- Placement Matters: Hang artwork at eye level and ensure it complements the surrounding decor. Group smaller pieces together for a gallery wall effect.
Expert Tips and Tricks
- Use a neutral backdrop to allow colorful artwork to pop.
- Consider the room’s mood; warm tones create coziness, while cool tones promote calmness.
- Incorporate metallic frames to add a touch of elegance.
Common Mistakes to Avoid
Avoid overwhelming your space with too many colors, which can create visual chaos. Instead, limit your palette to two or three accent colors that resonate with your artwork and room decor.
Best Practices for Harmonizing Artwork
Stay updated with current trends, such as minimalism and monochromatic schemes, which allow art to serve as a focal point. Remember, the goal is to create harmony, so choose pieces that reflect your personal style while enhancing your home’s aesthetic.
By following these guidelines, you can successfully harmonize artwork with your room color schemes, transforming your space into an inspiring haven.
10. Seasonal Swaps: Refreshing Artwork for Year-Round Style Changes

Seasonal Swaps: Refreshing Artwork for Year-Round Style Changes
Transforming your living space doesn’t have to be an extensive project. One of the simplest methods to achieve a fresh look is through seasonal artwork swaps. This practice not only enhances your home décor but also reflects the changing seasons, providing a dynamic atmosphere year-round.
Current Trends in Seasonal Artwork
As we embrace a more eclectic style in home décor, incorporating seasonal artwork allows for flexibility and creativity. Consider vibrant abstract prints in spring, serene landscapes in summer, warm-toned florals in autumn, and cozy winter scenes. These choices not only align with current trends but also create a harmonious flow throughout your home.
Step-by-Step Guidance for Artwork Swaps
- Choose a Focal Point: Identify a prominent wall or space for your seasonal artwork. This could be above a sofa or in a hallway.
- Curate Your Collection: Select a variety of artworks that resonate with each season. Mix framed prints, canvas pieces, and even textiles.
- Establish a Routine: Schedule your swaps at the start of each season. This keeps your décor fresh and exciting.
- Mix and Match: Combine seasonal pieces with existing décor for a cohesive look. Use colors from your artwork to inspire accent pillows or throws.
Expert Tips and Common Mistakes to Avoid
To maximize the impact of your seasonal artwork:
- Always consider the scale of your art in relation to the space. Oversized pieces can overwhelm, while too small can get lost.
- Avoid overcrowding your walls. Less is often more when it comes to impactful displays.
- Regularly assess your collection for pieces that no longer inspire you—donate or swap them out to keep your space feeling fresh.
In conclusion, seasonal swaps of artwork are a fantastic way to refresh your home’s style. By following these best practices and avoiding common pitfalls, you’ll create a living space that evolves beautifully throughout the year.
Frequently Asked Questions
How do I determine the right height to hang my artwork?
To find the ideal height for hanging artwork, follow the 57-inch rule, which suggests placing the center of the art piece at eye level, typically around 57 inches from the floor. This ensures that your artwork is visually accessible and creates a harmonious look in your space.
Why is layering art important in home decor?
Layering art adds depth and dimension to your displays, making them visually intriguing. By combining different media and textures, you can create a dynamic focal point that draws the eye and enhances the overall aesthetic of your room.
What should I consider when creating a gallery wall?
When designing a gallery wall, aim for cohesion by selecting a unifying theme or color palette that ties diverse art styles together. Additionally, consider the arrangement and spacing between pieces to create balance and flow, ensuring that each artwork complements the others.
How can I make my artwork a focal point in a room?
To make your artwork a focal point, place it strategically where it can capture attention, such as above a sofa or fireplace. Use contrasting colors or larger pieces to draw the eye, and ensure the surrounding decor enhances its impact while allowing the artwork to stand out.
What do I do if my artwork looks too high when hung?
If your artwork appears too high, consider adjusting its position by lowering it to align with the eye-level approach. This can significantly improve the visual appeal and make the piece more engaging, ensuring it complements the surrounding furnishings and architecture.

