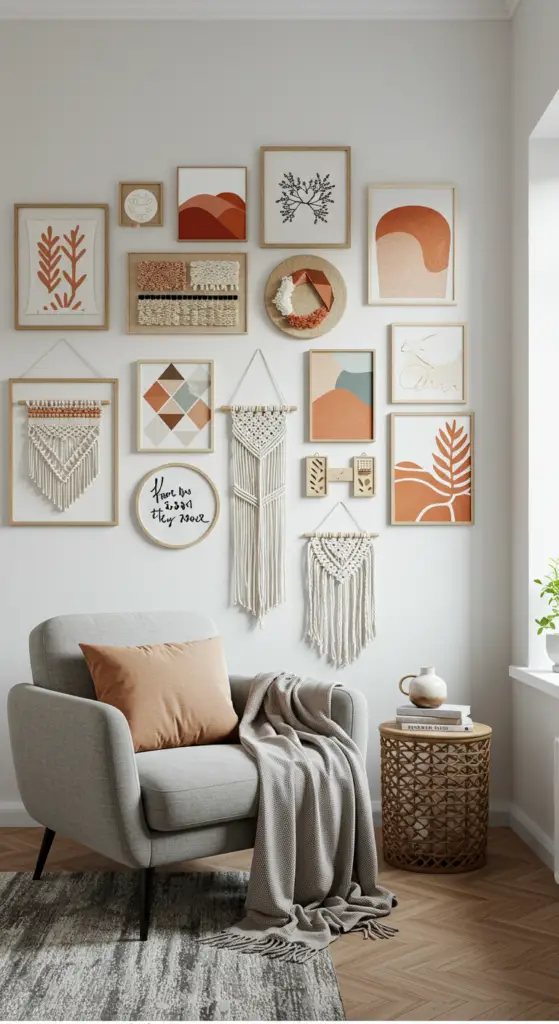
1. Modern Macramé Wall Hangings for a Boho Chic Vibe

Modern Macramé Wall Hangings for a Boho Chic Vibe
Transform your space into a serene sanctuary with modern macramé wall hangings that exude a boho chic vibe. These intricate designs not only elevate your home décor but also serve as a creative outlet. Whether you’re a seasoned crafter or a beginner, macramé offers endless possibilities to express your personal style.
Expert-Level Advice
To get started, gather your supplies: cotton cord (preferably 3-5mm thick), a wooden dowel or branch, and scissors. Begin by measuring your desired length of cord; a good rule of thumb is to cut pieces at least four times the length of the finished piece. This ensures ample material for knots and patterns.
Step-by-Step Guidance
- Choose Your Knots: Familiarize yourself with basic knots such as square knots, lark’s head knots, and spiral knots. These form the foundation of your design.
- Start Knotting: Attach your cords to the dowel using lark’s head knots. Experiment with various knotting techniques to create visual interest.
- Add Dimensions: Incorporate fringe, beads, or other embellishments to enhance texture and depth.
Common Mistakes to Avoid
- Inconsistent Tension: Keep your knots even to ensure a balanced look.
- Overcomplicating Designs: Start simple; complex patterns can be overwhelming.
Best Practices
Always have a clear vision or sketch of your design before starting. This will guide your knotting process and help you stay focused. Additionally, consider the color palette of your space; neutral tones often complement a boho aesthetic beautifully.
With these expert tips and current trends in DIY crafts, creating a stunning macramé wall hanging is within your reach. Embrace this artistic journey and watch your living space transform into a cozy retreat!
2. Abstract Geometric Canvas Art: Simple Techniques for Beginners
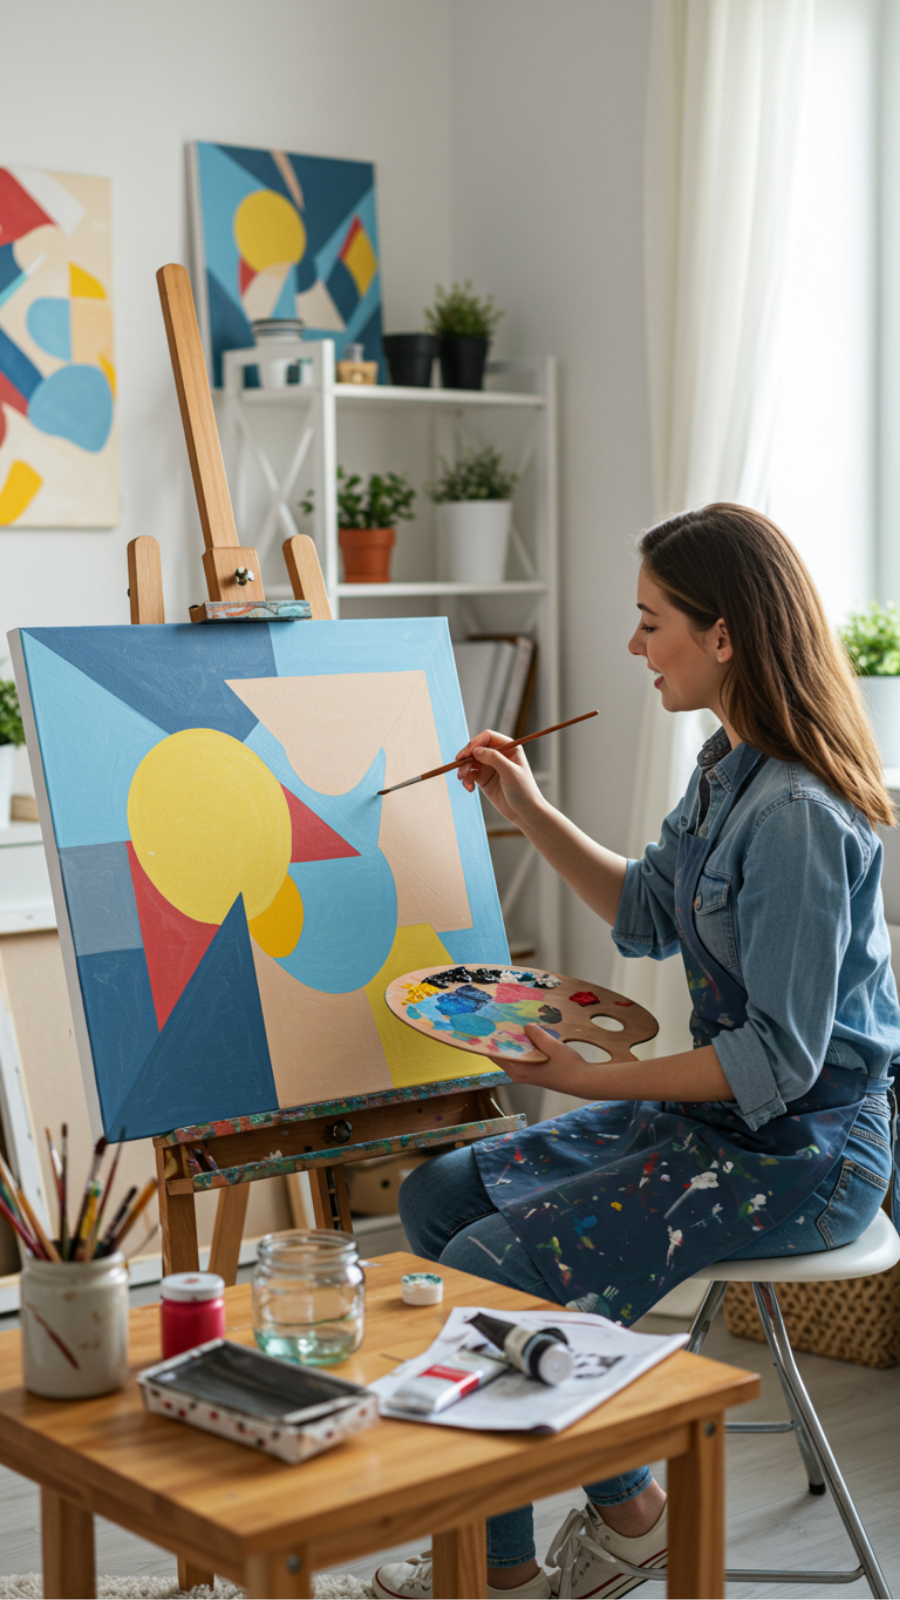
Abstract Geometric Canvas Art: Simple Techniques for Beginners
Creating abstract geometric canvas art is an exciting way to express your creativity while enhancing your living space. This DIY project is perfect for beginners looking to dive into the world of modern art. With just a few basic supplies and techniques, you can create stunning pieces that reflect current trends in home decor.
Essential Supplies
- Canvas (any size)
- Acrylic paints in various colors
- Painter’s tape
- Paintbrushes and sponges
- Palette for mixing colors
Step-by-Step Guide
- Prepare Your Canvas: Start by priming your canvas if it’s unprimed. This ensures better paint adhesion.
- Design Your Layout: Use painter’s tape to create geometric shapes on the canvas. Experiment with different angles and sizes.
- Paint the Shapes: Fill in the taped sections with your chosen colors. Use a sponge for a textured effect, or a brush for smooth areas.
- Remove the Tape: Once the paint is dry, carefully peel off the tape for clean edges.
- Final Touches: Add additional layers or details to enhance your artwork, such as splatters or outlines.
Expert Tips and Common Mistakes
- Tip: Choose a cohesive color palette to create a harmonious look.
- Mistake to Avoid: Applying too much paint at once can lead to drips and uneven textures. Start with thin layers.
- Best Practice: Allow each layer to dry completely before adding new elements to avoid muddy colors.
By following these simple techniques, you can create abstract geometric canvas art that showcases your personal style and adds flair to your home. Crafting your own art not only personalizes your space but also allows for a fulfilling creative outlet.
3. Upcycled Wooden Pallet Art: Rustic Decor with a Personal Touch
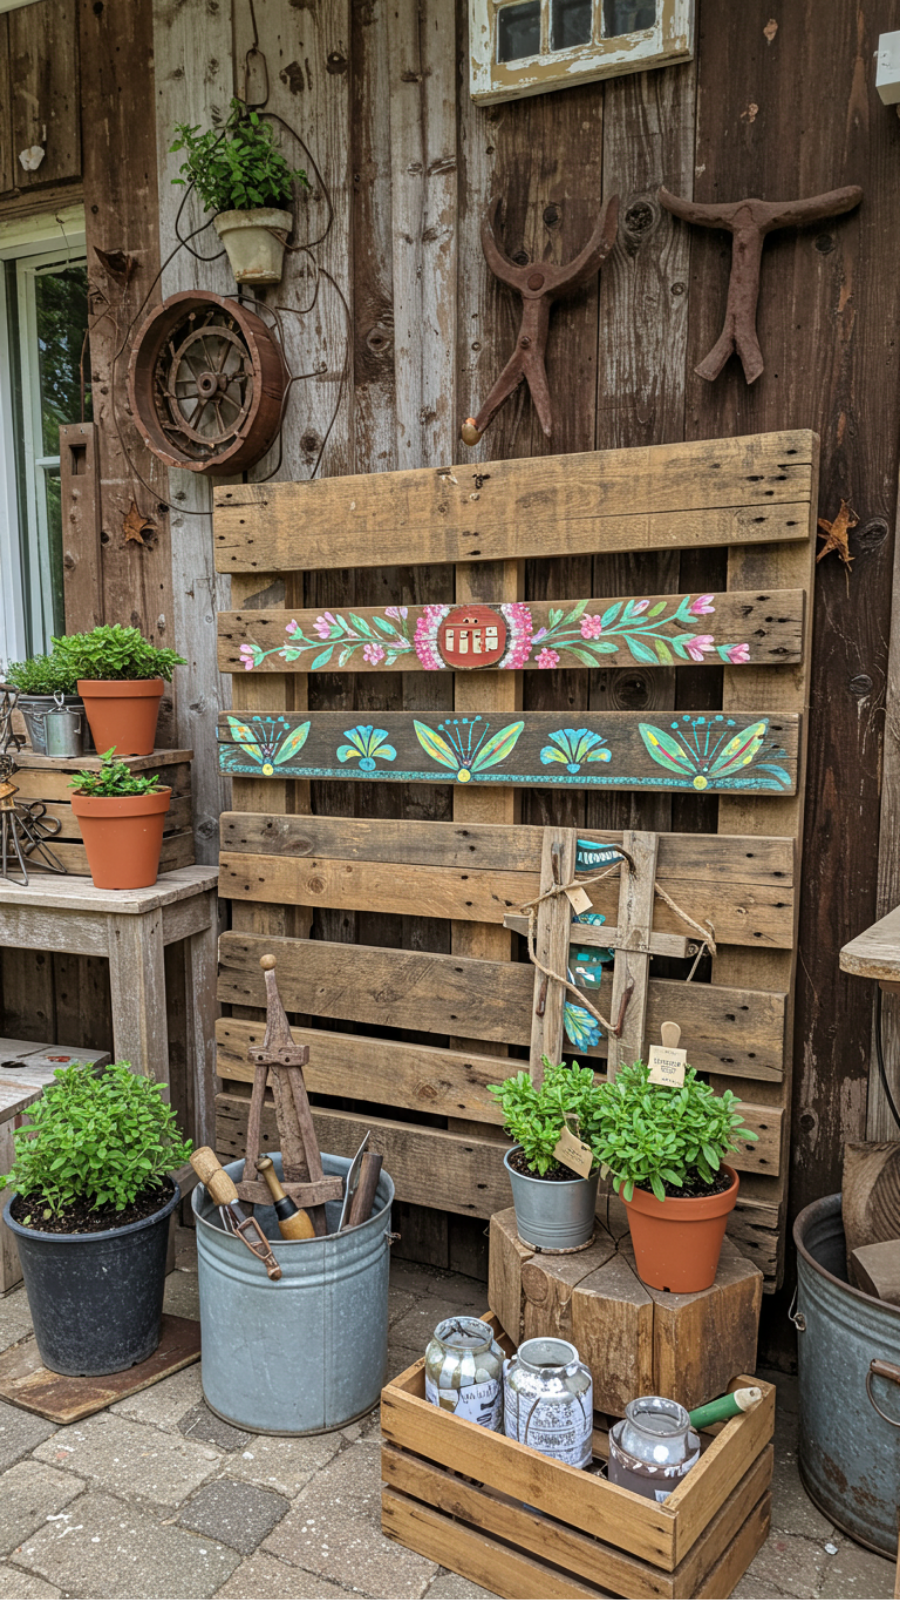
Upcycled Wooden Pallet Art: Rustic Decor with a Personal Touch
Transforming upcycled wooden pallets into stunning art pieces is a growing trend in DIY & creative crafts. Not only does this project promote sustainability, but it also allows you to infuse your home with rustic charm and a personal touch.
Materials Needed
- Wooden pallets (ensure they are heat-treated)
- Sandpaper or a power sander
- Wood stain or paint
- Brushes or rags
- Saw (if resizing is necessary)
- Nails or screws for assembly
- Optional: stencils or decorative elements
Step-by-Step Guidance
- Prepare the Pallet: Start by disassembling the pallet if needed. Sand the surfaces to remove rough edges and splinters.
- Design Your Art: Sketch your design on paper. Popular ideas include signs, wall art, or functional pieces like shelves.
- Paint or Stain: Apply your chosen wood stain or paint, allowing it to dry completely. Consider using stencils for intricate designs.
- Assemble and Finish: Reassemble your piece, securing with nails or screws. Ensure it’s sturdy for display.
Expert Tips and Common Mistakes to Avoid
To achieve the best results, remember these expert tips:
- Always choose heat-treated pallets to avoid chemical exposure.
- Test stains or paints on a small area before full application.
- Don’t rush the drying process—patience is key!
By following these steps, you can create beautiful upcycled wooden pallet art that enhances your living space. With a mix of creativity and craftsmanship, the possibilities are endless!
4. Gallery Wall Ideas: How to Curate Your Own Art Collection
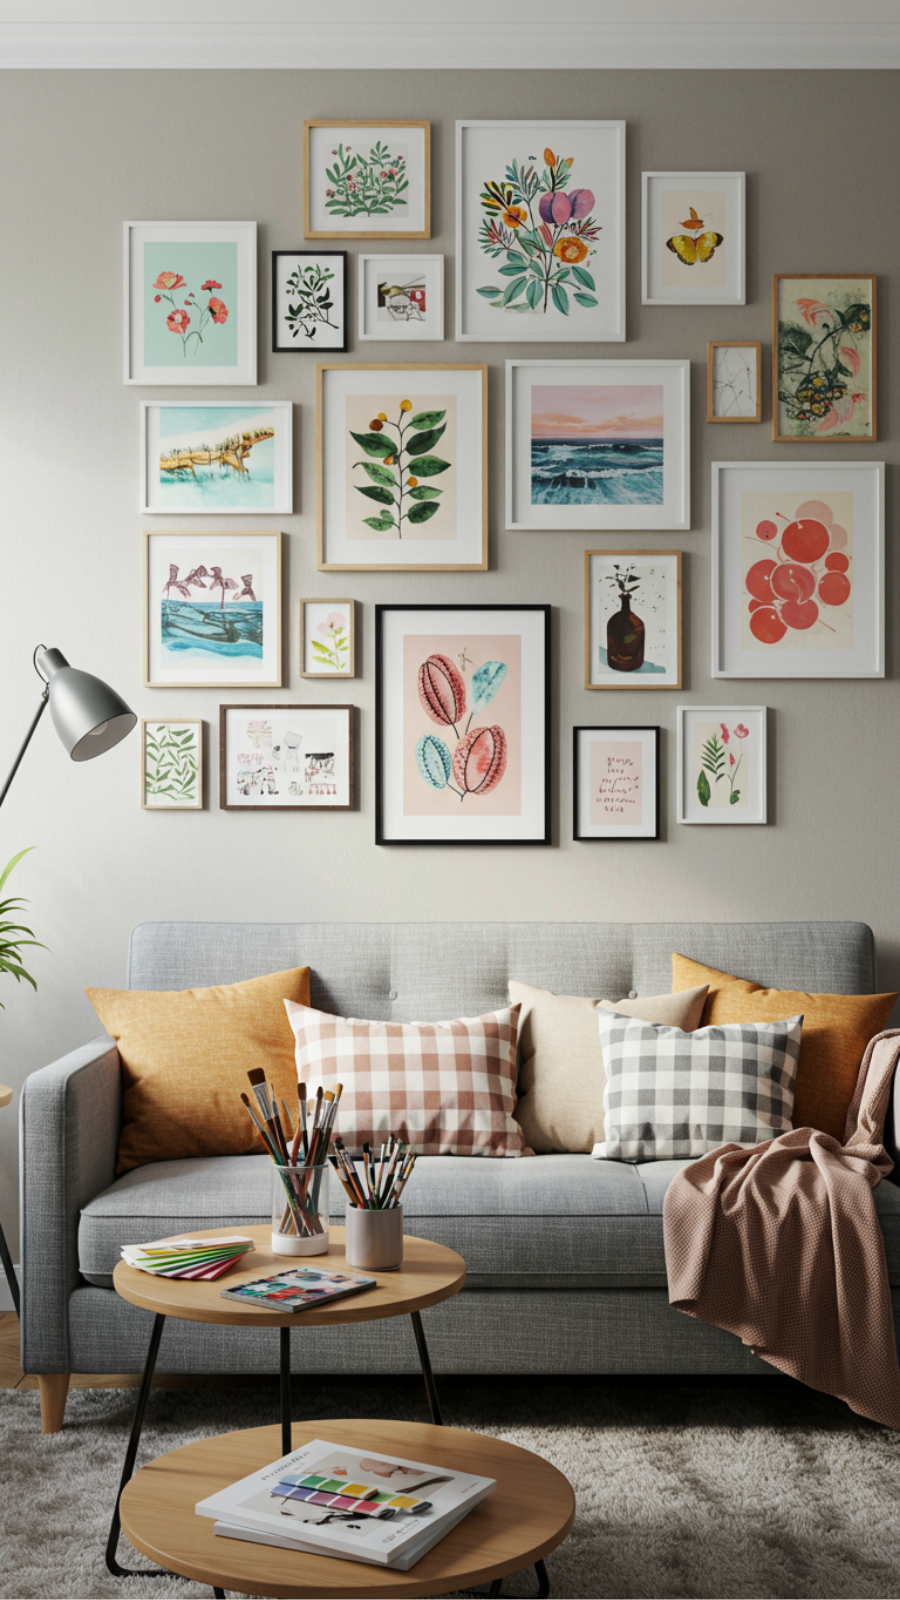
Gallery Wall Ideas: How to Curate Your Own Art Collection
Creating a gallery wall is a fantastic way to showcase your personal style while adding character to your living space. Curating your own art collection allows you to express individuality and incorporate current trends, making your wall a reflection of your unique taste.
Step-by-Step Guidance
- Choose a Theme: Start by selecting a cohesive theme—be it color, style, or subject matter. Popular themes include nature, abstract art, or family photos.
- Select Your Artwork: Mix and match various pieces, such as prints, paintings, and photographs. Consider local artists or DIY creations to add a personal touch.
- Plan Your Layout: Before hanging, lay the pieces on the floor to visualize the arrangement. Use painter’s tape to outline the arrangement on the wall.
- Hang with Precision: Start with the center piece at eye level, then work outward. Utilize a level to ensure your artwork is straight.
Expert Tips and Tricks
- Utilize frames of different styles and sizes to create visual interest.
- Incorporate three-dimensional objects like mirrors or shelves for added depth.
- Consider lighting to highlight your gallery wall, enhancing the overall aesthetic.
Common Mistakes to Avoid
One common mistake is overcrowding the wall. Aim for balance and allow each piece to breathe. Additionally, neglecting to consider wall color can detract from the artwork. Choose a neutral background to make your collection pop.
Best Practices
Regularly refresh your gallery wall with seasonal pieces or new finds. This keeps the display dynamic and exciting. Remember, a gallery wall is a reflection of your journey, so let it evolve!
By following these curated gallery wall ideas, you’ll create an inspiring art collection that not only beautifies your space but also tells your story.
5. DIY Fabric Wall Hangings: Create Stunning Textile Art Pieces
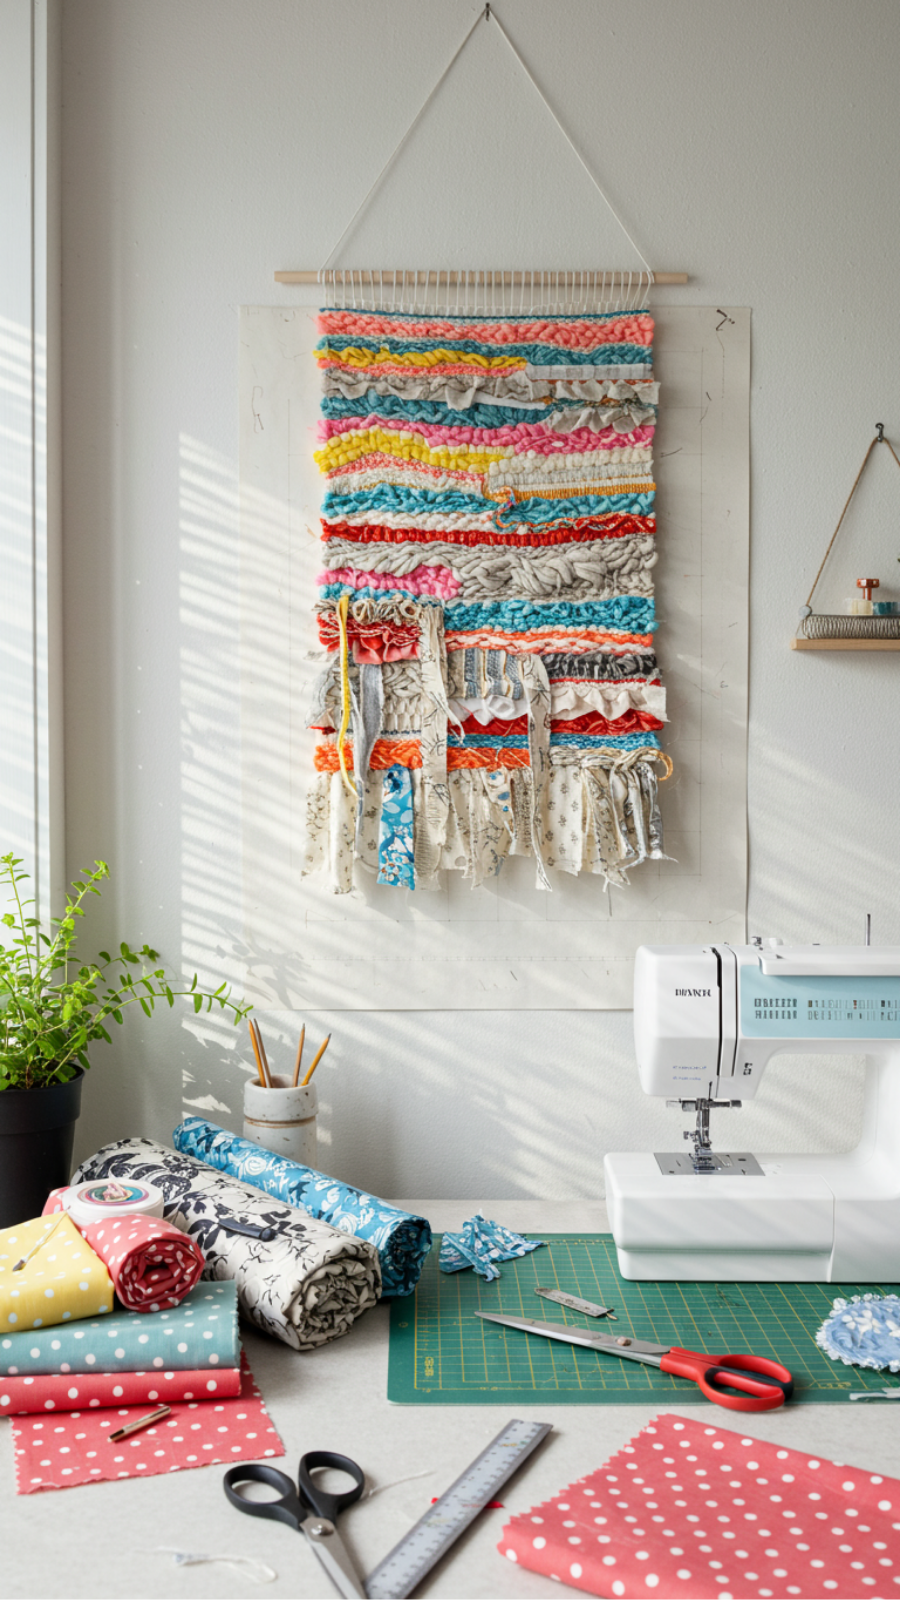
DIY Fabric Wall Hangings: Create Stunning Textile Art Pieces
Fabric wall hangings are an excellent way to introduce warmth and texture into your home decor. They are not only visually appealing but also a fantastic DIY project that allows you to express your creativity. In this guide, we’ll explore current trends in textile art and provide step-by-step instructions for crafting your own stunning fabric wall hangings.
Materials You’ll Need
- Fabric of your choice (cotton, linen, or felt)
- Wooden dowel or branch
- Scissors
- Hot glue gun
- Yarn or twine for hanging
Step-by-Step Guide
- Select Your Fabric: Choose fabrics that complement your room’s color scheme. Consider mixing textures for a more dynamic look.
- Cut the Fabric: Cut your fabric into various shapes and sizes. Experiment with triangles, circles, or even fringe styles for a trendy boho effect.
- Arrange and Attach: Lay out your fabric pieces on a flat surface and play around with the arrangement. Use a hot glue gun to attach the fabric to the wooden dowel, layering as desired.
- Hang It Up: Tie yarn or twine to the ends of the dowel for an easy hanging solution.
Expert Tips and Tricks
- Use a variety of fabric patterns to create depth.
- Incorporate embroidery or fabric paint for added personalization.
Avoid Common Mistakes
- Don’t rush the arrangement process; take your time to find the best layout.
- Avoid using too many colors that clash, which can detract from the overall design.
By following these steps and tips, you can create unique fabric wall hangings that enhance your living space. Dive into the world of DIY textile art and let your imagination run wild!
6. Nature-Inspired Wall Decor: Pressed Flowers and Leaves Tutorial
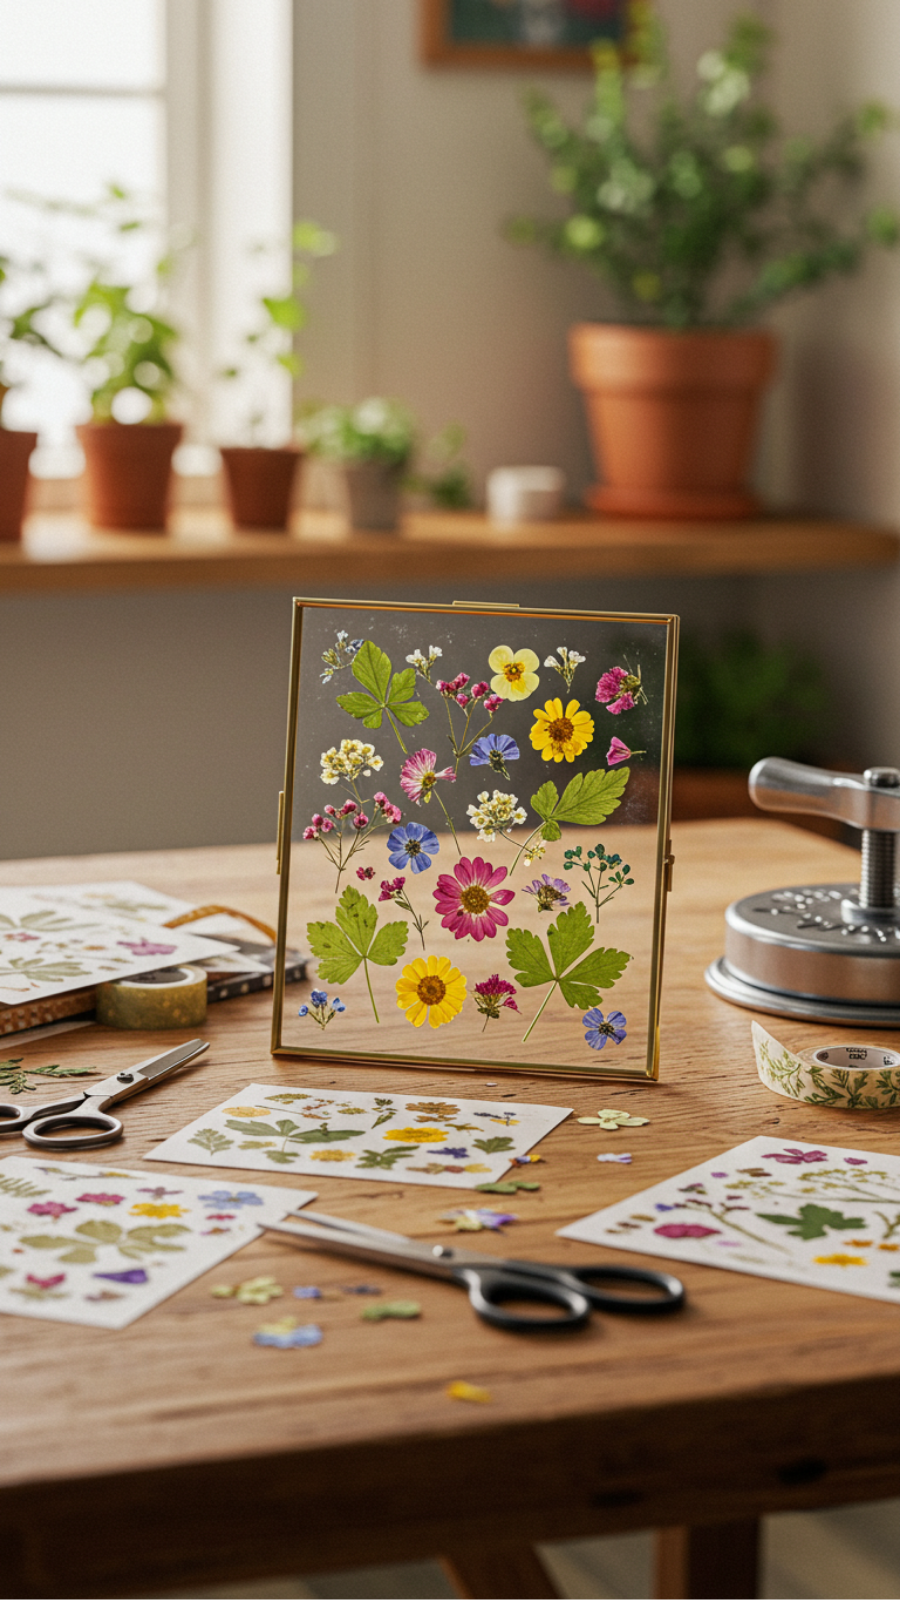
Nature-Inspired Wall Decor: Pressed Flowers and Leaves Tutorial
Transform your living space with stunning nature-inspired wall decor by creating pressed flowers and leaves art. This DIY project not only brings the beauty of the outdoors inside but also reflects current trends in sustainable crafting. Follow this expert-level tutorial to create personalized wall art that will elevate your home decor.
Materials You’ll Need
- Fresh flowers and leaves
- Heavy books or a flower press
- Acid-free cardstock or watercolor paper
- Mod Podge or a similar adhesive
- Frame (optional)
- Scissors
Step-by-Step Guide
- Select Your Foliage: Choose vibrant, flat flowers and leaves. Avoid overly thick or fleshy plants.
- Pressing: Place your selected flora between the pages of a heavy book or in a flower press. Leave them for 1-2 weeks to dry completely.
- Arrange and Adhere: Once dried, arrange your pressed flowers and leaves on the cardstock. Use Mod Podge to secure them in place.
- Frame Your Art: For added elegance, frame your finished piece to protect it and enhance its aesthetic appeal.
Expert Tips and Tricks
- For vibrant colors, choose flowers at their peak bloom.
- Use a heavy book that won’t warp; old encyclopedias work well.
- Avoid moisture and direct sunlight to prolong the life of your pressed art.
Common Mistakes to Avoid
- Skipping the drying time can lead to mold.
- Using non-acid-free materials can cause yellowing over time.
Creating nature-inspired wall decor with pressed flowers and leaves is not only a rewarding project but also a beautiful way to celebrate the natural world. By following these expert tips and techniques, you’ll craft stunning pieces that are both timeless and trendy, perfect for any home.
7. Paint Pouring Techniques for Unique Abstract Wall Art
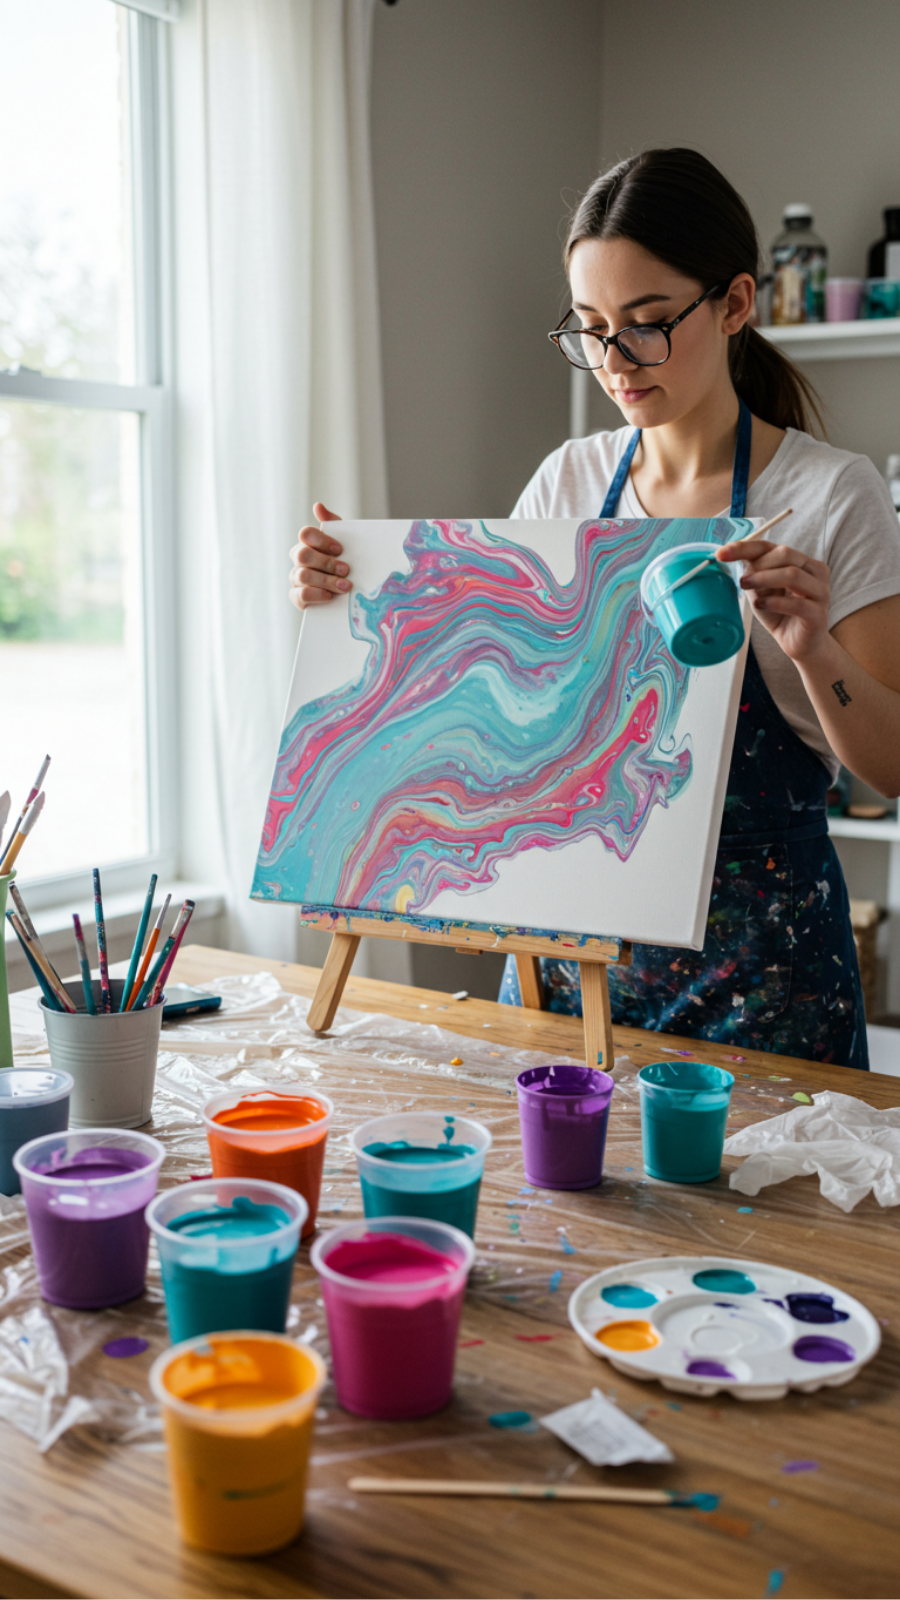
Paint Pouring Techniques for Unique Abstract Wall Art
Paint pouring is a captivating DIY technique that allows you to create mesmerizing abstract wall art with ease. This trend has taken the creative world by storm, enabling artists and crafters alike to express their individuality through vibrant colors and fluid designs. Here’s how to master paint pouring techniques for your next artistic endeavor.
Step-by-Step Guidance
- Gather Materials: You’ll need acrylic paints, a pouring medium, a canvas, cups for mixing, and stir sticks.
- Mix Your Paint: In separate cups, combine acrylic paints with a pouring medium (typically a 1:1 ratio). This ensures a smooth flow and helps avoid cracks.
- Choose Your Technique: Popular methods include the dirty pour, where you layer different colors in one cup, and the flip cup, which involves flipping the cup onto the canvas.
- Pour with Intent: Slowly pour your mixed paint onto the canvas, allowing the colors to blend organically. Move the canvas to create unique patterns.
- Let It Dry: Allow your artwork to dry completely before displaying it. This can take anywhere from 24 to 72 hours, depending on thickness.
Expert Tips and Tricks
- Experiment with different color combinations to see what resonates with your style.
- Use a heat gun or torch to pop bubbles and enhance color effects.
- Consider using silicone oil for added cells in your design.
Avoid Common Mistakes
To achieve stunning results, steer clear of these pitfalls:
- Using too much water can dilute your paint’s vibrancy.
- Poor canvas preparation can lead to uneven surfaces.
- Over-manipulating the paint can muddy your colors.
Best Practices
For the best outcome in your paint pouring projects, always:
- Work in a well-ventilated area.
- Protect your workspace with plastic sheets.
- Experiment on smaller canvases before committing to larger pieces.
By following these paint pouring techniques, you can create unique abstract wall art that reflects your personal style. Dive into this exciting DIY craft and transform your living space with your own creations!
8. Framed Succulent Displays: Living Art for Your Home
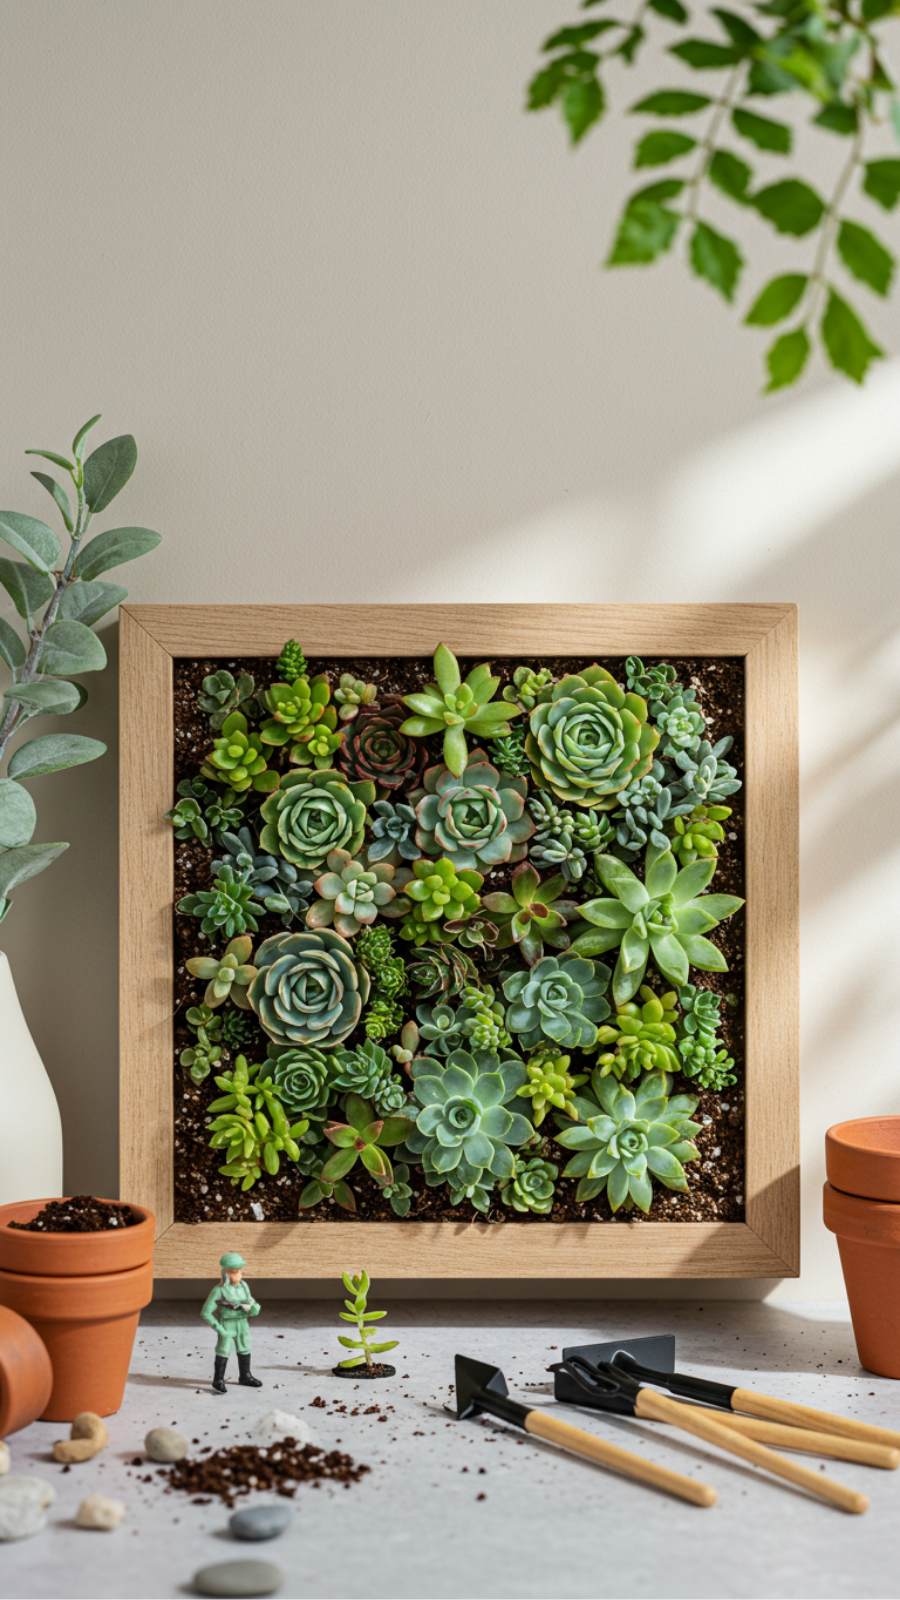
Framed Succulent Displays: Living Art for Your Home
Transform your living space with framed succulent displays, a creative and trendy way to bring nature indoors. These stunning living art pieces not only enhance your home decor but also purify the air, making them a perfect addition to any lifestyle. Below is a step-by-step guide to crafting your own unique succulent frame.
Step-by-Step Guide
- Gather Materials: You’ll need a shadow box frame, a variety of succulent plants, potting soil, moss, and tools like scissors and a spray bottle.
- Prepare the Frame: Remove the backing of the frame and add a layer of potting soil followed by a layer of moss for drainage.
- Arrange Succulents: Choose a mix of colors and textures. Place the succulents in the soil, ensuring they have enough space to grow. Common varieties include Echeveria and Haworthia.
- Secure and Maintain: Secure the backing of the frame and mist the plants lightly. Place your framed succulent display in indirect sunlight.
Expert Tips and Tricks
- Choose a variety of succulents for visual interest.
- Water sparingly; succulents thrive in dry conditions.
- Regularly check for any pests.
Avoid Common Mistakes
Many DIY enthusiasts fail to:
- Provide adequate drainage, leading to root rot.
- Overwater their succulents.
- Choose the wrong light conditions, which may hinder growth.
Best Practices
To ensure your framed succulent display thrives:
- Research the specific light and water needs of your chosen plants.
- Rotate the frame occasionally for even sunlight exposure.
Creating a framed succulent display not only makes a beautiful statement in your home but also serves as a rewarding DIY project. Embrace this trend and breathe life into your living spaces with these easy-to-follow steps!
9. Customizable Photo Collages: Turn Memories into Stunning Art

Customizable Photo Collages: Turn Memories into Stunning Art
Creating customizable photo collages is an excellent way to transform cherished memories into stunning art pieces for your home. This DIY project not only adds a personal touch to your decor but also showcases your creativity. Let’s dive into the steps to craft a captivating photo collage that resonates with your style.
Gather Your Materials
To start, you’ll need:
- A selection of photos (digital or printed)
- Poster board or a canvas
- Glue stick or double-sided tape
- Scissors
- Decorative elements (stickers, washi tape, etc.)
Step-by-Step Guidance
- Select Your Photos: Choose images that evoke emotions or tell a story. Mixing different sizes adds visual interest.
- Plan Your Layout: Before attaching anything, lay out your photos on the board. Experiment with placement until you find a balanced design.
- Attach Photos: Once satisfied, adhere the photos using glue or tape, ensuring they are secure.
- Add Decorative Elements: Incorporate stickers or washi tape around the edges to enhance your collage.
- Final Touches: Consider framing your collage or adding a protective sealant for longevity.
Expert Tips and Common Mistakes to Avoid
For a polished finish, avoid overcrowding your collage; leave some space for the eyes to rest. Also, consider using a consistent color palette to unify the design. Current trends in DIY crafts lean towards minimalism and natural aesthetics, so think about incorporating organic materials like dried flowers or leaves.
By following these steps and tips, you can create a beautiful, customizable photo collage that not only decorates your space but also preserves your favorite memories for years to come.
10. Seasonal Wall Art Swaps: Easy Crafts for Every Holiday
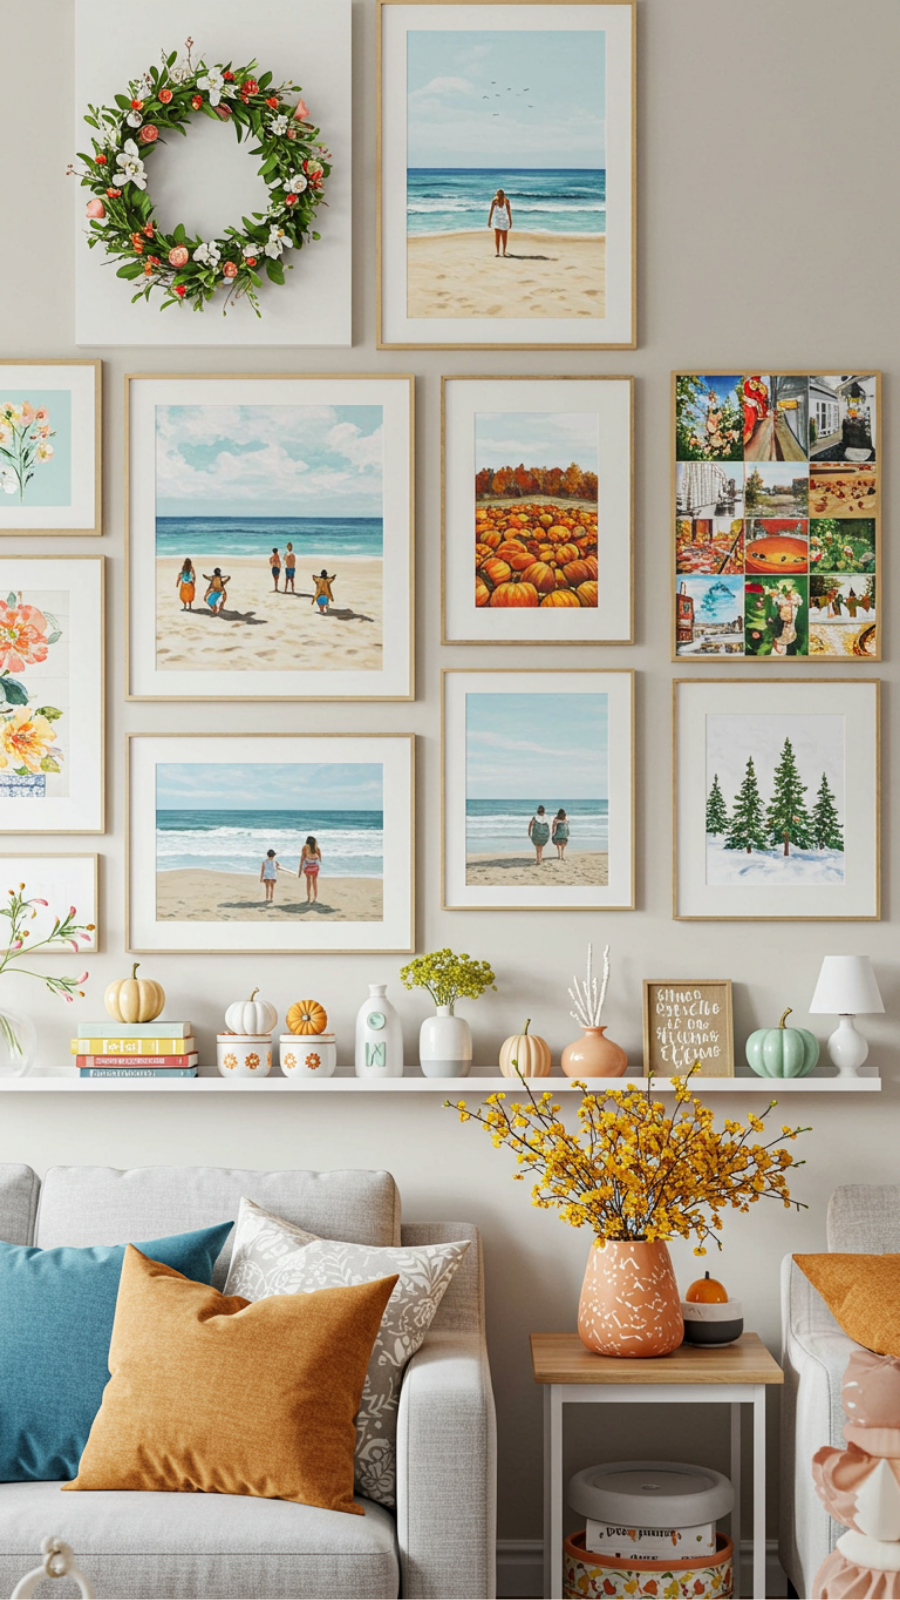
Seasonal Wall Art Swaps: Easy Crafts for Every Holiday
Transforming your home decor with seasonal wall art swaps is an enjoyable and creative way to celebrate holidays throughout the year. With simple crafts tailored to each season, you can easily refresh your space and express your festive spirit.
Current Trends in DIY Wall Art
Embrace the latest trends, such as bohemian macramé, minimalist prints, or upcycled materials. These styles not only enhance your home but also reflect your personal aesthetic.
Step-by-Step Guide to Creating Seasonal Wall Art
- Spring: Floral Wreath
- Materials: Grapevine wreath, faux flowers, hot glue gun.
- Instructions: Glue flowers onto the wreath in a balanced manner, then hang it on your front door or wall.
- Summer: Beach-Themed Canvas
- Materials: Canvas, acrylic paints, sponge brushes.
- Instructions: Use sponge brushes to create ocean waves, adding sandy textures with a palette knife.
- Autumn: Pumpkin Wall Hanging
- Materials: Felt in various colors, scissors, string.
- Instructions: Cut out pumpkin shapes, string them together, and hang them for a cozy fall vibe.
- Winter: Snowflake Mobile
- Materials: White cardstock, scissors, fishing line.
- Instructions: Cut out snowflake shapes and suspend them from a wooden branch using fishing line.
Expert Tips and Tricks
- Use high-quality materials to ensure durability.
- Incorporate personal touches, such as family photos or hand-painted elements.
Common Mistakes to Avoid
- Overcomplicating designs can lead to frustration; keep it simple.
- Neglecting color schemes may disrupt your home’s aesthetic; choose a cohesive palette.
Best Practices for Seasonal Swaps
Store your seasonal artworks in a dedicated space, ensuring they remain in pristine condition. Regularly rotate your decor to keep your home feeling fresh and inviting.
With these easy crafts and expert advice, your seasonal wall art swaps will not only elevate your home decor but also provide a delightful way to celebrate each holiday.
11. DIY Inspirational Quote Boards: Uplift Your Space Creatively

DIY Inspirational Quote Boards: Uplift Your Space Creatively
Creating DIY inspirational quote boards is a fantastic way to infuse positivity into your living or workspace. Not only do they serve as daily motivation, but they also add a personal touch to your décor. Here’s how you can craft your own uplifting board with ease.
Materials You’ll Need
- Wooden board or canvas
- Acrylic paints or markers
- Stencils (optional)
- Adhesive letters or vinyl cutouts
- Paintbrushes and sponges
- Decorative elements (washi tape, stickers, etc.)
Step-by-Step Guidance
- Select Your Quotes: Choose 3-5 quotes that resonate with you. Current trends favor short, impactful phrases.
- Prepare Your Board: Paint your board with a base color. Pastel shades are trendy and create a calm backdrop.
- Design Layout: Arrange your quotes on the board using stencils or adhesive letters. Experiment with fonts and sizes for visual interest.
- Add Decorative Elements: Enhance your board with washi tape, stickers, or even pressed flowers for a unique touch.
- Finalize and Display: Once dry, hang your quote board in a prominent spot where you’ll see it daily.
Expert Tips and Common Mistakes
To ensure your DIY project is a success, avoid overcrowding your board. Less is more when it comes to design. Additionally, use high-quality adhesive to prevent letters from peeling off over time.
Incorporating DIY inspirational quote boards into your space not only elevates your décor but also serves as a continuous source of motivation. Embrace your creativity and watch your environment transform!
12. Recycled Paper Mache Art: Sustainable and Stylish Wall Decor
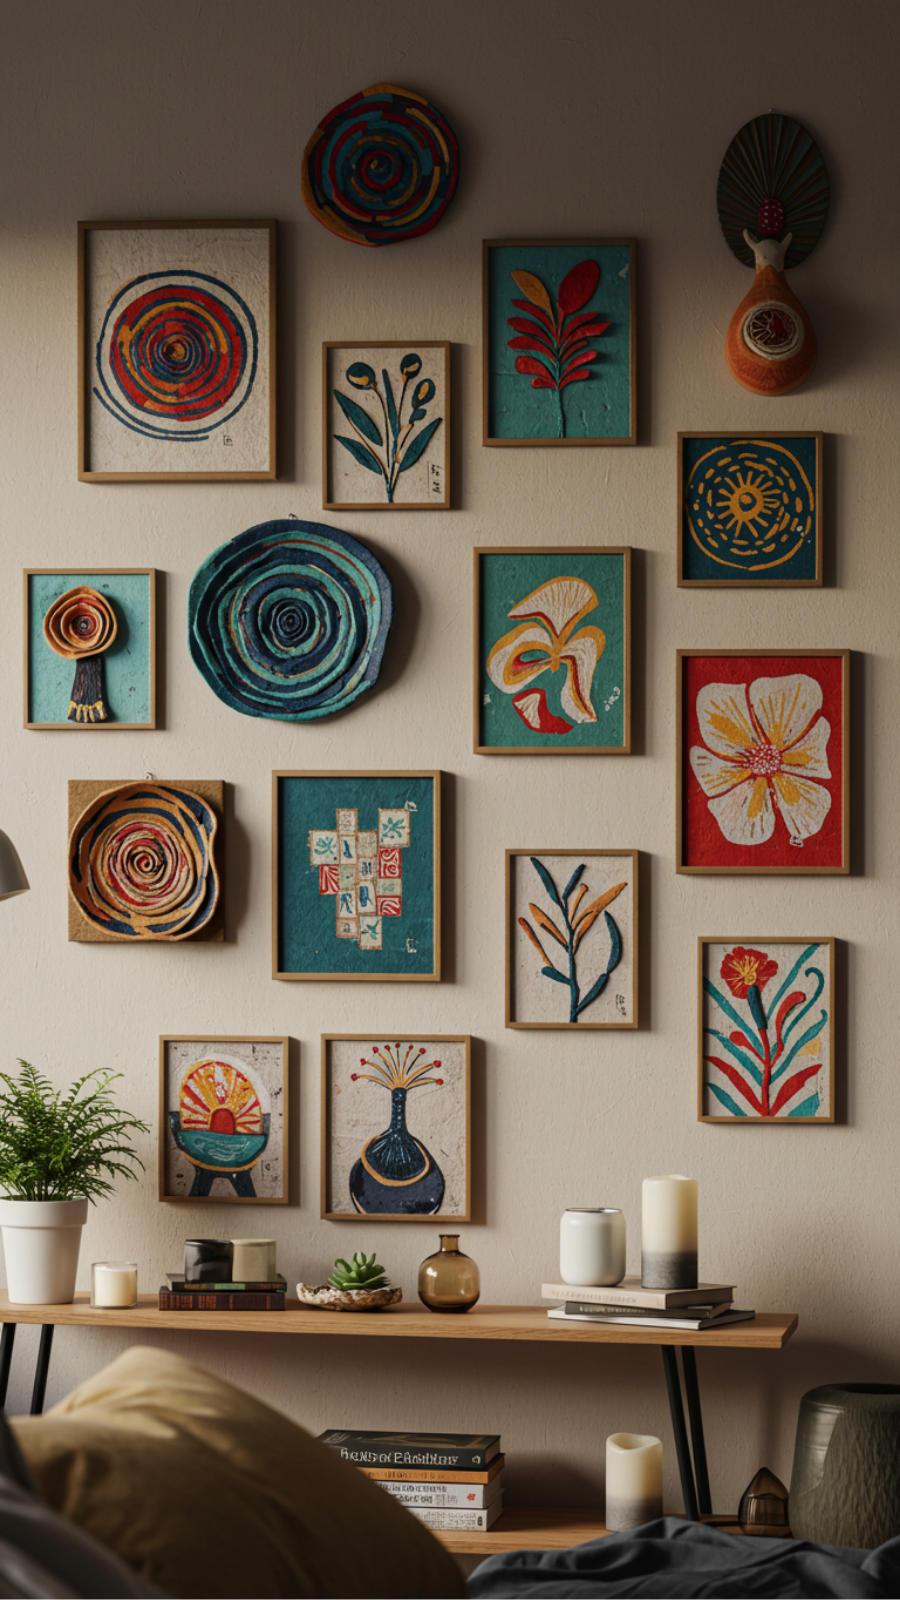
Recycled Paper Mache Art: Sustainable and Stylish Wall Decor
In today’s environmentally conscious era, recycled paper mache art is not only a sustainable craft but also a chic way to enhance your home decor. This creative process transforms discarded paper into stunning wall art that reflects your personal style while reducing waste.
Getting Started with Paper Mache
To create your own paper mache masterpieces, gather the following materials:
- Used newspapers or old magazines
- Flour and water (for the paste)
- Balloon or mold (for shaping)
- Acrylic paints (for finishing touches)
Step-by-Step Guidance
- Prepare the Paste: Mix equal parts flour and water to create a smooth paste.
- Rip the Paper: Tear your paper into strips; avoid cutting, as torn edges adhere better.
- Form the Base: Inflate a balloon or use a mold. Dip paper strips into the paste and layer them over the base.
- Dry and Decorate: Allow your creation to dry completely, then paint it in your desired colors.
Expert Tips and Common Mistakes
To achieve the best results with your paper mache art, consider these expert tips:
- Ensure good ventilation when using acrylic paints.
- Apply multiple layers for durability, typically 3-4.
- Avoid over-soaking the paper, which can lead to a soggy mess.
Remember, the current trend in DIY crafts emphasizes sustainability and personalization. By incorporating recycled materials, you not only contribute to eco-friendliness but also create unique pieces that tell a story. Embrace your creativity, and let your walls reflect your commitment to style and sustainability!
Frequently Asked Questions
How do I choose the right colors for my DIY wall art project?
Choosing the right colors for your DIY wall art can significantly impact the overall aesthetic of your space. Start by considering the existing color palette in the room and select shades that either complement or contrast harmoniously. Use color theory principles, like the color wheel, to guide your choices and create a cohesive look that fits your style.
What materials do I need for creating abstract geometric canvas art?
For abstract geometric canvas art, you’ll need a blank canvas, acrylic paints, painter’s tape, and brushes or sponges for application. Additionally, having a palette for mixing colors and a protective covering for your workspace will help keep things organized. These materials are budget-friendly and perfect for beginners to experiment with different designs.
Why is upcycled wooden pallet art a good choice for home decor?
Upcycled wooden pallet art is an excellent choice for home decor because it adds a rustic charm while being environmentally friendly. Using reclaimed materials not only reduces waste but also allows you to incorporate unique textures and character into your living space. Plus, it offers a personal touch that showcases your creativity and commitment to sustainability.
How can I effectively curate a gallery wall with my DIY art?
To effectively curate a gallery wall, start by selecting a focal point and arranging your artwork in a way that creates visual balance. Mix different sizes and styles of frames for interest, and use consistent spacing to unify the display. Before hanging, lay out your pieces on the floor to experiment with the layout, ensuring it reflects your personal style and tells a story.
What should I do if my fabric wall hanging looks uneven or frayed?
If your fabric wall hanging appears uneven or frayed, consider trimming the edges with sharp fabric scissors to achieve a clean finish. You can also reinforce the edges with fabric glue or a sewing machine to prevent further fraying. For added structure, use a dowel or wooden rod for hanging, which helps maintain the shape and prevents sagging over time.

