1. Easy Ombre Nail Art Tutorial for a Trendy Gradient Look

Easy Ombre Nail Art Tutorial for a Trendy Gradient Look
Ombre nail art is a timeless trend that adds a chic gradient effect to your manicure. This easy ombre nail art tutorial will guide you through creating a stunning gradient look at home, with expert tips and tricks to achieve salon-quality results.
What You’ll Need
- Base coat
- Two nail polish colors (choose complementary shades)
- Makeup sponge
- Top coat
- Nail polish remover
- Small brush or clean-up tool
Step-by-Step Guide
- Prep Your Nails: Start with clean, dry nails. Apply a base coat to protect your nails and enhance polish longevity.
- Apply Base Color: Paint your nails with the lighter shade and allow it to dry completely.
- Prepare Your Sponge: On a clean surface, apply a stripe of each color (light and dark) next to each other on the makeup sponge.
- Blending: Dab the sponge onto your nail, moving from the tip to the base to blend the colors together. Repeat until you achieve your desired gradient effect.
- Finish Up: Clean the edges with a brush dipped in nail polish remover, then seal your design with a top coat for a glossy finish.
Expert Tips & Common Mistakes to Avoid
For the best results, ensure your base color is fully dry before applying the gradient. Avoid overloading the sponge with polish, as this can lead to uneven application. Additionally, use a gentle dabbing motion rather than rubbing to blend the colors seamlessly.
With this easy ombre nail art tutorial, you’ll create a trendy gradient look that’s perfect for any occasion. Embrace your creativity and enjoy experimenting with different color combinations!
2. Stunning Dot Nail Art: Simple Techniques for Eye-Catching Designs

Stunning Dot Nail Art: Simple Techniques for Eye-Catching Designs
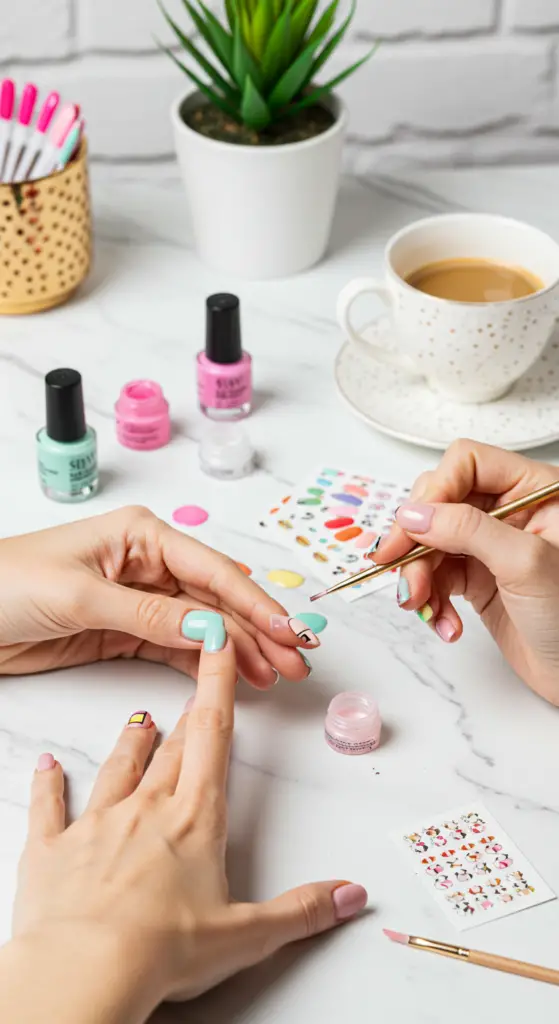
Dot nail art is a versatile and trendy way to elevate your manicure game. By using simple techniques, you can create stunning designs that are both eye-catching and easy to master. This guide will provide you with expert-level advice and practical examples to help you achieve beautiful dot nail art.
Getting Started with Dot Nail Art
To begin, gather your supplies:
- Nail polish in your choice of colors
- Dotting tools or a bobby pin
- Base coat and top coat
- Nail art brush (optional)
Step-by-Step Guide
Follow these simple steps for eye-catching designs:
- Prepare Your Nails: Start with a clean slate. Apply a base coat to protect your nails and create a smooth canvas.
- Choose Your Colors: Select two to three contrasting colors for your dots. This creates a visually striking effect.
- Dotting Technique: Dip your dotting tool or bobby pin into your polish and gently press it onto your nail. Vary the size and spacing for a playful look.
- Seal the Design: Once your design is dry, finish with a top coat to add shine and longevity.
Expert Tips and Tricks
To ensure your dot nail art stands out, consider the following:
- Practice on paper before applying to your nails.
- Use a quick-dry top coat to minimize smudging.
- Experiment with negative space for a modern touch.
Avoid Common Mistakes
While dot nail art is simple, here are a few pitfalls to avoid:
- Using too much polish on your dotting tool can create messy dots.
- Skipping the base coat can lead to staining and uneven application.
- Not allowing enough drying time between layers may smudge your design.
With these techniques and tips, you’re ready to create stunning dot nail art that reflects your unique style. Embrace the current trends and let your creativity shine!
3. Chic Nail Stamping: Create Intricate Patterns Like a Pro

Chic Nail Stamping: Create Intricate Patterns Like a Pro
Nail stamping is a fantastic way to elevate your manicure with chic, intricate patterns that can rival salon results. With the right tools and techniques, you can create stunning designs that reflect your personal style. In this guide, we’ll explore current trends and provide expert tips to help you master nail stamping.
Getting Started with Nail Stamping
To begin your nail art journey, you’ll need the following essential tools:
- Nail stamping plate
- Stamping polish (highly pigmented)
- Stamping scraper
- Silicone stamper
- Base coat and top coat
Follow these steps to create your nail art masterpiece:
- Prep Your Nails: Start with clean, filed nails. Apply a base coat to protect your natural nails.
- Choose Your Design: Select a stamping plate with trendy patterns—florals and geometric shapes are currently in vogue.
- Apply Stamping Polish: Use a small amount of stamping polish on the design you’ve chosen, ensuring you cover the area completely.
- Scrape and Stamp: Use the scraper to remove excess polish, then quickly press the stamper onto the design, transferring it to the stamper.
- Transfer to Nail: Align the stamper with your nail and press down gently to transfer the design.
- Seal the Design: Finish with a top coat to protect your design and add shine.
Expert Tips and Common Mistakes
To achieve professional results, consider these tips:
- Use a quick-drying top coat to avoid smudging your design.
- Experiment with different colors for a unique look.
- Practice on a nail wheel before applying to your fingers.
Avoid these common mistakes:
- Using regular polish instead of stamping polish.
- Pressing too hard with the stamper.
- Not cleaning your stamping tools regularly.
With patience and practice, nail stamping can be an enjoyable and rewarding way to express your creativity. Embrace the chic patterns and elevate your nail game!
4. Mastering Marble Nail Art: A Beginner’s Guide to Swirling Styles

Mastering Marble Nail Art: A Beginner’s Guide to Swirling Styles
Marble nail art is a stunning technique that mimics the elegant swirls of marble stone, making it a popular choice among nail art enthusiasts. Whether you’re preparing for a special occasion or just want to elevate your everyday look, mastering this style can set you apart. Here’s how to create beautiful marble nails with ease.
Step-by-Step Guide to Marble Nail Art
- Gather Your Supplies: You’ll need a base coat, two contrasting nail polishes, a small bowl of water, a toothpick or nail art brush, and a top coat.
- Prepare Your Nails: Start with clean, trimmed nails. Apply a base coat to protect your nails and let it dry.
- Create the Marble Effect: Drop the two nail polishes into the bowl of water, allowing them to spread. Use a toothpick to swirl the colors together gently.
- Dip Your Nails: Carefully dip your nail into the water, ensuring it picks up the marble pattern. Remove excess polish with a toothpick.
- Seal and Finish: Once dry, apply a top coat to enhance shine and durability.
Expert Tips and Common Mistakes to Avoid
- Tip: Use room temperature water for better polish dispersion.
- Common Mistake: Dipping too quickly can result in a mess; give the polish time to spread.
- Best Practice: Experiment with color combinations to stay on trend—pastels and neons are particularly popular this season.
By following this beginner’s guide, you can achieve stunning marble nail art that showcases your creativity. Remember, practice makes perfect, so don’t hesitate to try different techniques until you find your signature swirl!
5. Glamorous Foil Accents: Elevate Your DIY Nail Art Game

Glamorous Foil Accents: Elevate Your DIY Nail Art Game
If you’re looking to elevate your DIY nail art, incorporating glamorous foil accents is a game-changer. Foil accents can add a stunning metallic touch to your nails, transforming a simple manicure into a chic statement. This trend has taken the nail art world by storm, offering endless possibilities for creativity.
Step-by-Step Guide to Applying Foil Accents
- Prep Your Nails: Start with clean, dry nails. Apply a base coat to protect your nails and ensure longevity.
- Choose Your Base Color: Select a nail polish that complements your foil. Neutral shades like nude or pastel hues work well.
- Apply the Foil Adhesive: Once your base color dries, apply a thin layer of foil adhesive where you want the foil to stick.
- Apply the Foil: After the adhesive becomes tacky, gently press the foil onto your nails, using your fingers or a silicone tool to smooth it down.
- Seal with Top Coat: Finish with a clear top coat to seal your design and add shine.
Expert Tips and Common Mistakes to Avoid
To achieve the best results with foil accents, keep these expert tips in mind:
- Use high-quality foil and adhesive for better adherence.
- Experiment with different foil patterns and colors to match your personal style.
- Avoid applying too much adhesive; a thin layer works best.
- Don’t rush the drying time of the base color—patience is key!
By following these best practices, you can create stunning nail art that showcases your personal flair. Foil accents are not only a current trend but also an easy way to make your nails stand out. So gather your supplies and get creative!
6. Fun Striping Tape Techniques for Clean Geometric Nail Designs
Fun Striping Tape Techniques for Clean Geometric Nail Designs
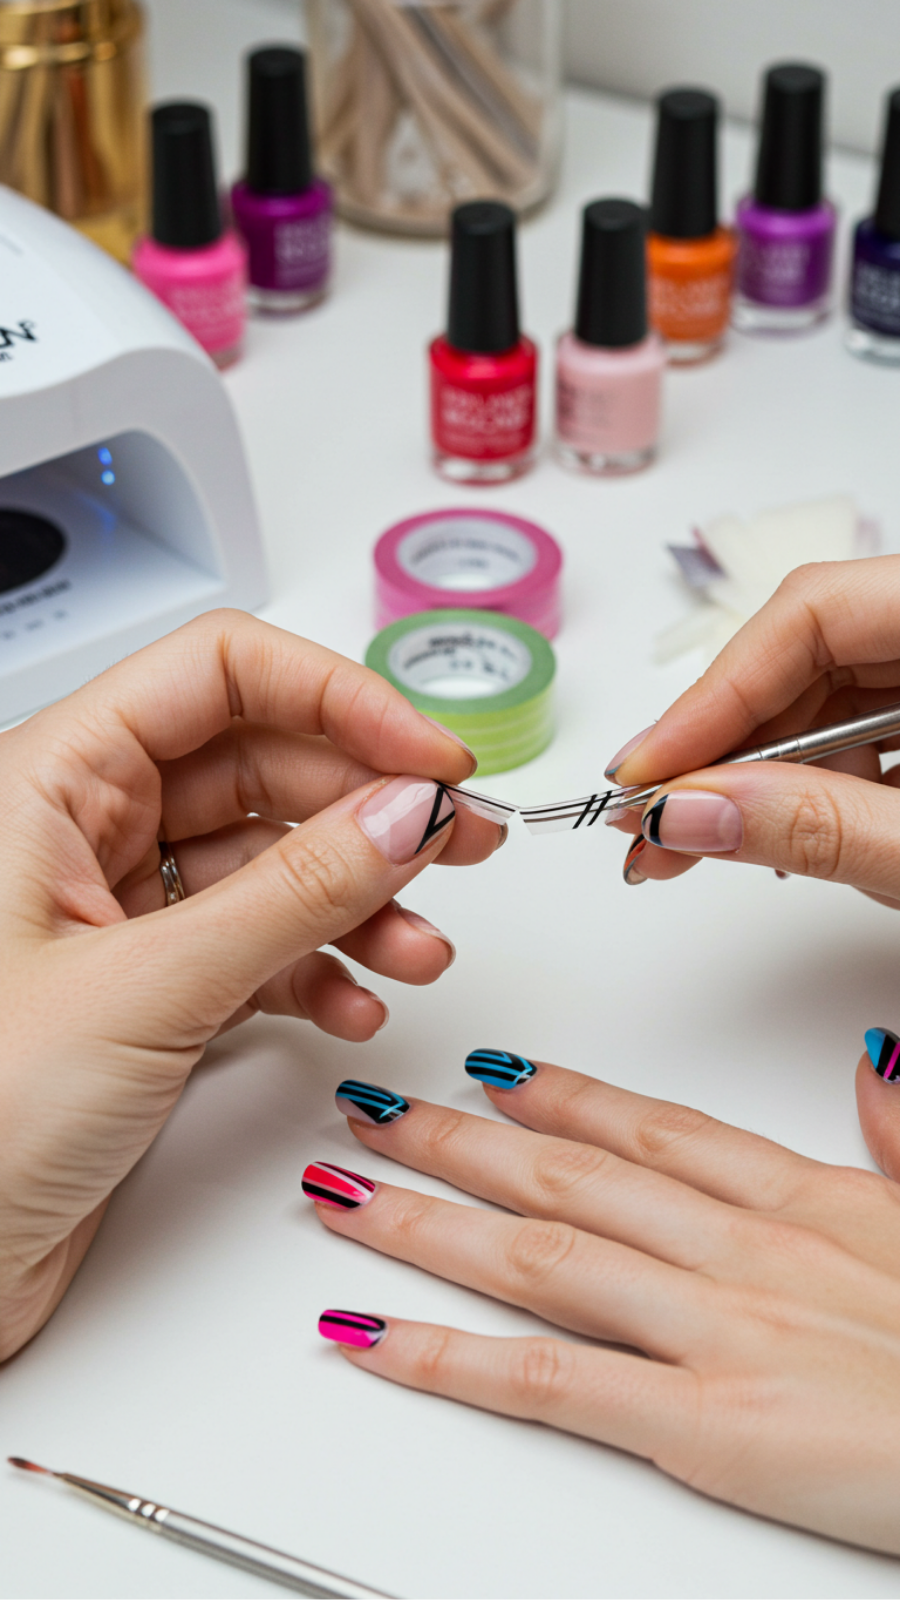
Striping tape is a versatile tool in the world of nail art, allowing enthusiasts to create stunning geometric designs with ease. Whether you’re a beginner or an experienced nail artist, mastering striping tape techniques can elevate your manicure game to new heights.
Getting Started with Striping Tape
Before diving into designs, ensure you have the right materials: striping tape, a base coat, nail polish in your chosen colors, a top coat, and a pair of tweezers. The current trend leans towards bold colors and intricate geometric patterns, making striping tape the perfect ally.
Step-by-Step Guide to Clean Geometric Designs
- Prep Your Nails: Start with a clean slate. Apply a base coat to protect your nails and help the polish adhere better.
- Base Color: Choose a vibrant base color and apply two coats for full opacity. Allow it to dry completely.
- Apply Striping Tape: Use tweezers to place the striping tape onto your nails in your desired geometric pattern. Press down firmly to prevent polish from seeping underneath.
- Add Contrast: Paint over the exposed areas with a contrasting color. This technique creates a striking design.
- Remove Tape: While the polish is still wet, carefully peel off the tape for clean lines.
- Top Coat: Finish with a top coat to seal your design and add shine.
Expert Tips and Common Mistakes to Avoid
- Don’t Rush: Ensure each layer is dry before applying tape to avoid smudging.
- Use Quality Tape: Invest in good-quality striping tape to prevent tearing and ensure clean edges.
- Experiment: Play with different patterns, such as chevrons or stripes, to keep your designs fresh and trendy.
By incorporating these fun striping tape techniques, you can achieve stunning geometric nail designs that are sure to impress. Embrace your creativity and don’t shy away from experimenting with colors and patterns!
Frequently Asked Questions
How do I create an ombre nail art look at home?
To create an ombre nail art look at home, start with a base coat and let it dry. Use a makeup sponge to apply two nail polish colors, blending them together. Dab the sponge onto your nail to achieve the gradient effect, and finish with a top coat for a smooth appearance.
What supplies do I need for dot nail art?
For dot nail art, you will need a dotting tool or a toothpick, several nail polish colors, a base coat, and a top coat. Make sure to use polishes with varying viscosities to create different dot sizes, and practice on a piece of paper before applying to your nails for precision.
Why is nail stamping a good technique for beginners?
Nail stamping is an excellent technique for beginners because it allows you to create intricate designs without needing advanced skills. With a stamping kit, you can easily transfer patterns onto your nails, making it a quick and fun way to achieve professional-looking results.
How do I fix mistakes in my DIY nail art?
To fix mistakes in your DIY nail art, use a small brush dipped in nail polish remover to clean up areas around your cuticles and skin. If the design is smudged, you can layer another color on top or apply a glitter polish to distract from imperfections.
What is the best way to apply foil accents to my nails?
The best way to apply foil accents is by using a special foil adhesive or a sticky top coat. After applying the base color and allowing it to dry, brush on the adhesive, let it become tacky, and then gently press the foil onto your nails for a glamorous effect that catches the light.

