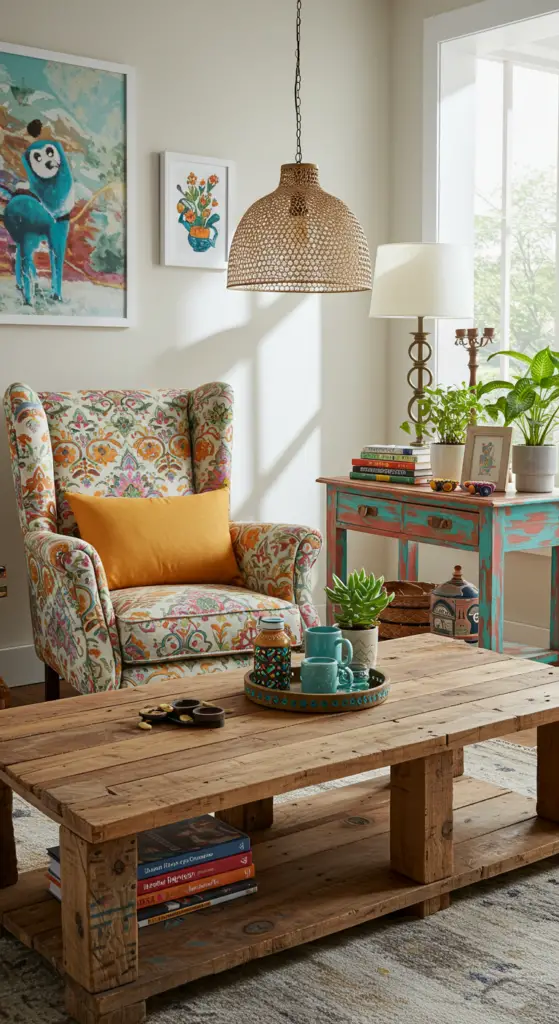
1. Transform Old Wooden Pallets into Chic Garden Furniture

Transform Old Wooden Pallets into Chic Garden Furniture
Repurposing old wooden pallets into chic garden furniture is not only a sustainable choice but also a trendy DIY project that can elevate your outdoor space. With a bit of creativity and effort, you can create stylish, functional pieces that showcase your personal style.
Step-by-Step Guidance
Follow these simple steps to transform your pallets:
- Gather Materials: Collect old wooden pallets, sandpaper, wood screws, outdoor paint or sealant, and cushions.
- Preparation: Thoroughly sand the pallets to remove rough edges and splinters. This is crucial for safety and aesthetics.
- Design Your Furniture: Decide on the type of furniture you want to create. Common options include benches, tables, and lounge chairs.
- Assembly: Use wood screws to secure pallets together. For a table, stack two pallets for height, then secure them at the corners.
- Finishing Touches: Apply outdoor paint or sealant for durability. Add cushions for comfort and style.
Expert Tips and Tricks
- Choose pallets free from chemicals—look for the “HT” (Heat Treated) stamp.
- Incorporate wheels for mobility, especially for larger pieces.
- Mix and match different pallet sizes for an eclectic look.
Common Mistakes to Avoid
Many DIYers overlook the importance of wood treatment. Always ensure that your pallets are clean and free from pests. Additionally, avoid using untreated wood in wet areas, as it may deteriorate quickly.
Best Practices
For a polished finish, consider applying a coat of varnish after painting. This will enhance durability and protect against the elements. Finally, remember to regularly maintain your furniture to keep it looking chic!
By following these expert guidelines, you can easily transform old wooden pallets into chic garden furniture that reflects your style and enhances your outdoor living experience.
2. Revamp Vintage Suitcases into Stylish Storage Ottomans

Revamp Vintage Suitcases into Stylish Storage Ottomans
Transforming vintage suitcases into stylish storage ottomans is an innovative DIY project that not only enhances your home decor but also provides functional storage solutions. This trend perfectly marries nostalgia with practicality, making it a popular choice among DIY enthusiasts.
Materials You Will Need
- Vintage suitcase (ensure it’s sturdy)
- Foam padding or cushion
- Fabric (upholstery or canvas works well)
- Staple gun and staples
- Scissors
- Paint (optional, for suitcase exterior)
- Brush or spray for painting (if applicable)
Step-by-Step Guidance
- Choose Your Suitcase: Select a vintage suitcase with a solid structure. Look for unique designs that complement your decor.
- Prep the Suitcase: Clean and, if desired, paint the exterior to rejuvenate its appearance. Allow it to dry completely.
- Add Padding: Measure and cut foam padding to fit the lid of the suitcase. This will provide comfort for seating.
- Upholster the Lid: Lay your chosen fabric over the foam, pulling it tightly. Use a staple gun to secure the fabric to the underside of the lid.
- Final Assembly: Reattach the lid to the suitcase. Ensure all components are secured and sturdy.
Expert Tips and Common Mistakes to Avoid
- Measure Twice: Always measure your foam and fabric before cutting to avoid costly mistakes.
- Choose Durable Fabrics: Opt for upholstery-grade materials that can withstand wear and tear.
- Don’t Skip the Cleaning: Properly clean your suitcase to remove any odors and ensure longevity.
By following these steps, you can create a chic and functional ottoman that adds character to your living space. Embrace the current DIY trend of upcycling and enjoy the satisfaction of crafting a unique piece that reflects your style.
3. Makeover Thrifted Dressers with Bold Paint and Decals

Makeover Thrifted Dressers with Bold Paint and Decals
Transforming thrifted dressers into stunning statement pieces is a rewarding DIY project that not only enhances your space but also aligns with current sustainability trends. By using bold paint and decals, you can breathe new life into second-hand furniture while showcasing your personal style.
Step-by-Step Guide to Your Dresser Makeover
Follow these expert steps to ensure a successful dresser transformation:
- Choose Your Dresser: Look for solid wood or sturdy materials that can withstand a makeover.
- Prep the Surface: Clean the dresser thoroughly and sand any rough spots to create a smooth base for painting.
- Select Bold Paint: Opt for high-quality, non-toxic paint in vibrant colors. Current trends favor deep greens, rich blues, and soft pastels.
- Apply Paint: Use a paintbrush or roller to apply the first coat. Allow it to dry completely, then follow up with a second coat for a flawless finish.
- Add Decals: Choose trendy decals that complement your color scheme. Position them thoughtfully to enhance the dresser’s design.
- Seal Your Work: Use a clear topcoat to protect your painted surface and decals from wear and tear.
Expert Tips and Tricks
- Test Paint Color: Always test your paint on a small section before committing to ensure it matches your vision.
- Decal Placement: Use painter’s tape to visualize placement before adhering decals to avoid misalignment.
Common Mistakes to Avoid
Avoid these pitfalls to ensure your project is a success:
- Skipping surface preparation, which can lead to poor paint adhesion.
- Rushing the drying process; always allow ample time between coats.
By following this guide, you can effectively makeover thrifted dressers with bold paint and decals, creating personalized furniture that stands out and reflects your unique style.
4. Create a Rustic Coffee Table from Reclaimed Barn Wood

Create a Rustic Coffee Table from Reclaimed Barn Wood
Transform your living space with a stunning rustic coffee table made from reclaimed barn wood. This DIY project not only adds character to your home but also promotes sustainability. Here’s a step-by-step guide to help you craft your own masterpiece.
Materials Needed
- Reclaimed barn wood (ensure it’s free of nails and rot)
- Wood screws
- Wood glue
- Sandpaper (various grits)
- Wood stain or sealant
- Table legs (metal or wooden)
Step-by-Step Guide
- Select Your Wood: Choose pieces that showcase beautiful grain patterns. Aim for a mix of widths to enhance the rustic charm.
- Cut to Size: Measure your desired table dimensions and cut the wood accordingly. A typical coffee table is about 48 inches long.
- Assemble the Top: Lay the wood pieces side by side. Use wood glue between the seams, and reinforce with wood screws for stability.
- Sanding: Sand the tabletop using coarse to fine grit sandpaper, ensuring a smooth finish while maintaining the rustic feel.
- Finish: Apply a wood stain or sealant to protect your table and bring out the natural beauty of the wood.
- Attach Legs: Securely attach your chosen table legs to the underside of the tabletop.
Expert Tips
When creating your rustic coffee table, consider the following:
- Use a mix of wood types for visual interest.
- Leave some imperfections; they add character.
- Regularly check for loose screws after assembly.
Common Mistakes to Avoid
Many DIY enthusiasts overlook the importance of proper sanding and finishing. Skipping these steps can lead to a rough surface that detracts from the rustic aesthetic. Always prioritize quality over speed in your project.
Current Trends
Incorporating reclaimed materials is a popular trend in DIY and home décor. A rustic coffee table not only serves as a functional piece but also as a conversation starter, showcasing your commitment to sustainability.
By following these expert guidelines, you’ll create a beautiful rustic coffee table that complements your home while showcasing your DIY skills. Happy crafting!
5. Upcycle Old Chairs into Unique Indoor Planters

Upcycle Old Chairs into Unique Indoor Planters
Transforming old chairs into unique indoor planters is a creative and sustainable way to bring a touch of nature into your home. Not only does this DIY project breathe new life into furniture that might otherwise be discarded, but it also adds a charming focal point to your indoor decor.
Step-by-Step Guide
- Select Your Chair: Choose a chair with a sturdy frame, ideally with a removable seat. Look for styles that resonate with current trends, such as vintage, farmhouse, or mid-century modern.
- Prepare the Seat: Remove the seat from the chair. If it has upholstery, consider removing it for a rustic look or leave it on for added texture.
- Create Drainage: Drill holes in the bottom of the seat to ensure proper drainage. This is essential to prevent waterlogging and root rot.
- Add Liner: Line the seat with landscaping fabric or burlap to hold soil while allowing excess water to escape.
- Fill with Soil: Fill the seat with a high-quality potting mix, leaving enough space for your chosen plants.
- Plant Your Greens: Select indoor plants that thrive in your lighting conditions, such as succulents, ferns, or herbs. Arrange them creatively, mixing heights and textures for visual interest.
- Style It: Place your planter in a well-lit area and consider adding decorative elements like fairy lights or seasonal decor to enhance its charm.
Expert Tips and Common Mistakes
- Tip: Seal the wood with a waterproof sealant if using an untreated chair to protect it from moisture.
- Mistake to Avoid: Skipping the drainage holes can lead to issues with plant health. Always ensure proper drainage.
Upcycling old chairs into indoor planters not only showcases your creativity but also aligns with eco-friendly practices. Embrace this trend and let your indoor greenery flourish uniquely!
6. Turn an Antique Door into a Statement Headboard

Turn an Antique Door into a Statement Headboard
Transforming an antique door into a stunning headboard is a popular trend in DIY & creative crafts that not only adds character to your bedroom but also showcases your unique style. This project is a fantastic way to repurpose vintage materials while creating a focal point in your space.
Materials Needed
- Antique door (choose a size that fits your bed)
- Sandpaper or a power sander
- Paint or wood stain (optional)
- Mounting hardware
- Level
- Drill
Step-by-Step Guide
- Select Your Door: Look for a door that speaks to you. Consider size, style, and condition.
- Prepare the Surface: Sand down any rough edges and remove old paint or finish to create a smooth surface.
- Finish the Door: Apply a coat of paint or stain if you want to enhance its appearance. Current trends favor distressed finishes or bold colors.
- Mounting: Use mounting hardware appropriate for your wall type. Ensure the door is level and securely attached.
Expert Tips and Tricks
- Choose the Right Height: Ensure the headboard is at a comfortable height for your bed.
- Accessorize: Add string lights or decor elements to personalize your headboard further.
Common Mistakes to Avoid
- Neglecting to check for structural integrity before mounting.
- Overlooking the importance of proper height and alignment.
By following these best practices, you can successfully turn an antique door into a stunning statement headboard that reflects your personality and enhances your bedroom’s aesthetic. This DIY project not only showcases your creative flair but also promotes sustainability by reusing vintage materials. Happy crafting!
7. Revive a Broken Crate into a Functional Bookshelf

Revive a Broken Crate into a Functional Bookshelf
Transforming a broken wooden crate into a stylish and functional bookshelf is a rewarding DIY project that aligns with current trends in sustainable living and upcycling. This guide will provide you with expert-level advice to breathe new life into your crate, making it a centerpiece in your home or office.
Materials Needed
- Broken wooden crate
- Sandpaper (medium and fine grit)
- Wood glue or screws
- Paint or wood stain (optional)
- Sealer (polyurethane or similar)
- Paintbrush or roller
Step-by-Step Guidance
- Assess the Damage: Examine your broken crate for any structural weaknesses. Ensure the base and sides can support the weight of books.
- Repair and Reinforce: Use wood glue or screws to fix any broken slats. Reinforce the corners for added stability.
- Sanding: Sand the entire surface, starting with medium grit and finishing with fine grit for a smooth finish.
- Finishing Touches: Apply paint or wood stain to enhance the aesthetic. Allow it to dry completely before moving on.
- Seal the Surface: Apply a protective sealer to prevent damage from moisture and wear.
- Style Your Bookshelf: Arrange your books and decorative items creatively to showcase your new DIY masterpiece.
Expert Tips and Tricks
For a trendy look, consider using a two-tone color scheme or adding rope handles for a rustic touch. Common mistakes to avoid include skipping the sanding process, which can lead to splinters, and overloading the crate with too many heavy items.
By following these best practices and embracing your creativity, you can successfully revive a broken crate into a beautiful and functional bookshelf. Enjoy this sustainable project that not only enhances your space but also reflects your personal style!
8. Craft a Mid-Century Modern Console from Vintage Furniture Parts

Craft a Mid-Century Modern Console from Vintage Furniture Parts
Transforming vintage furniture parts into a stunning Mid-Century Modern console is a rewarding DIY project that combines sustainability with style. This guide will walk you through the steps to create your own unique piece, embracing current trends in DIY & creative crafts.
Step-by-Step Guide
- Gather Materials: Look for vintage furniture pieces such as old sideboards, dressers, or even table legs. Ensure they have clean lines and a solid structure to maintain the Mid-Century aesthetic.
- Design Your Console: Sketch a design that incorporates open and closed storage. Consider using natural wood finishes or bold colors reminiscent of the Mid-Century palette.
- Disassemble and Prep: Carefully take apart the selected furniture. Sand down surfaces to prepare them for painting or staining.
- Construct the Console: Use wood glue and screws to assemble your console. Incorporate the original legs for an authentic Mid-Century look.
- Finish with Style: Apply a clear coat to protect the wood or paint it with a vibrant hue. Add retro hardware for an extra touch of flair.
Expert Tips and Tricks
- Utilize a miter saw for precise cuts to ensure a polished finish.
- When painting, use a spray primer for an even base coat.
Avoid Common Mistakes
Be cautious of:
- Over-sanding, which can damage the wood’s integrity.
- Neglecting to measure your space, leading to an oversized console.
Best Practices
Always test finishes on a small area first, and maintain a clean workspace to improve efficiency. By following these steps, you will create a stylish Mid-Century Modern console that enhances your living space while celebrating the charm of vintage furniture.
Frequently Asked Questions
How can I transform old wooden pallets into garden furniture?
Transforming old wooden pallets into chic garden furniture involves disassembling the pallets and sanding the wood to remove rough edges. You can then reassemble the pieces into a bench or table, securing them with screws or nails. Finish by applying outdoor paint or wood sealant to protect the furniture from the elements.
Why should I upcycle vintage suitcases into storage ottomans?
Upcycling vintage suitcases into storage ottomans adds a unique aesthetic to your home while providing functional storage. This creative project not only recycles old materials but also allows you to showcase your personal style. Plus, the hard shell of the suitcase makes for a sturdy and stylish seat or footrest.
What are the best techniques for revamping thrifted dressers?
The best techniques for revamping thrifted dressers include cleaning the surface thoroughly and then applying a bold paint color for a fresh look. Adding decals, stencils, or new hardware can further enhance the dresser’s appeal. Consider using chalk paint for a matte finish that adheres well to various surfaces.
How do I create a rustic coffee table from reclaimed barn wood?
To create a rustic coffee table from reclaimed barn wood, start by selecting sturdy planks that have a nice patina. Cut them to your desired table size and assemble them using wood glue and screws. For added stability, consider using metal brackets, and finish with a coat of varnish to enhance the wood’s natural beauty.
What should I do if my upcycled chair planters are leaking water?
If your upcycled chair planters are leaking water, ensure that drainage holes are drilled into the bottom of the seat area. You can also add a layer of rocks at the bottom to help with drainage. If leaks persist, consider repositioning the planters to a location that allows excess water to escape easily without damaging your floors.

