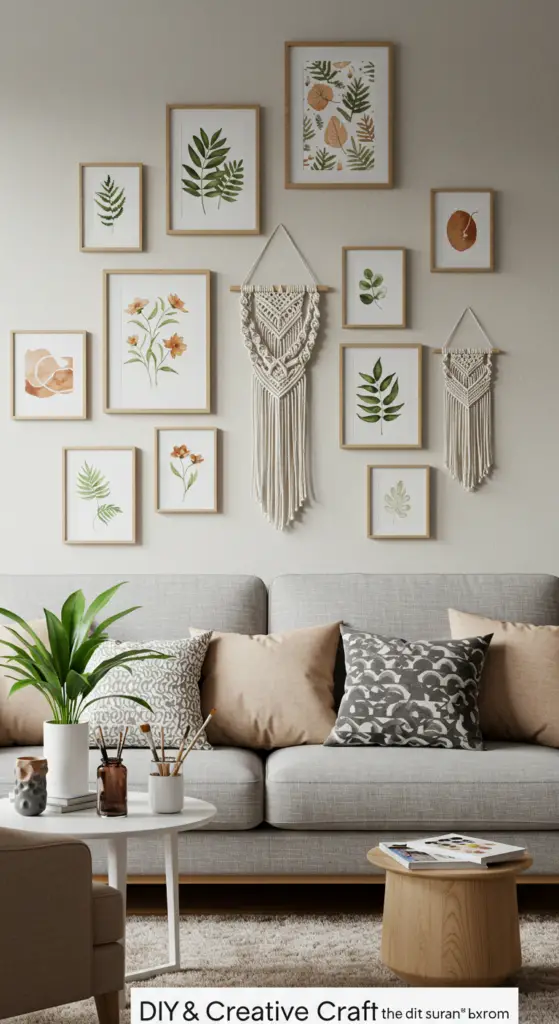
1. DIY Macramé Wall Hangings: Crafting Boho-Chic Art for Any Space

DIY Macramé Wall Hangings: Crafting Boho-Chic Art for Any Space
Macramé wall hangings are an excellent way to bring a touch of bohemian style into your home. This DIY project not only enhances your decor but also offers a gratifying crafting experience. Let’s dive into the essentials of creating your very own macramé art piece!
Gather Your Materials
To start crafting your macramé wall hanging, you’ll need:
- Macramé cord (3-5mm thickness)
- A wooden dowel or branch
- Scissors
- Measuring tape
- Optional: beads for added flair
Step-by-Step Guide
- Measure and Cut: Cut your macramé cord into lengths of about 4-6 feet, depending on your desired wall hanging size.
- Attach the Cord: Fold each length in half and attach it to the dowel using a lark’s head knot.
- Design Your Pattern: Use square knots, spiral knots, or any other knotting techniques to create your design.
- Finish Up: Once you’re satisfied with your design, trim the ends to your preferred length for a uniform finish.
Expert Tips and Common Mistakes
To achieve a professional look, consider these expert tips:
- Plan Your Design: Sketch out your pattern before you start to avoid confusion.
- Avoid Over-Tension: Keep your knots loose for a relaxed look; overly tight knots can distort your design.
Current Trends in Macramé
In 2023, oversized wall hangings and intricate geometric patterns are trending. Incorporating natural elements like driftwood or incorporating color gradients can elevate your piece.
Conclusion
Creating DIY macramé wall hangings is not just about crafting; it’s about expressing your unique style. This boho-chic art form fits seamlessly into any space, making it a perfect addition to your home decor. Embrace the current trends and enjoy the therapeutic process of macramé!
2. Create Stunning Geometric Canvas Art Using Acrylic Pour Techniques

Create Stunning Geometric Canvas Art Using Acrylic Pour Techniques
Elevate your home decor with stunning geometric canvas art created through the captivating acrylic pour technique. This trending art form not only allows for vibrant color combinations but also creates mesmerizing patterns that can enhance any space.
Step-by-Step Guidance
Follow these steps to create your own geometric masterpiece:
- Gather Materials: You will need acrylic paints, a pouring medium, canvas, painter’s tape, and gloves.
- Prepare Your Canvas: Use painter’s tape to create geometric shapes on your canvas for defined areas of color.
- Mix Your Paint: Combine acrylic paint with a pouring medium to achieve a smooth, fluid consistency. Aim for a 1:1 ratio.
- Pouring Technique: Pour the mixed paint into your geometric shapes, allowing colors to flow and blend naturally.
- Drying: Let your canvas dry completely before removing the tape to reveal clean lines.
Expert Tips and Tricks
- Experiment with color palettes that complement your existing decor.
- Use a heat gun to create unique effects and eliminate air bubbles.
- Practice on smaller canvases to refine your technique.
Common Mistakes to Avoid
To achieve optimal results, steer clear of:
- Using too much paint, which can lead to muddled colors.
- Skipping the mixing step, resulting in inconsistent textures.
- Forgetting to protect your workspace from spills.
Best Practices
Embrace the beauty of imperfections; acrylic pour art thrives on unpredictability. By following these guidelines, you can create breathtaking geometric canvas art that reflects your unique style and adds a vibrant touch to your home.
3. Upcycled Vintage Frames: Transforming Photos into Rustic Wall Art

Upcycled Vintage Frames: Transforming Photos into Rustic Wall Art
Upcycling vintage frames is a fantastic way to add a rustic charm to your home decor while preserving memories. With a few creative touches, you can transform old frames into stunning wall art that tells a story. Here’s how to get started.
Step-by-Step Guidance
- Source Your Frames: Visit local thrift stores, flea markets, or yard sales to find vintage frames. Look for unique shapes and textures that resonate with your style.
- Clean and Prepare: Remove any glass or backing. Clean the frames with a gentle cleanser and sand down any rough edges to ensure a smooth finish.
- Paint or Stain: Apply a coat of chalk paint or a wood stain to enhance the rustic feel. Current trends favor muted tones like sage green or dusty blue.
- Add Your Photos: Choose your favorite images, preferably in black and white for a cohesive look. Mount them on cardstock for added durability.
- Reassemble: Once dry, reinsert the photos and secure the backing. Hang your frames on a gallery wall for a personalized touch.
Expert Tips and Tricks
- Mix and match frame sizes and colors for an eclectic look.
- Consider adding embellishments like lace or twine for additional texture.
Common Mistakes to Avoid
- Skipping the cleaning process can lead to a messy finish.
- Using overly bright colors can detract from the vintage aesthetic.
By following these best practices, you can create captivating rustic wall art that reflects your personal style and brings warmth to your space. Upcycled vintage frames not only showcase your photos beautifully but also serve as a conversation starter in any room.
4. Personalized Fabric Wall Art: Sewing Techniques for Unique Decor

Personalized Fabric Wall Art: Sewing Techniques for Unique Decor
Transform your living space with personalized fabric wall art that showcases your creativity and style. This DIY project not only adds a unique touch to your decor but also allows you to explore various sewing techniques to create stunning visual pieces.
Choosing Your Materials
Start by selecting high-quality fabrics that resonate with your interior design. Consider current trends such as bold patterns, textured fabrics, and eco-friendly materials. Popular choices include:
- Cotton prints for vibrant colors
- Linen for a natural, rustic feel
- Felt for easy handling and layering
Step-by-Step Guidance
- Design Your Concept: Sketch your ideas or gather inspiration from online platforms like Pinterest.
- Cut Your Fabric: Measure and cut your fabric according to your design. Remember to leave extra fabric for hems.
- Sew the Layers: Use techniques such as applique and patchwork to add dimension. A zigzag stitch can prevent fraying.
- Mounting: Frame your fabric art or use wooden dowels for a modern look.
Expert Tips and Common Mistakes
To achieve a professional finish, avoid these common mistakes:
- Skipping fabric pre-washing, which can lead to shrinkage.
- Neglecting to iron fabric before sewing, resulting in uneven surfaces.
Instead, embrace these best practices:
- Experiment with layering textures for a captivating visual effect.
- Incorporate personal touches like monograms or quotes to make your art truly unique.
By utilizing these sewing techniques and expert tips, your personalized fabric wall art will not only reflect your individuality but also enhance the aesthetic of your home. Get creative and let your walls tell your story!
5. Watercolor Botanical Prints: Easy Techniques for Nature-Inspired Art

Watercolor Botanical Prints: Easy Techniques for Nature-Inspired Art
Creating watercolor botanical prints is a delightful way to bring the beauty of nature into your home. This DIY craft not only enhances your decor but also allows for personal expression through art. Here’s a step-by-step guide to help you get started on this trending creative project!
Gather Your Materials
To create stunning watercolor prints, you’ll need:
- Watercolor paper
- Watercolor paints
- Brushes (round and flat)
- Masking tape
- Pencil and eraser
- Reference images of plants
Step-by-Step Techniques
- Sketch your design: Lightly draw your chosen botanical elements with a pencil.
- Masking: Use masking tape to secure the edges of your paper to prevent warping.
- Layering Colors: Start with light washes, gradually building up to darker hues for depth.
- Detailing: Once dry, add fine details using a smaller brush for a more realistic look.
Expert Tips and Common Mistakes
To achieve professional results, keep the following tips in mind:
- Always work in layers—this adds dimension.
- Don’t overwork the paint; let it dry between applications.
- Experiment with wet-on-wet and wet-on-dry techniques for varied effects.
Avoid common pitfalls such as using too much water, which can cause colors to bleed excessively, and neglecting to plan your composition ahead of time.
Best Practices for Display
Once your watercolor botanical prints are complete, consider framing them with a simple mat to enhance their aesthetic appeal. This not only protects your artwork but also elevates its presentation in your home.
Embrace the beauty of nature through your art. With these simple techniques, you can create stunning watercolor botanical prints that reflect your personal style.
6. DIY Photo Collage Wall: Curating Memories with Style and Flair

DIY Photo Collage Wall: Curating Memories with Style and Flair
Creating a DIY photo collage wall is a fantastic way to showcase cherished memories while adding a unique flair to your living space. This trend not only personalizes your decor but also serves as a conversation starter. Here’s how to curate your own stylish collage, step-by-step!
Step-by-Step Guidance
- Gather Your Materials: Collect photos, frames, and decorative elements like washi tape or string lights. Consider using a mix of sizes for visual interest.
- Select a Theme: Decide on a color scheme or theme, such as family vacations or milestones, to create a cohesive look.
- Plan Your Layout: Before hanging anything, lay out your photos on the floor. Try different arrangements until you find one that resonates.
- Mount Your Photos: Use adhesive hooks or nails; ensure they’re level. For a clean look, consider gallery-style frames.
- Add Decorative Touches: Enhance your collage with quotes, art pieces, or shelves for added dimension.
Expert Tips and Common Mistakes to Avoid
- Balance is Key: Avoid clustering similar colors together; distribute them evenly for a harmonious appearance.
- Height Variation: Incorporate different heights in your arrangement to keep the eye moving.
- Consider Lighting: Place your collage in a well-lit area to highlight your memories.
By following these best practices, you can create a stunning photo collage wall that reflects your personality and style. Remember, the goal is to curate an experience that tells your story with flair!
7. Modern Minimalist Line Art: A Step-by-Step Guide to Simple Elegance

Modern Minimalist Line Art: A Step-by-Step Guide to Simple Elegance
Embracing modern minimalist line art is a fantastic way to elevate your home decor with simple elegance. This trending DIY craft focuses on clean lines and minimalist aesthetics, allowing for creative expression without overwhelming your space.
Step-by-Step Guide to Creating Line Art
- Gather Your Materials: You will need quality drawing paper, fine-line pens, or markers, and a ruler. Optional: a compass for geometric shapes.
- Choose Your Subject: Select a simple design, such as abstract shapes, floral forms, or human silhouettes. Keep it minimal!
- Sketch Lightly: Use a pencil to outline your design gently. This allows for adjustments before committing with ink.
- Inking: Carefully trace over your pencil lines using fine-line pens. Aim for smooth, continuous strokes to maintain that minimalist vibe.
- Final Touches: Erase any remaining pencil marks and consider adding subtle color with watercolor or colored pencils for a modern touch.
Expert Tips and Tricks
- Start with simple shapes to build your confidence in line work.
- Experiment with varying line thicknesses to add depth and interest.
- Use a lightbox or tracing paper to refine your designs without starting from scratch.
Avoid Common Mistakes
Many beginners rush the inking process, resulting in uneven lines. Take your time and practice steady hand movements. Also, avoid overcrowding your artwork; simplicity is key in modern minimalist line art.
Best Practices for Displaying Your Art
Once complete, frame your artwork in a simple frame to enhance its elegance. Consider creating a gallery wall with a cohesive color palette and theme to showcase multiple pieces.
By following this guide, you’ll master modern minimalist line art, adding a touch of sophistication to your home while enjoying the creative process. Happy crafting!
8. Textured Wall Art with Natural Materials: Embracing Earthy Aesthetics

Textured Wall Art with Natural Materials: Embracing Earthy Aesthetics
Creating textured wall art with natural materials is a fantastic way to infuse earthy aesthetics into your home decor. This DIY project not only enhances your living space but also promotes sustainability by using eco-friendly materials. With current trends leaning towards organic and rustic styles, textured wall art has become a popular choice for contemporary homes.
Materials You’ll Need
- Wood slices or driftwood
- Natural fibers (jute, burlap, or cotton)
- Paint (earthy tones)
- Glue (hot glue gun or craft glue)
- Canvas or wood panel
Step-by-Step Guidance
- Prepare Your Base: Start with a canvas or wood panel as your base. Choose a size that fits well in your intended space.
- Design Layout: Arrange your natural materials on the base. Experiment with different placements to find a visually appealing composition.
- Secure the Elements: Once satisfied with the layout, use glue to attach the materials. Ensure everything is firmly adhered for durability.
- Add Texture: Incorporate layers by adding jute or burlap behind wood slices to create depth. Consider painting some elements for added contrast.
- Finishing Touches: Allow everything to dry completely before hanging your masterpiece.
Expert Tips and Tricks
- Choose materials that complement your existing decor.
- Experiment with different textures to create a dynamic piece.
- Use natural dyes or stains for an authentic touch.
Avoid Common Mistakes
One common mistake is overloading your piece with too many materials, which can lead to a cluttered look. Keep your design balanced and cohesive. Additionally, ensure that your glue is suitable for the materials you are using to avoid any mishaps.
Best Practices
To achieve the best results, focus on harmony between colors and textures. Regularly step back to view your work from a distance. This perspective will help you refine your design and achieve a polished final product.
By embracing textured wall art with natural materials, you can create unique, eco-friendly decor that resonates with the earthy aesthetics trending in today’s homes.
9. DIY Inspirational Quote Boards: Creative Ways to Motivate and Inspire

DIY Inspirational Quote Boards: Creative Ways to Motivate and Inspire
Creating DIY inspirational quote boards is a fantastic way to infuse motivation into your daily life. These boards serve not only as decorative pieces but also as powerful reminders of your goals and values. Here’s a step-by-step guide to crafting your own, along with expert tips to maximize impact.
Materials You’ll Need
- Wooden board or canvas
- Acrylic paints or markers
- Stencils or printed quotes
- Glue, washi tape, or decorative paper
- Magnetic strips (optional for a movable design)
Step-by-Step Guidance
- Choose Your Quotes: Select 3-5 quotes that resonate with you. Look for phrases that inspire action or positivity.
- Prepare Your Board: Paint or cover your board with decorative paper. Ensure a clean and even surface.
- Design Layout: Use stencils or print your quotes in various fonts. Play with sizes and placements for visual interest.
- Affix Quotes: Secure your quotes using glue or washi tape. Consider layering for depth.
- Finish with Flair: Add embellishments like stickers, drawings, or photos to personalize your board.
Expert Tips and Tricks
To enhance your DIY project, consider the following:
- Use contrasting colors for visibility.
- Incorporate seasonal themes to keep your board fresh.
- Regularly rotate quotes to maintain motivation.
Avoid Common Mistakes
While crafting your inspirational board, steer clear of:
- Overcrowding the design, which can dilute the message.
- Using quotes that do not resonate personally.
- Neglecting the balance of colors and textures.
By following these guidelines, you can create a stunning and motivating DIY inspirational quote board that not only beautifies your space but also uplifts your spirit. Happy crafting!
Frequently Asked Questions
How can I create a DIY macramé wall hanging?
To create a DIY macramé wall hanging, start by selecting your macramé cord and a wooden dowel. Use basic knots like square knots and lark’s head knots to create various patterns and designs. There are plenty of online tutorials that can guide you through the process step-by-step, making it easy even for beginners.
Why should I consider upcycling vintage frames for wall art?
Upcycling vintage frames not only gives your wall art a unique, rustic charm, but it also promotes sustainability by reducing waste. These frames can be customized with various finishes and colors, allowing you to create personalized art that reflects your style while preserving a piece of history.
What are some tips for creating geometric canvas art using acrylic pour techniques?
For creating stunning geometric canvas art with acrylic pour techniques, it’s essential to use the right paint-to-medium ratio for a smooth flow. Choose your colors wisely, and make sure to tape off sections of the canvas for clean lines. Experiment with different pouring methods, such as the flip cup or dirty pour, to achieve unique designs.
How can I troubleshoot issues when making personalized fabric wall art?
If you’re facing issues with your personalized fabric wall art, such as fraying edges or uneven stitching, consider using a fabric stabilizer before sewing. Additionally, ensure your needle and thread are appropriate for the fabric type, and practice your sewing techniques on scrap fabric to achieve the desired look without damaging your main piece.
What materials do I need for watercolor botanical prints?
To create watercolor botanical prints, gather high-quality watercolor paper, a set of watercolor paints, brushes of various sizes, and a palette for mixing colors. You may also want to have a pencil for sketching your designs lightly before painting. This will help you achieve vibrant and detailed nature-inspired art easily.

