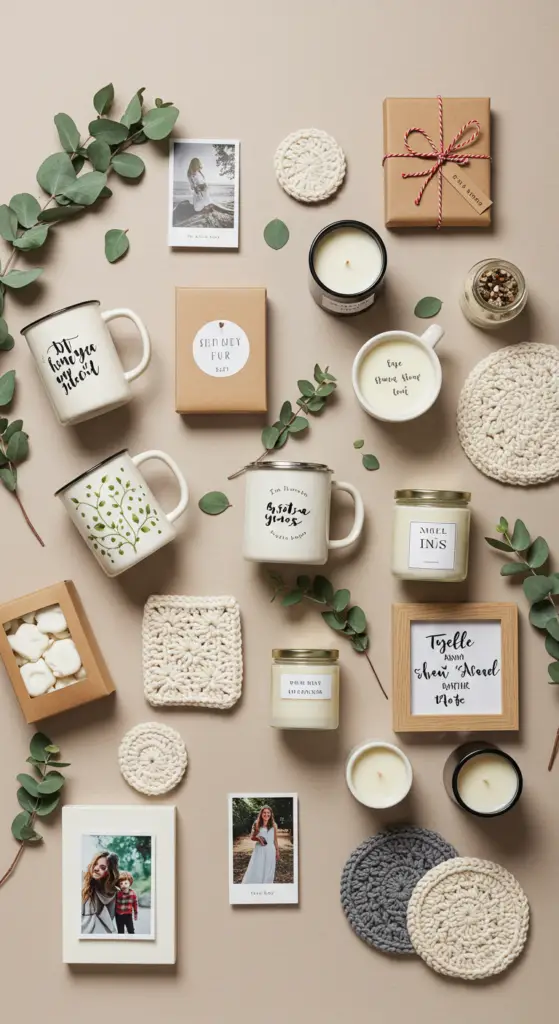
1. Crafting Personalized Photo Coasters for Stylish Home Decor

Crafting Personalized Photo Coasters for Stylish Home Decor
Creating personalized photo coasters is a wonderful way to add a unique touch to your home decor while preserving cherished memories. This DIY project not only serves a functional purpose but also allows you to express your creativity. Follow these expert tips and tricks to craft coasters that will impress your guests and elevate your living space.
Materials You’ll Need
- Cork or wooden coasters
- Printed photos (preferably on photo paper)
- Mod Podge or any clear-drying adhesive
- Sealant (e.g., acrylic spray or polycrylic)
- Scissors
- Paintbrush
Step-by-Step Guide
- Select Your Photos: Choose high-resolution images that resonate with your style. Family portraits, scenic landscapes, or even abstract art are great options.
- Prepare the Coasters: Ensure your coasters are clean and dry. If using wooden coasters, lightly sand the surface for better adhesion.
- Adhere the Photos: Cut your photos to fit the coasters. Apply a thin layer of Mod Podge onto the coaster, place the photo, and smooth out any bubbles.
- Seal Your Coasters: Once the adhesive is dry, apply a sealant to protect your coasters from moisture and wear.
Expert Tips and Best Practices
To achieve a professional look, avoid using low-quality photos, as they can detract from the overall aesthetic. Additionally, ensure each layer of Mod Podge is completely dry before applying the next to prevent bubbling. A final coat of sealant will enhance durability and longevity.
Common Mistakes to Avoid
- Skipping the sealing step, which can lead to water damage.
- Using glossy photo paper without proper sealing, causing glare.
- Not allowing adequate drying time between each step.
With these steps, you can create stunning, personalized photo coasters that reflect your unique style. This trending DIY project not only beautifies your space but also makes for excellent gifts!
2. Handmade Scented Candles: Create Relaxing Ambiance on a Budget

Handmade Scented Candles: Create Relaxing Ambiance on a Budget
Creating handmade scented candles is a delightful way to enhance your living space while staying budget-friendly. Not only do they fill your home with inviting aromas, but they also add a personal touch to your decor. Follow these expert tips and step-by-step guidance to craft your own candles that promote relaxation.
Materials Needed
- Soy wax or beeswax
- Candle wicks
- Essential oils or fragrance oils
- Double boiler or microwave-safe container
- Candle jars or molds
- Thermometer
Step-by-Step Guide
- Melt the Wax: Use a double boiler to melt your wax, monitoring the temperature closely (ideally between 170°F and 180°F).
- Add Fragrance: Once melted, mix in your chosen essential oils. A good rule of thumb is to use 1 ounce of fragrance per pound of wax.
- Prepare the Containers: Secure the wick at the bottom of your candle jar with a dab of melted wax.
- Pour the Wax: Carefully pour the wax into the container, ensuring the wick remains centered.
- Cool and Trim: Allow the candles to cool completely before trimming the wick to about 1/4 inch.
Expert Tips and Common Mistakes
To ensure your candles turn out perfectly, avoid these common pitfalls:
- Skipping the wax temperature check can lead to poor scent throw.
- Using too much fragrance oil can cause the wax to not solidify properly.
- Neglecting wick size can result in uneven burning.
Current Trends in DIY Candles
Popular trends include using natural dyes and incorporating unique containers like vintage teacups. These creative ideas not only personalize your candles but also make excellent gifts.
By following these guidelines, you can easily create handmade scented candles that not only beautify your space but also provide a calming atmosphere—all without breaking the bank!
3. DIY Macrame Plant Hangers to Elevate Indoor Greenery

DIY Macrame Plant Hangers to Elevate Indoor Greenery
Macrame plant hangers have become a trendy and stylish way to showcase indoor greenery. Not only do they add a touch of bohemian flair to your home decor, but they also maximize space by lifting your plants off the ground. In this guide, we’ll explore expert-level advice on creating your very own macrame plant hangers, ensuring your plants are displayed beautifully.
Materials Needed
- Macrame cord (3-5mm thickness)
- Wooden or metal ring
- Scissors
- Tape measure
- Plant pot
Step-by-Step Guidance
- Measure and Cut: Cut your macrame cord into several lengths, typically 4-6 strands of around 3-4 feet each, depending on desired length.
- Attach to Ring: Fold each cord in half and use a lark’s head knot to attach them to the ring.
- Begin Knotting: Use square knots or spiral knots to create the design. For a classic look, alternate between square knots every few inches.
- Form the Basket: As you knot, keep the cords evenly spaced to form a basket shape that will hold your plant pot securely.
- Finish and Trim: Once you reach the desired height, tie off with a final knot and trim any excess cord for a clean finish.
Expert Tips and Tricks
To ensure a professional look, consider using different types of knots, such as the half hitch for added texture. Furthermore, avoid common mistakes like overly tight knots, which can cause strain on the cords. Instead, keep your knots snug but not restrictive.
Current Trends
In 2023, incorporating natural fibers and earthy tones in macrame crafts is on the rise. Consider using organic cotton or hemp cords for a more eco-friendly approach. Pair your plant hangers with trendy pots, such as terracotta or ceramic, to further enhance your decor.
By following these guidelines, you can create stunning DIY macrame plant hangers that not only elevate your indoor greenery but also reflect your personal style. Happy crafting!
4. Chic Fabric Scraps: Sew Your Own Trendy Tote Bags

Chic Fabric Scraps: Sew Your Own Trendy Tote Bags
Creating your own trendy tote bags from chic fabric scraps is not only a sustainable practice but also a fantastic way to showcase your personal style. With the rise of DIY culture, transforming leftover fabric into functional accessories is a current trend that appeals to crafters of all skill levels.
Step-by-Step Guide to Crafting Your Tote
Follow these expert steps to sew your own tote bag:
- Gather Materials: Collect fabric scraps, scissors, sewing machine, thread, and pins. Aim for a mix of textures and colors to create a unique look.
- Design Your Tote: Sketch a simple design. A classic tote is typically rectangular, measuring about 15 inches wide and 18 inches tall.
- Cut Your Fabric: Cut two pieces of fabric for the body and two strips for the handles (2 inches wide and 22 inches long).
- Sew the Body: Place the two body pieces right sides together. Sew around the sides and bottom, leaving the top open.
- Attach the Handles: Fold the handle strips in half lengthwise, sew, and then attach to the bag about 3 inches from the side seams.
- Finish Edges: Zigzag stitch the edges to prevent fraying and add a professional touch.
Expert Tips and Common Mistakes to Avoid
- Choose the Right Fabric: Use durable materials like canvas or denim for longevity.
- Measure Twice: Ensure all cuts are accurate to avoid mismatched seams.
- Test Your Stitching: Always do a test run on scrap fabric to set your machine correctly.
By following these guidelines, you will not only create a chic tote bag but also embrace the ethos of sustainable fashion. Always remember, the key to a successful DIY project lies in planning and precision. Happy sewing!
5. Customizable Painted Flower Pots for a Unique Garden Touch

Customizable Painted Flower Pots for a Unique Garden Touch
Add a personal flair to your garden with customizable painted flower pots. This DIY project not only enhances your outdoor decor but also provides a therapeutic crafting experience. In this guide, we’ll explore expert-level techniques to create stunning pots that reflect your style.
Materials You’ll Need
- Terra cotta or ceramic pots
- Outdoor acrylic paints
- Paintbrushes (various sizes)
- Sealer (for durability)
- Pencil and stencils (optional)
Step-by-Step Guidance
- Prep Your Pots: Clean your flower pots thoroughly and let them dry. This ensures the paint adheres properly.
- Design Your Layout: Use a pencil to lightly sketch your design. Stencils can help create intricate patterns.
- Paint: Apply outdoor acrylic paint in thin layers for even coverage. Let each layer dry before adding more.
- Seal the Design: Once dry, apply a clear sealer to protect your artwork from the elements.
Expert Tips and Common Mistakes to Avoid
When creating your painted flower pots, consider these expert tips:
- Use outdoor acrylic paints to ensure longevity.
- Mix colors to create unique shades.
- Avoid using too much water when diluting paint, as this can lead to peeling.
By following these best practices, you’ll create stunning, durable pots that bring a unique touch to your garden. Dive into this trendy DIY project and showcase your creativity!
6. Knitted Mug Cozy Patterns for Cozy Winter Vibes

Knitted Mug Cozy Patterns for Cozy Winter Vibes
As winter approaches, adding knitted mug cozies to your home decor can create a warm and inviting atmosphere. These cozy creations not only keep your beverages warm but also add a personal touch to your kitchen. Here, we present expert-level advice on various knitted mug cozy patterns that are perfect for crafting enthusiasts looking to embrace the season.
Trending Patterns to Consider
This year, popular trends include:
- Textured Stitches: Techniques like bobbles and cables add depth and interest.
- Color Blocking: Use contrasting yarns to create a vibrant look.
- Fair Isle Motifs: These intricate patterns bring a festive charm to your cozies.
Step-by-Step Guidance
Follow these steps to create your own knitted mug cozy:
- Choose yarn in a warm, winter-friendly fiber like wool or alpaca.
- Cast on 40 stitches using size 8 needles for a standard mug cozy.
- Work in a simple knit stitch for 10 rows, then switch to your chosen pattern.
- After reaching the desired length, bind off and sew the edges together to form a sleeve.
Expert Tips and Common Mistakes
To ensure your mug cozy turns out beautifully:
- Always check your gauge before starting.
- Avoid overly tight stitches, which can lead to an uncomfortable fit.
- Experiment with different yarn weights for varied thickness.
By following these best practices, you can create stunning mug cozies that provide comfort and style, making your winter vibes cozy and inviting. Happy knitting!
7. Hand-Painted Wooden Signs: Add Rustic Charm to Any Space

Hand-Painted Wooden Signs: Add Rustic Charm to Any Space
Hand-painted wooden signs are a creative way to infuse rustic charm into any space, from cozy homes to vibrant gardens. These personalized crafts not only add character but also serve as a unique expression of your style. Whether you’re a seasoned DIY enthusiast or a beginner, this guide will help you create stunning wooden signs with ease.
Materials Needed
- Sandpaper (medium and fine grit)
- Wooden board (preferably pine or cedar)
- Acrylic paints or chalk paints
- Paintbrushes (various sizes)
- Sealer (polyurethane or varnish)
- Pencil and ruler
- Stencils or vinyl decals (optional)
Step-by-Step Guidance
- Prepare Your Wood: Sand the surface of your wooden board to create a smooth finish. This step is crucial to ensure even paint application.
- Design Your Sign: Use a pencil to sketch your design. If you’re using stencils, position them carefully to avoid misalignment.
- Paint: Apply your base coat, allowing it to dry completely. Then, use different brushes to add details, ensuring to layer colors for depth.
- Seal the Sign: Once dry, apply a sealer to protect your artwork from environmental factors.
Expert Tips and Common Mistakes to Avoid
To achieve the best results, consider these expert tips:
- Choose colors that complement your space; earthy tones often enhance rustic aesthetics.
- Don’t rush the drying process; allow ample time for each layer to cure.
- Keep the design simple; intricate details can be challenging and may lead to frustration.
By following these best practices, you can create hand-painted wooden signs that truly reflect your personality and style. This DIY project not only beautifies your space but also provides a fulfilling creative outlet!
8. DIY Bath Bombs with Essential Oils for Luxurious Self-Care

DIY Bath Bombs with Essential Oils for Luxurious Self-Care
Creating DIY bath bombs with essential oils is a delightful way to enhance your self-care routine. These fizzy creations not only elevate your bathing experience but also provide therapeutic benefits, making them perfect for relaxation and rejuvenation.
Essential Ingredients
To craft your own luxurious bath bombs, gather the following ingredients:
- 1 cup baking soda
- 1/2 cup citric acid
- 1/2 cup Epsom salt
- 1/2 cup cornstarch
- 2 1/2 tablespoons essential oils (e.g., lavender, eucalyptus)
- Water (in a spray bottle)
- Food coloring (optional)
- Mold of your choice
Step-by-Step Guide
- In a large bowl, mix the dry ingredients: baking soda, citric acid, Epsom salt, and cornstarch.
- In a separate container, combine the essential oils and food coloring.
- Gradually add the wet mixture to the dry ingredients, stirring continuously to prevent fizzing.
- Lightly spray water into the mixture until it holds together when squeezed.
- Pack the mixture tightly into your mold and let it dry for 24 hours.
Expert Tips and Tricks
For the best results:
- Avoid adding too much water, as it will cause the mixture to fizz prematurely.
- Experiment with different essential oils for unique scents and benefits.
- Store bath bombs in a cool, dry place to maintain their fizz.
Common Mistakes to Avoid
Many DIY-ers overlook the importance of precise measurements and moisture control. Ensure your ingredients are well-balanced to achieve optimal fizz without crumbling.
By following these expert tips and crafting your own DIY bath bombs with essential oils, you can enjoy a spa-like experience at home. Embrace the current trends in self-care and indulge in the luxurious benefits of these fizzy delights!
9. Upcycled Glass Jar Herb Gardens: Stylish Kitchen Decor

Upcycled Glass Jar Herb Gardens: Stylish Kitchen Decor
Transforming glass jars into herb gardens is a fantastic way to enhance your kitchen decor while embracing sustainability. Upcycled glass jar herb gardens not only save money but also provide fresh herbs at your fingertips. With the rise of eco-friendly DIY projects, this trend is perfect for those looking to add a touch of green to their cooking space.
Step-by-Step Guide to Creating Your Herb Garden
- Gather Your Materials: Collect empty glass jars, potting soil, and your favorite herb seeds (basil, parsley, and mint are popular choices).
- Prepare the Jars: Clean the jars thoroughly and let them dry. You can leave them as is or paint them for an added decorative touch.
- Add Drainage: Place small pebbles at the bottom of each jar to ensure proper drainage, preventing overwatering.
- Fill with Soil: Add potting soil, leaving an inch of space at the top. Moisten the soil lightly before planting.
- Plant Your Herbs: Follow the seed packet instructions for planting depth and spacing. Label each jar for easy identification.
- Water and Sunlight: Water gently and place your jars in a sunny spot, ideally where they receive 6-8 hours of light daily.
Expert Tips and Tricks
- Rotate your jars regularly to ensure even sunlight exposure.
- Use a spray bottle for watering to avoid soil displacement.
- Consider using a mix of herbs that thrive together for visual appeal and culinary versatility.
Common Mistakes to Avoid
Many DIYers overlook proper drainage, leading to root rot. Additionally, overwatering is a frequent mistake; always check the soil moisture before watering. Finally, ensure your jars are in a location that provides adequate light without overheating.
Best Practices for Maintenance
Regularly trim your herbs to encourage growth and prevent them from becoming leggy. Fertilize every few weeks with a diluted liquid fertilizer to promote healthy development. With these upcycled glass jar herb gardens, you’ll not only elevate your kitchen’s aesthetic but also enjoy the satisfaction of growing your own herbs.
10. Personalized Friendship Bracelets: Trendy and Meaningful Gifts

Personalized Friendship Bracelets: Trendy and Meaningful Gifts
Creating personalized friendship bracelets is an engaging and heartfelt way to express your affection for friends. These trendy accessories not only enhance your style but also carry deep sentimental value. With current trends leaning towards unique, customized designs, you can easily craft a gift that speaks volumes.
Choosing Your Materials
Start by selecting colorful embroidery threads, beads, or charms that resonate with your friend’s personality. Popular materials include:
- Macrame cord for a boho chic look
- Beads with initials or meaningful symbols
- Natural fibers for an eco-friendly option
Step-by-Step Guide to Crafting
- Measure and Cut: Cut strands of thread or cord, typically about 24 inches long. Adjust based on wrist size.
- Choose a Knotting Technique: Popular methods include the square knot or the chevron pattern. YouTube tutorials can provide visual guidance.
- Add Personal Touches: Incorporate beads or charms that reflect shared memories or interests.
- Finish with a Secure Knot: Ensure it’s tight to withstand daily wear.
Expert Tips and Common Mistakes
To elevate your crafting experience, consider these expert tips:
- Use a clipboard or tape to secure your work as you knot.
- Experiment with color combinations to reflect your friend’s style.
- Avoid overly complicated patterns if you’re a beginner; simplicity can be stunning!
Remember, the goal is to create a meaningful piece that embodies your friendship. By following these best practices, your personalized friendship bracelets will surely be cherished gifts that celebrate your unique bond.
11. DIY Resin Keychains: Create One-of-a-Kind Accessories

DIY Resin Keychains: Create One-of-a-Kind Accessories
Resin keychains are a popular trend in the DIY and creative crafts community, allowing you to design unique accessories that reflect your personal style. With just a few materials and some creativity, you can craft stunning keychains that are perfect for gifts or personal use.
Materials Needed
- Epoxy resin and hardener
- Silicone molds
- Additives (glitters, dried flowers, or pigments)
- Protective gloves and a mask
- Keychain hardware
Step-by-Step Guide
- Prepare Your Workspace: Ensure you have a clean, well-ventilated area. Lay down protective coverings.
- Mix the Resin: Following the manufacturer’s instructions, mix the resin and hardener thoroughly for about 3-5 minutes.
- Add Color and Elements: Incorporate your chosen glitters or dried flowers into the resin mix.
- Pour Into Molds: Carefully pour the mixture into your silicone molds, filling them to the desired level.
- Let It Cure: Allow the resin to cure as per instructions, usually 24 hours, to achieve a hard finish.
- Assemble the Keychains: Once cured, remove the pieces from the molds and attach your keychain hardware.
Expert Tips and Tricks
To ensure your DIY resin keychains turn out beautifully:
- Work in small batches to avoid premature curing.
- Use a heat gun to remove bubbles trapped in the resin.
- Experiment with different molds for varied shapes and sizes.
Common Mistakes to Avoid
Many DIY enthusiasts face challenges when working with resin:
- Not measuring resin and hardener accurately can lead to soft or sticky outcomes.
- Skipping the protective gear can expose you to harmful fumes.
By following these best practices, you’ll create stunning DIY resin keychains that are not only functional but also a true expression of your creativity. Happy crafting!
12. Fabric Covered Notebooks: Stylish Journals for Every Occasion

Fabric Covered Notebooks: Stylish Journals for Every Occasion
Crafting fabric covered notebooks is a delightful way to create personalized, stylish journals that can be used for various occasions. Whether you’re journaling, sketching, or taking notes, these customized notebooks add a touch of elegance to your everyday activities.
Step-by-Step Guide to Creating Your Own Fabric Covered Notebook
- Gather Your Materials: You’ll need a plain notebook, fabric of your choice, scissors, a glue stick or fabric adhesive, and a ruler.
- Measure and Cut: Measure the notebook’s dimensions and cut the fabric to size, leaving an extra inch on all sides for wrapping.
- Glue the Fabric: Apply adhesive to the notebook cover, then carefully lay the fabric on top, smoothing out any bubbles.
- Fold and Secure: Fold the excess fabric over the edges, gluing as you go for a neat finish.
- Finishing Touches: Consider adding embellishments like buttons or ribbons for a unique flair.
Current Trends in DIY Fabric Crafting
Fabric covered notebooks are trending as they blend functionality with fashion. Popular fabrics include floral patterns, denim, and even repurposed vintage textiles. These materials not only enhance the aesthetic but also promote sustainability.
Expert Tips and Common Mistakes to Avoid
- Choose the Right Adhesive: Using the wrong glue can lead to fabric peeling off. Opt for fabric glue for the best results.
- Pre-Wash Fabric: This prevents color bleeding and shrinking after your notebook is completed.
- Be Precise with Measurements: Accurate cutting ensures a polished look, avoiding fabric overlaps or gaps.
By following these best practices, your fabric covered notebooks will not only be stylish but also functional. Dive into this creative craft today and make journals that reflect your personal style!
13. Customizable Tote Bags with Iron-On Transfers for Creative Expression

Customizable Tote Bags with Iron-On Transfers for Creative Expression
Tote bags are not just practical; they also serve as a canvas for your creativity. With iron-on transfers, you can easily design customizable tote bags that reflect your personal style. This DIY project is trending in the world of crafts, allowing for endless creative expression.
Getting Started: Materials Needed
- Plain canvas tote bags
- Iron-on transfer paper
- Inkjet printer (for printing designs)
- Iron
- Parchment paper
Step-by-Step Guide
- Design Your Transfer: Use graphic design software or online templates to create your design. Ensure it’s sized appropriately for your tote.
- Print Your Design: Print on the iron-on transfer paper following the manufacturer’s instructions. Remember to print in mirror image for text designs.
- Prepare the Tote: Iron the tote bag to remove any wrinkles, making sure it’s smooth and ready for the transfer.
- Apply the Transfer: Place the printed transfer face down on the tote. Cover it with parchment paper and iron over it firmly for the recommended time.
- Cool and Peel: Allow the transfer to cool before carefully peeling off the backing to reveal your custom design.
Expert Tips and Tricks
For best results, avoid common mistakes such as:
- Not prewashing the tote bag, which can cause the design to crack.
- Using too much heat or pressure, leading to melted designs.
Additionally, consider using seasonal themes or personal quotes to make your tote bags unique and trendy!
Customizable tote bags with iron-on transfers are a fantastic way to express individuality while staying on-trend in DIY crafts. By following these best practices, you’ll create eye-catching tote bags that showcase your creativity.
14. DIY Beaded Wine Glass Charms for Elegant Entertaining

DIY Beaded Wine Glass Charms for Elegant Entertaining
Elevate your next gathering with DIY beaded wine glass charms, a trendy and personalized touch for elegant entertaining. Not only do these charming accessories help guests identify their drinks, but they also add a beautiful aesthetic to your table setting.
Materials Needed
- Assorted beads (glass, wood, or acrylic)
- Wire or string (beading wire is recommended)
- Wire cutters
- Scissors
- Small charms (optional)
Step-by-Step Guide
- Choose Your Beads: Select a color palette that complements your event theme. Current trends include earthy tones or vibrant jewel colors.
- Cut the Wire: Measure approximately 6 inches of wire for each charm. This length allows for easy manipulation and securing.
- String the Beads: Thread your chosen beads onto the wire, leaving a little space at both ends. Mix shapes and sizes for visual interest.
- Secure the Charm: Create a loop at one end and twist to secure. You can attach a small charm for added personality.
- Finish the Charm: Form the other end into a loop, shaping it into a hook that can easily clasp around the stem of a wine glass.
Expert Tips and Common Mistakes to Avoid
To ensure your wine glass charms are both functional and beautiful, consider these expert tips:
- Avoid overly heavy beads that can weigh down the charm.
- Use high-quality wire to prevent breakage.
- Keep the design simple for a more elegant look.
By following these steps, you will create unique DIY beaded wine glass charms that are not only practical but also aesthetically pleasing. Perfect for any gathering, these charms will impress your guests and showcase your creativity!
15. Handmade Natural Soap Bars: Luxurious Gifts Under $20

Handmade Natural Soap Bars: Luxurious Gifts Under $20
Creating handmade natural soap bars is a delightful way to craft luxurious gifts that won’t break the bank. With a budget of under $20, you can produce high-quality, personalized soap that your family and friends will cherish. Here’s how you can embark on this rewarding DIY journey.
Step-by-Step Guide to Making Natural Soap Bars
- Gather Your Materials: You will need natural soap base (like glycerin), essential oils for fragrance, molds, and optional additives like dried herbs or natural colorants.
- Melting the Soap Base: Cut the soap base into small pieces and melt it in the microwave or a double boiler until completely liquid.
- Add Your Ingredients: Stir in essential oils (lavender, eucalyptus) and any additives to enhance the soap’s appearance and benefits.
- Pour and Set: Pour the mixture into molds and let it cool for a few hours until solid.
- Unmold and Package: Carefully remove the soap from the molds and wrap them in eco-friendly packaging for a luxurious touch.
Expert Tips and Common Mistakes to Avoid
- Choose Quality Ingredients: Always opt for organic and natural materials to enhance the soap’s skin benefits.
- Avoid Overheating: Melt the soap base gently to prevent burning, which can affect the final product’s texture.
- Test Fragrance Levels: Start with a small amount of essential oil; you can always add more if needed.
Current Trends in Handmade Soap
In 2023, eco-friendly packaging and unique scents are trending. Consider incorporating local herbs or seasonal fragrances to make your soap truly special. These handmade natural soap bars not only make fantastic gifts but also showcase your creativity and commitment to sustainability.
By following these expert-level guidelines, you can create stunning handmade natural soap bars that are perfect for gifting or personal use. Happy crafting!
Frequently Asked Questions
-
How do I make personalized photo coasters as a DIY gift?
-
To create personalized photo coasters, start by printing your favorite photos on photo paper. Cut them to fit cork or ceramic tiles, then adhere the photos using Mod Podge. Seal with a waterproof topcoat for durability, and you’ll have a stylish, memorable gift perfect for any home decor.
-
Why should I choose handmade scented candles as a DIY gift?
-
Handmade scented candles are a thoughtful gift that adds a personal touch to any space. They can be customized with different fragrances, colors, and even decorative containers. Plus, they provide a relaxing ambiance, making them an ideal present for friends or family looking to unwind.
-
What materials do I need to make a macrame plant hanger?
-
To create a macrame plant hanger, you will need cotton macrame cord, scissors, a wooden or metal ring, and a plant pot. Start by measuring and cutting the cord into equal lengths, then follow a simple knotting pattern to create the hanger. It’s a fun and rewarding project that enhances your indoor greenery.
-
How can I troubleshoot issues when sewing my own tote bag?
-
If you encounter issues while sewing a tote bag, such as uneven seams or fabric puckering, check your tension settings on the sewing machine. Using the right needle and thread for your fabric type can also alleviate many problems. Practice on scrap fabric before starting your tote to ensure a smooth process.
-
What is the best way to customize painted flower pots?
-
The best way to customize painted flower pots is to use acrylic paint or outdoor-safe spray paint for durability. Consider adding stencils, patterns, or positive quotes to make them unique. You can also seal your design with a clear varnish to protect it from the elements, making it a delightful gift for garden lovers.

